Domain Settings
Custom domains are available to users of the Pro and Max plans. This means that instead of the default address of your school, which was automatically created upon registration on the platform, you can use your own website address or a subdomain of your main website.
To do this, follow these steps:
1. Go to your school and navigate to the “Settings” – “Domain” section.

2. In the field that opens, you will see two blocks: “Subdomain” and “Self Domain”.
3. In the “Subdomain” block, you will find the current subdomain of your school. It is created based on the email address you used to register on the platform. In the same block, there is a field to change the subdomain. If you want to change the subdomain while remaining within the Softbook LMS subdomain, enter any word in the field that is not already taken by other users. Click the “Save Subdomain” button to get a new subdomain with the .lms.softbook.app extension.
Important: Please note that after the subdomain change, the old link to your school will no longer work.
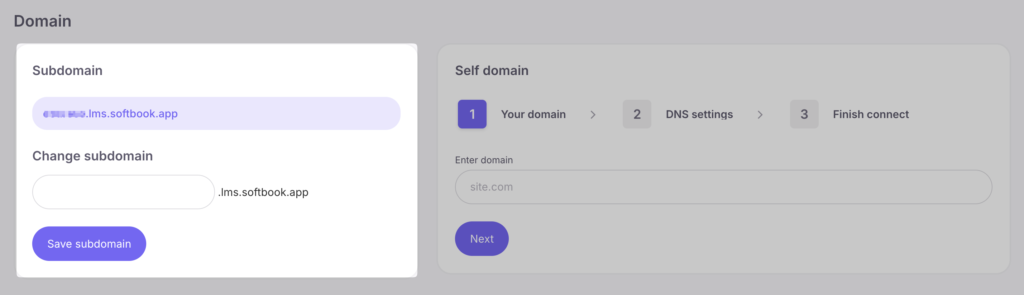
If you want to use your own custom domain, proceed to the “Custom Domain” block.
The process consists of three steps:
- Your Domain
- DNS Configuration
- Complete the Connection
Enter your domain in the “Custom Domain” field. It can be made as similar as possible to the school website domain, if you have one. For example, if you have school websites lms.bestphotoschool.com.ua.
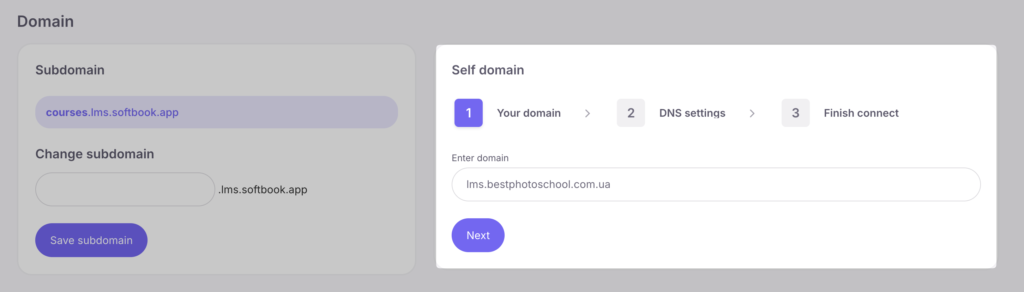
You can set a subdomain on your hosting, for example, lms.bestphotoschool.com.ua and specify it in the “Custom domain” section. Click the “Next” button and save the domain.
The second step will open, titled “DNS Configuration,” with the following instructions:
On your domain registrar’s control panel, register DNS record for your domain:
A record pointing to the IP address: 168.119.88.125
After registering the DNS record, wait for the DNS propagation to complete. Periodically check the status using the button below. When you receive a message confirming that the DNS record are configured correctly, you can proceed to the final step of connecting the domain.
Follow the instructions provided. Once you have completed the necessary steps, click the “Verify DNS record” button. The platform will automatically verify the correctness of the settings and notify you if everything is configured correctly or if any changes are required.
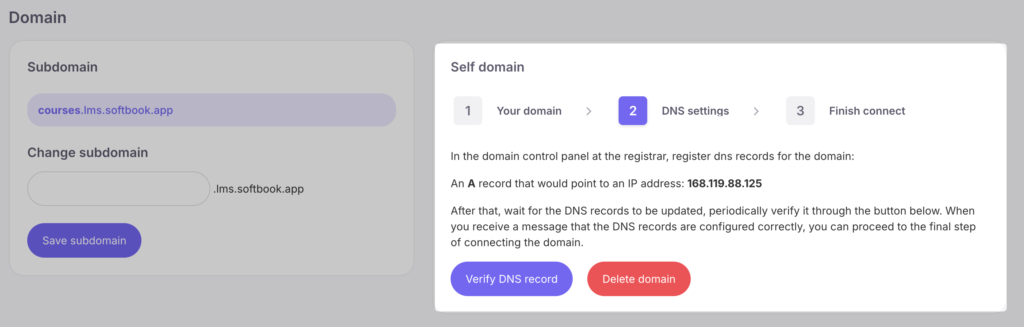
Important: DNS record can be checked within 24 hours. Yes, sometimes you have to wait.
If everything worked correctly, you will proceed to the third step – “Finish connect.” Here, you will see a message confirming the successful DNS record verification. Click the “Finish domain connect” button.
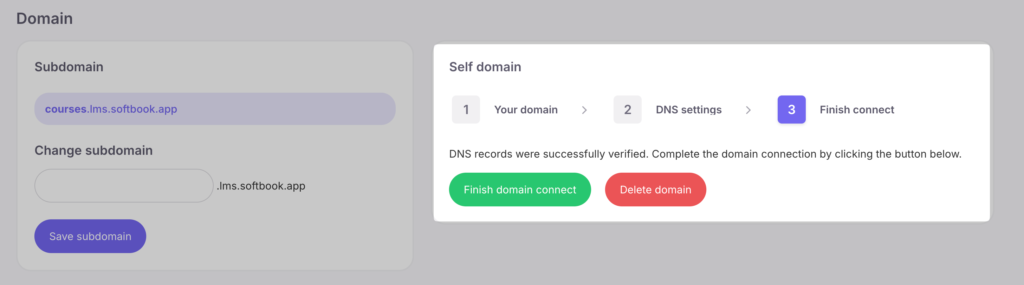
Wait on the page for 5-10 seconds while the HTTPS certificate is issued. A message will appear in the block indicating that the domain has been successfully connected and will be available within a few minutes. Below this message, you will see the domain address of your platform and its backup subdomain address.
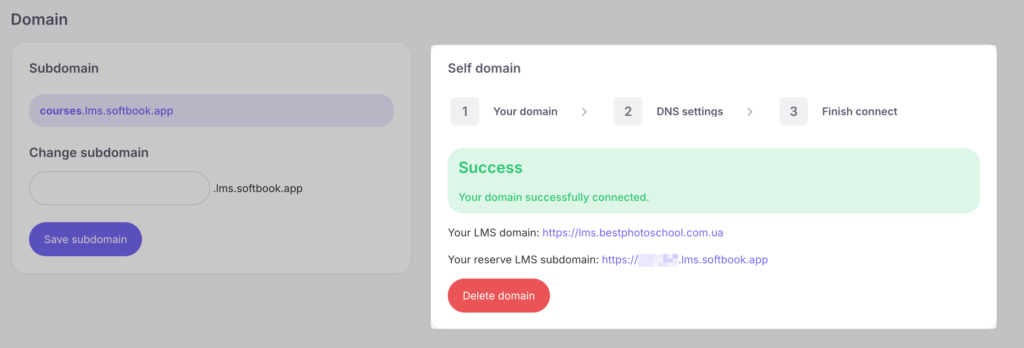
The platform operates in both the domain and the subdomain. This ensures that your platform remains accessible in case of any unforeseen issues, such as expired domain or other related problems, as it will always be accessible through the backup subdomain.
Please note that when you add your custom domain and enroll students in your courses, they will receive login links with the new domain. If you later disable your custom domain, your students will not be able to access the school. This can occur because there is always a possibility that some students may try to access the school using the link from the old email.


