


Forms
Gamification
Social
Automations
Marketing
Knowledgebase
Education
- Mobile app for the school team
- Creating a course with AI
- How to create course on Softbook
- Setting up a course
- Filling a lesson with content
- Creating homework
- Creating testing
- Changing the order of blocks in the lesson
- Creating a module
- Adding students
- Adding students using API
- Student groups
- Homeworks
- Certificates
- Plans
- Announcements
- Schedules
- Feedback
- Accesses
- Comments
- Video protection
- Content protection
CRM
Webinars
Sales
Tickets
Settings
- General settings
- Domain Settings
- Email Settings
- Dashboards
- Webhooks
- Custom fields
- API
- Branding
- Notifications
Analytics
- Mobile app for the school team
- Overview
- Education
- CRM
- Sales
- Team Actions
- Course Analytics
- Lesson Analytics
- Testing statistics
My team
Softbook Store
Adding an administrator
29.04.2023
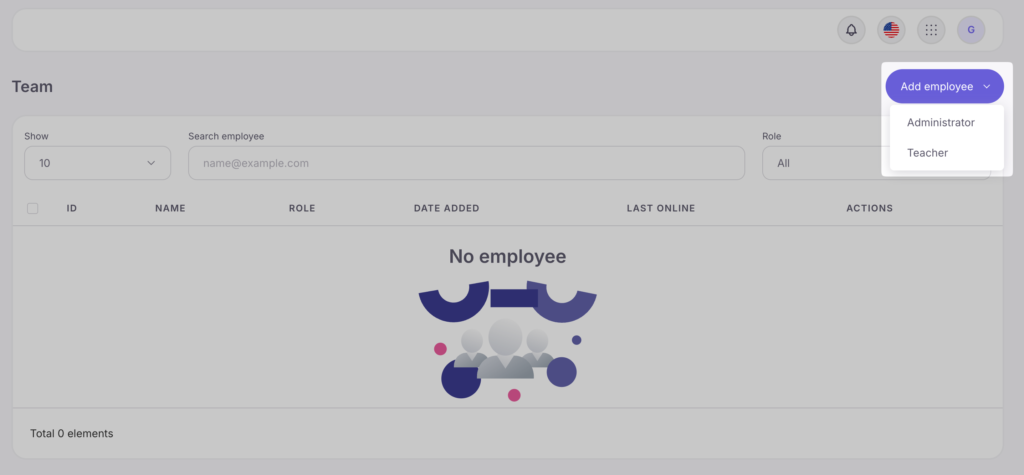
To add an administrator to your team, click the “Add” button in the top right corner of the screen. Select the “Administrator” option and fill in the employee’s name, surname, and email address in the form that appears. Click “Add Employee.” Now, this employee will appear in the general list of the “My Team” section.
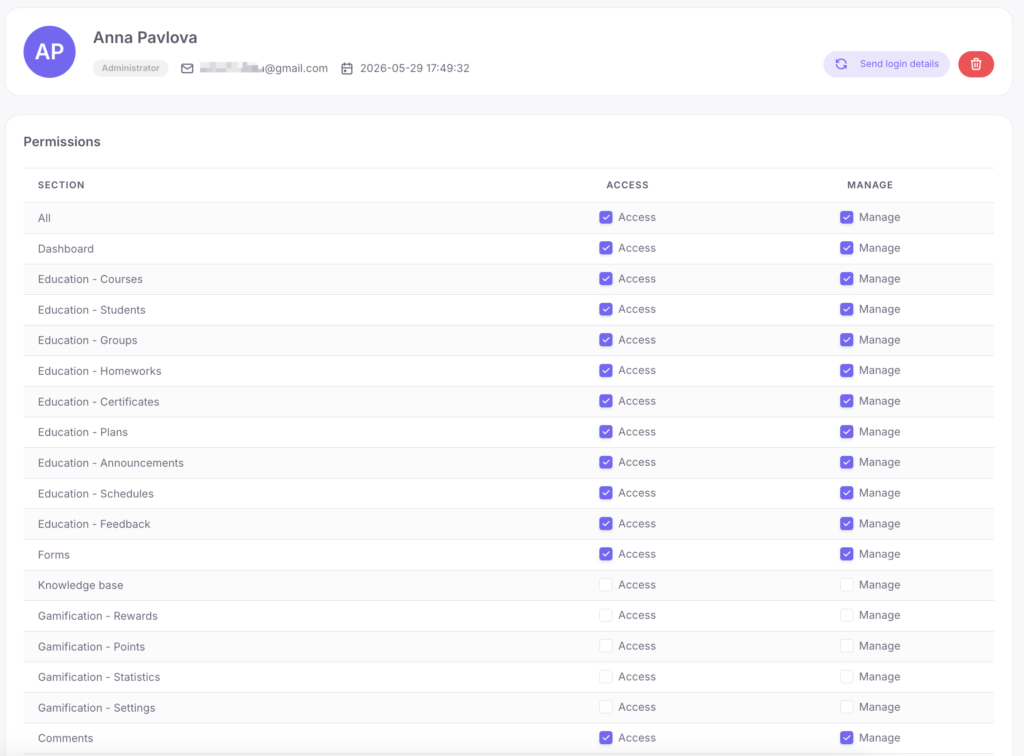
Click on the employee’s name to open their profile card. In this card, you will find their photo, first name, last name, and email address. Below that, there is a list of permissions that you can grant to them. There are two options for granting permissions:
- Check the box next to “Select All” – this means you are granting access and editing rights to all content in your online school.
- Review the list of permissions and define their boundaries specifically for each department – administration or editing.
Once you have made your selection, click the “Save” button below the list.



 Book a demo call right now!