Subscriptions
In the «Products» section, you can create a product with the type «Subscription». A subscription allows you to create a flexible access model for educational materials, giving students the ability to access one or more courses for a regular fee.
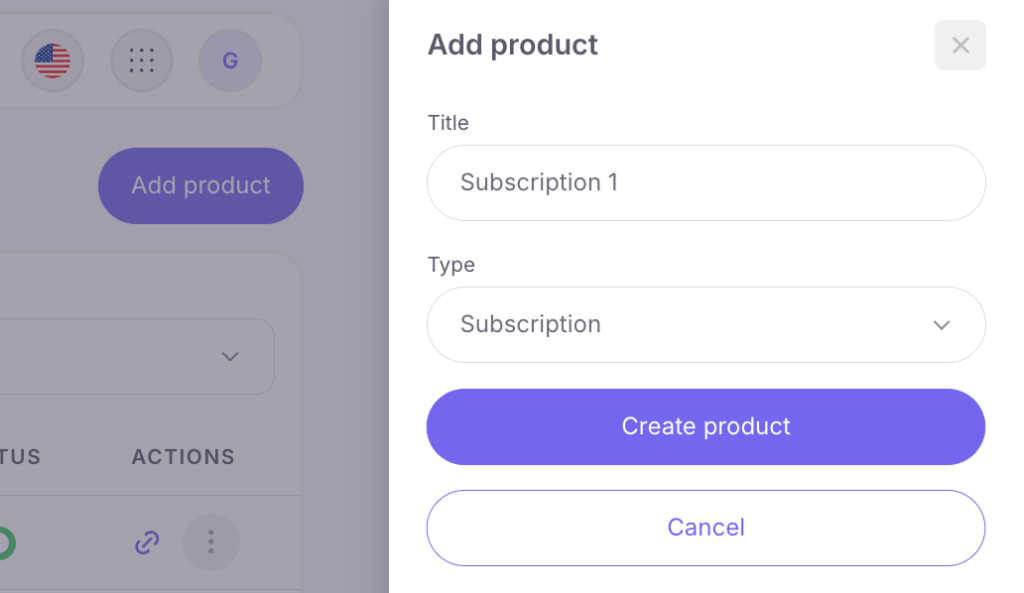
To create a «Subscription» product:
- Go to the «Products» subsection and click the «Add Product» button in the upper-right corner.
- In the open sidebar, enter the product name and select the «Subscription» type.
- You will be directed to the step-by-step subscription creation page.
1. Step One – Basic Information
Here, you can edit and change the subscription name, add a description, as well as set an avatar and cover image.
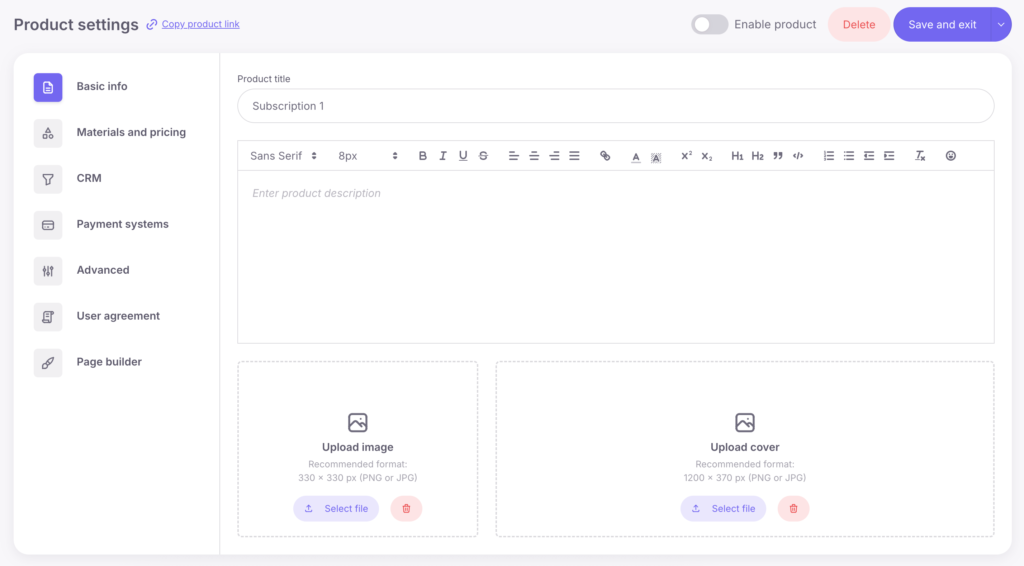
By default, the product activation option is turned off. To activate it, click the «Enable product» button located to the right above the product editor. Click «Save» (this option will appear after clicking the arrow to the right of the «Save and exit» button) and proceed to the next step.

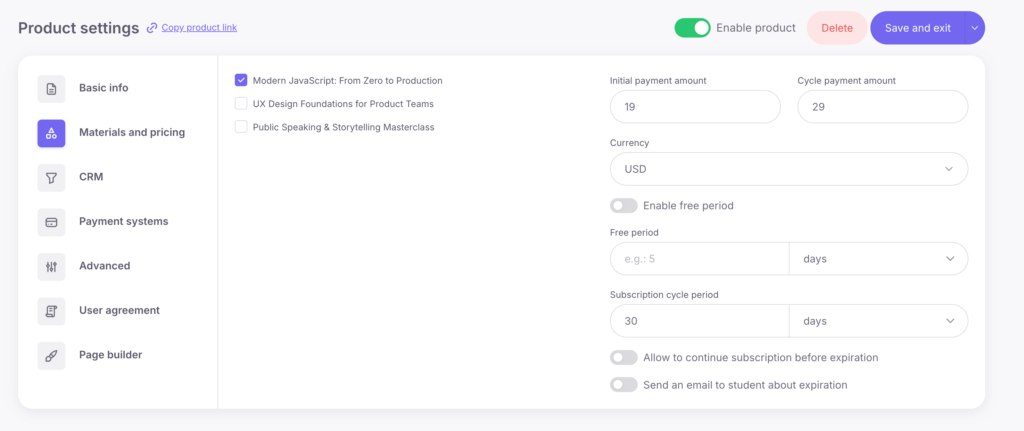
2. Step Two – Materials and pricing
Add one or more courses that will be available under the subscription and fill in the following parameters:
- Initial payment amount — the amount that will be charged for the first payment. For example, you can set the first payment as 10 USD, and then set the recurring payment to a higher amount, such as 20 USD.
- Cycle payment amount — the amount that will be automatically charged to the customer on a regular basis (e.g., daily or monthly).
- Free period — if you want to offer the customer free access for a specified period (e.g., 14 days or 1 month), activate this option and set the duration of the free period.
- Subscription cycle period — specify the time after which the next payment will be charged (e.g., every 30 days or every 3 months).
- Allow continue subscription before expire — enable this option if you want to allow students to extend their subscription before it expires (e.g., if the student has 7 days left before the current subscription expires, the days will be added after renewal).
- Send an email to the student about the expiration date — automatic email delivery on the day the subscription ends.
Note: If the «Allow continue subscription before expire» option is disabled, the student will only be able to renew their subscription on the last day of the current subscription or after it expires.
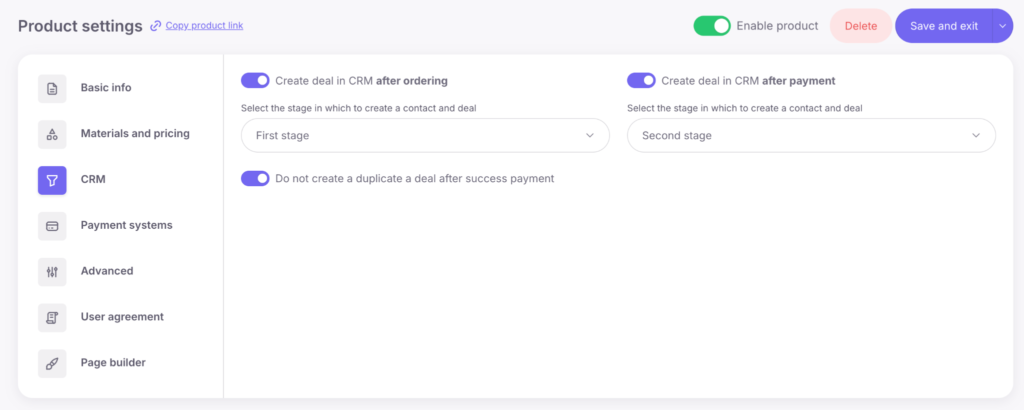
3. Step Three – CRM
Here, you can set when to create a deal and select its placement in the sales funnel.
There are only 2 options:
- «Create a deal in CRM after the order»
- «Create a deal in CRM after payment»
If you select «Create a deal in CRM after the order», deal will be created in CRM when your client fills out the form, at the step in the funnel you’ve chosen.
If you choose «Create a deal in CRM after payment», the deal will be created in CRM at the chosen funnel stage only after the client makes the payment.
Activate and set up one of these options, or both (but with different funnel stages), click «Save» and proceed to the next step.
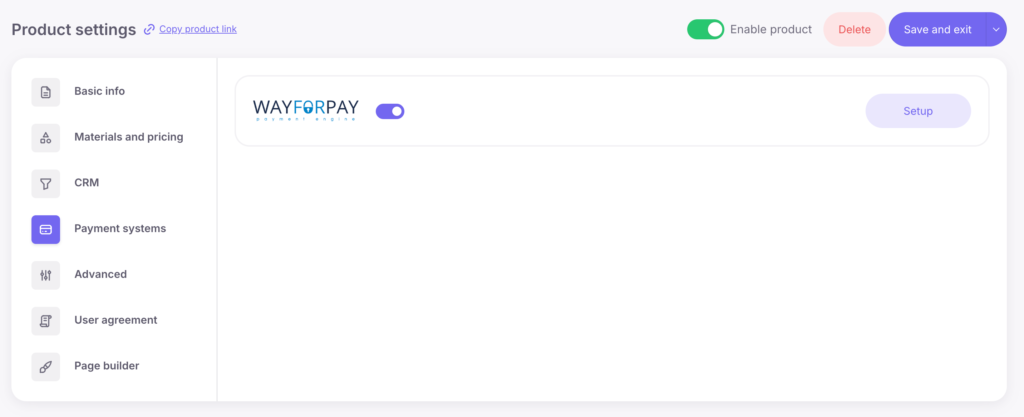
4. The next step is Payment Systems. At this stage, you can activate payment systems and, if needed, access the payment system settings in the Softbook Store.
Important: changing Integration Keys with Active Subscriptions. If you already have active subscriptions, it is not recommended to change your payment gateway integration keys.
When a customer makes the first subscription payment, a payment token is created and used for all future automatic recurring charges. This token is linked to the current integration keys.
If you change the integration keys, all previously created payment tokens will become invalid. As a result, automatic recurring payments for existing subscriptions will no longer be processed.
This is not a limitation of the Softbook platform. It is a standard security mechanism used by payment providers.
If you plan to change your integration keys, we recommend doing so before you start selling subscription-based products. Otherwise, existing recurring payments will stop working.
5. Next Stage – “Advanced Settings”. At this stage, you can add links to pages after successful or failed payment with your own design, or use the standard one. To set up a custom page, you need to prepare, design, and format it in advance, and then insert the link to it in the corresponding field. If you don’t have a custom page, the platform will use its default page.
If you already have student groups created in your school, you will have an active field to enroll the student in a specific group.
It is recommended to assign the new students to a group for two reasons:
- Easier organization: It will be easier to manage and sort new students within your school.
- Schedule compatibility: If you have a class schedule set up for that group, it will automatically apply to all students assigned to that group.
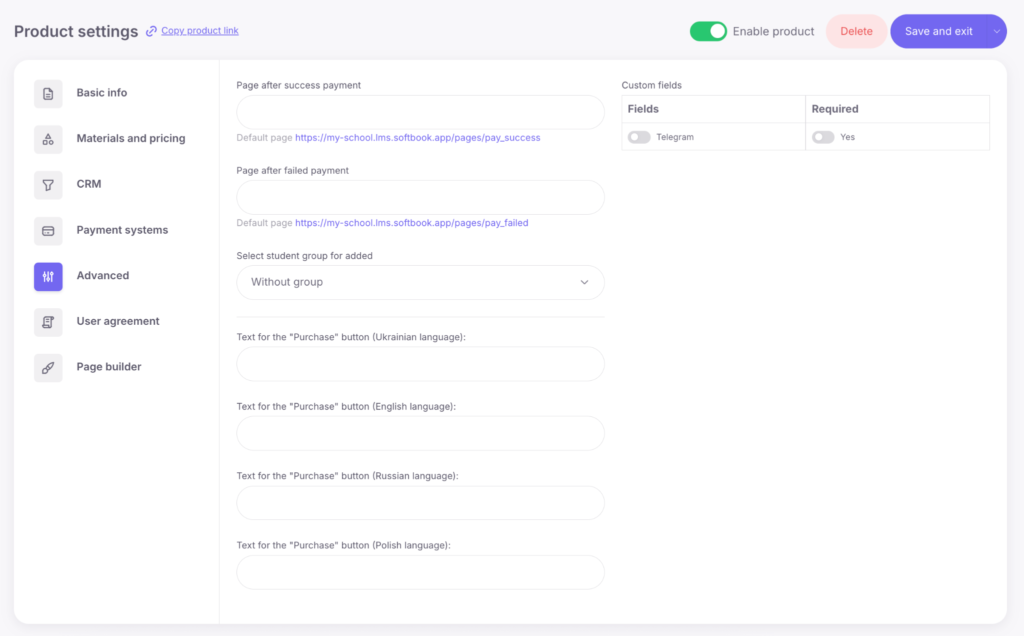
At this stage, you can also set your own text for the “Purchase” button.
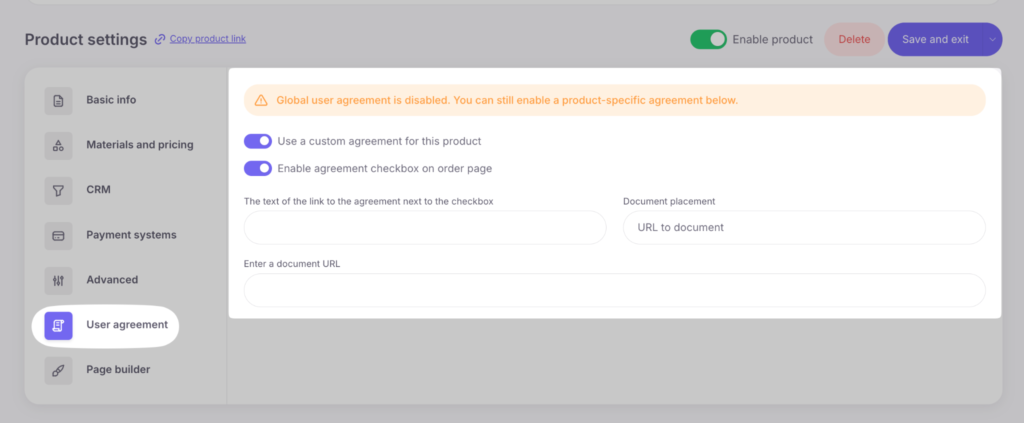
6. “User Agreement” Tab
This tab is intended for configuring the display of a user agreement or public offer agreement on the product page. To activate this option, enable the corresponding toggle, after which you can specify the agreement terms in detail in the text field or add a link to the document. This setting requires the customer to confirm their agreement with the terms before proceeding to the payment system page.
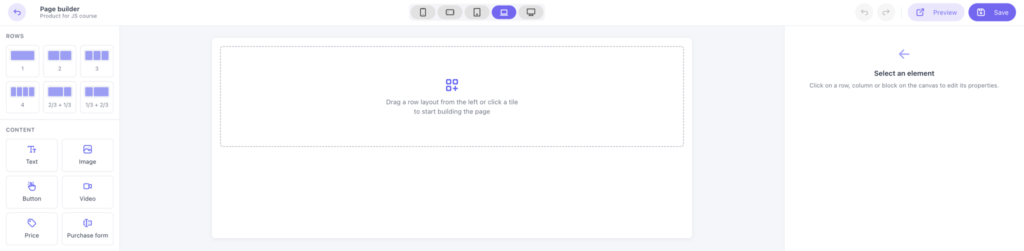
7. Page Builder
A page builder is available for creating a custom design for the product landing page. To use this tool, enable the “Custom Page” toggle.

After enabling the toggle, the following options become available:
- Choose a ready-made template: you can select one of 4 pre-configured page layouts. To edit and customize them for your brand, click the “Edit” button — the system will automatically redirect you to the editor page.
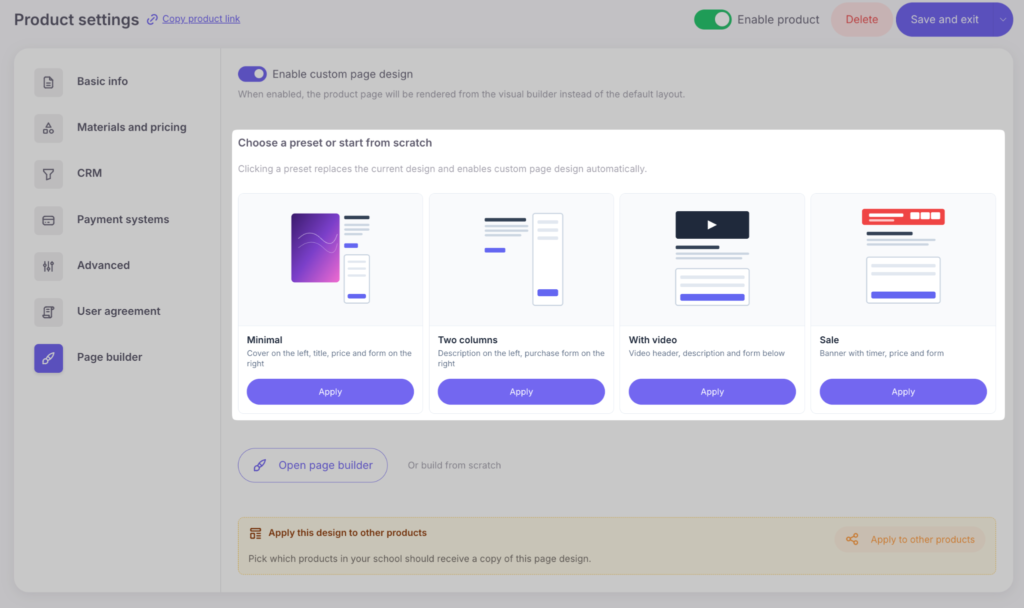
- Create manually in the Page Builder: you can open the builder and fully create the page structure yourself.

The builder interface allows you to add and configure rows, change their arrangement, and fill the page with various types of content. The following elements are available in the builder: text blocks, images, video materials, buttons, pricing sections, and payment forms.
Once the product is saved, it will appear in the general list where brief information about the product’s name, content, status, and available actions such as editing, copying the product, copying the product link, and deletion will be shown.
By following the public link, users will be taken to the product page with an order form. It will display:
- Product name, description, avatar, and cover image
- Client data input form
- Available payment methods (if more than one is connected)
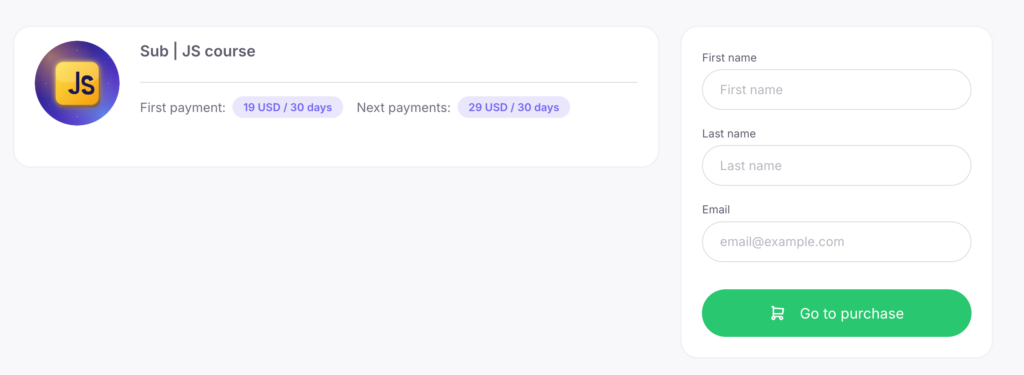
After filling out the form and clicking the «Go to purchase» button, the student will be redirected to the payment system page. After successful payment, they will receive an email with login details and access to the materials included in the subscription.
Detailed Information About Subscriptions
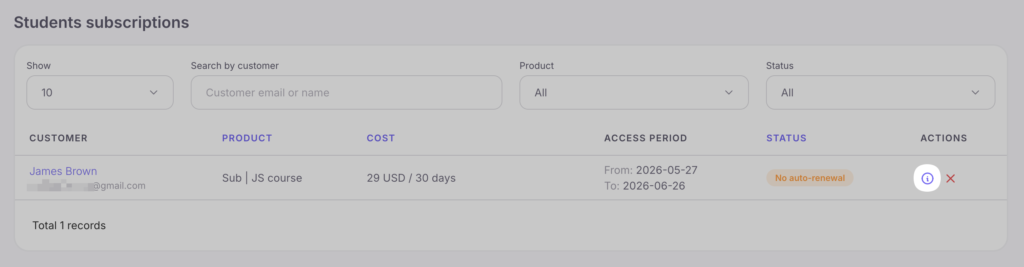
In the «Sales» section, there is a separate subsection «Subscriptions», where all active and inactive student subscriptions are displayed.
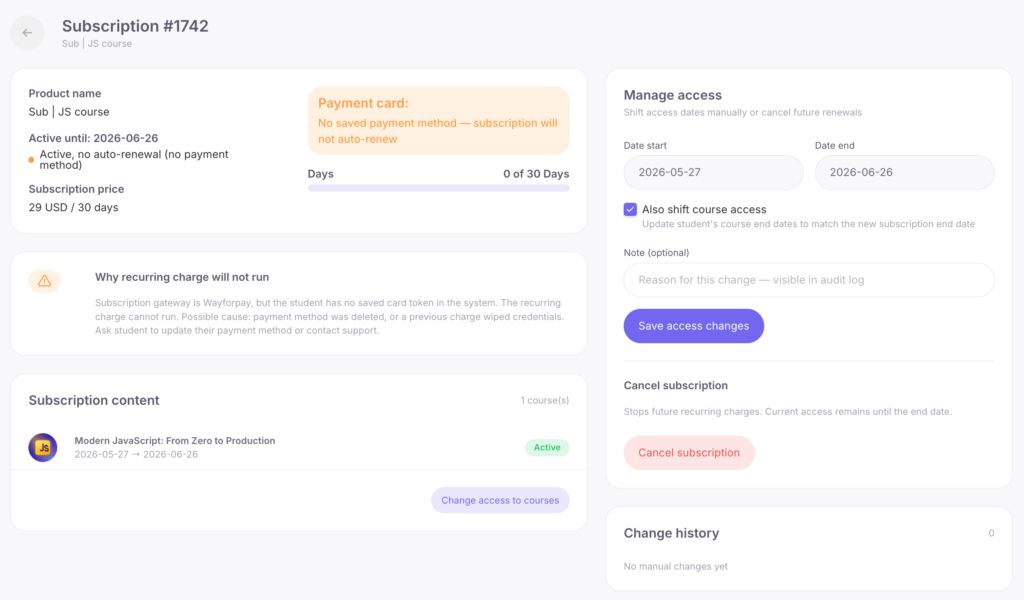
When you click the “View” button, a separate detailed subscription management page opens. It contains all advanced information and management tools, divided into the following sections:
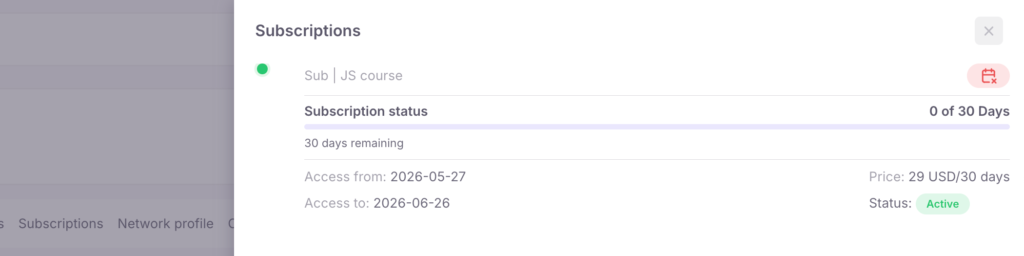
- General Information: the product name, the access expiration date, the current status (for example, active without auto-renewal), the subscription price, and billing period. It also displays the payment card status (whether a payment method is saved) and a visual progress bar showing the number of days used.
- Warnings: a block of system notifications. For example, if automatic payment withdrawal is not possible because no payment card is saved, the system will explain the reason in detail.
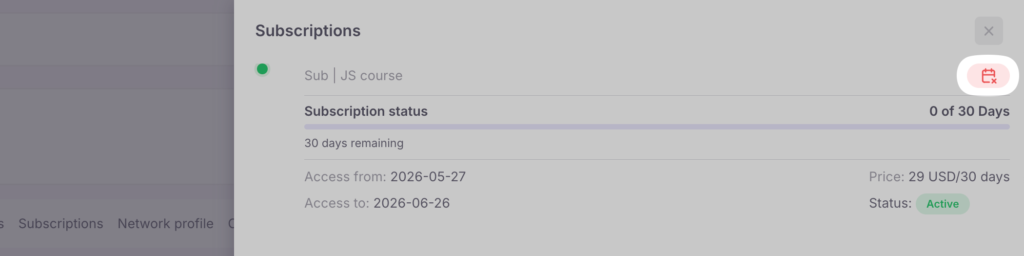
- Subscription Content: a list of courses included in the subscription, their statuses, and current access dates. There is also a quick-access button for changing access to these courses.
- Access Management: a tool for manually changing the subscription start and end dates. If you enable the “Also change course access duration” option, the system will automatically update the student’s course access dates according to the new subscription dates. Any change can be accompanied by a text comment, which will be saved in the history.
- Cancel Subscription: a button for stopping future recurring payments. After cancellation, the student’s current access remains active until the end of the already paid period.
- Change History: a log of all manually made changes (date changes, access synchronization, etc.). It records the performed action, the exact time it was completed, and the name of the administrator who made it.
If a student has multiple subscriptions, each subscription will be displayed as a separate row in the general subscriptions list, from which you can open the details of each one.
Subscriptions in the Student Card
In each student’s profile, there is a «Subscriptions» tab, where all their active, completed, or canceled subscriptions are displayed.

Here, you will find the following information:
- Product name
- Start and end dates of the subscription
- Subscription status
- Number of used days (displayed as a progress bar)
- Cost and duration
- Masked card number used for payment
- Subscription status
If the subscription status is «Active», you can manually cancel renewal. In this case, the student will retain access until the end of the paid period, but no further charges will occur.
Subscriptions cannot be deleted. Even completed and canceled subscriptions are saved in the system as history, ensuring transparency and addressing any potential complaints from students.
What the Student Sees After Subscribing
After successful payment, the student will gain access to the relevant courses and will be able to find them in the «My courses» section. A new «My subscriptions» section will appear in the student interface, visible only if the student has at least one active subscription.
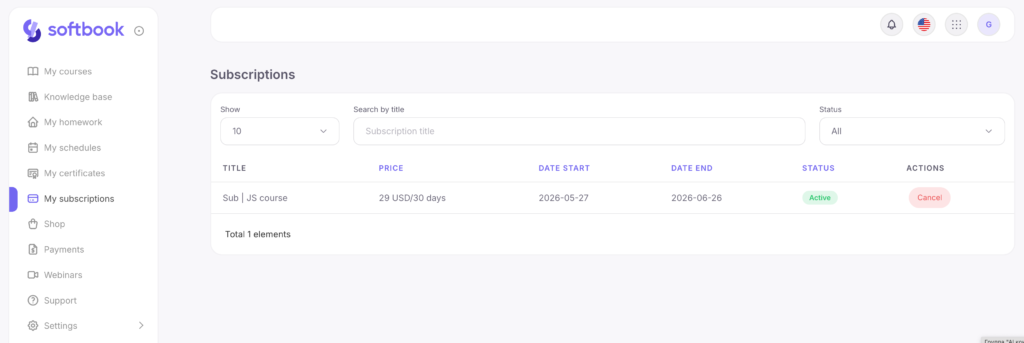
In the «My subscriptions» section, the following information is displayed:
- Subscription name (product name)
- Frequency and cost (e.g., 20 USD / 30 days)
- Start and end dates of the subscription
- Current subscription status (Active / Inactive)
- The option to extend the subscription (if enabled in the product settings)
- Subscription cancellation button
Filters for status (Active, Inactive, All) and search by subscription name are also available.

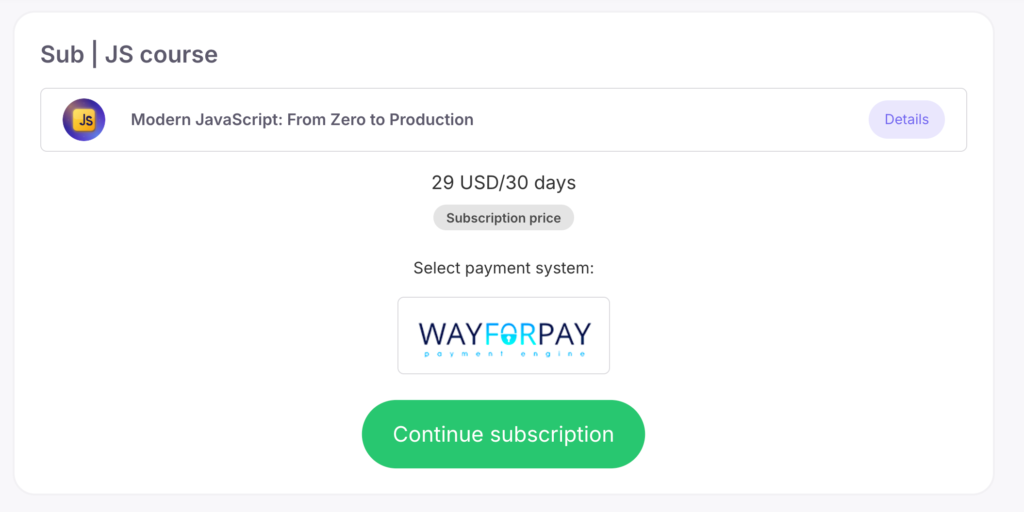
If the subscription allows renewal before the expiration date, the student will see a «Continue» button.
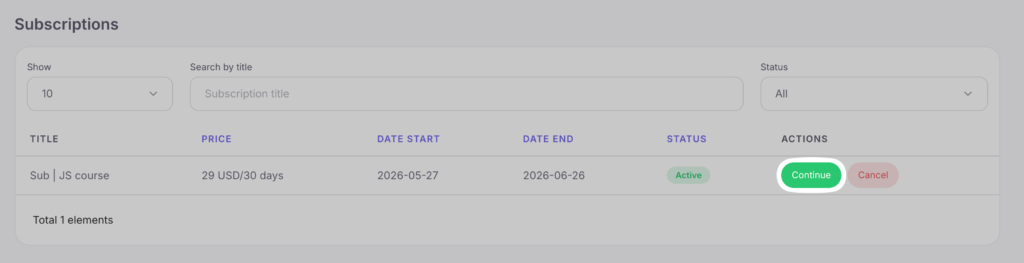
Clicking it opens a form to choose the payment system and method. If the card was previously used, the student will be able to make the payment using the linked card.
When the subscription is canceled, access to the courses remains until the end of the paid period. After this date, no further charges will occur.
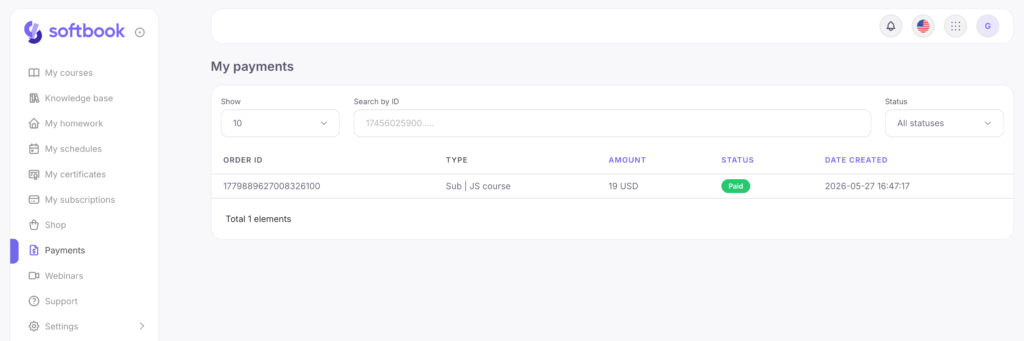
The student also has access to the «Payments» section, where the entire payment history for products and courses is displayed.
Instructions for Students: how to subscribe from your personal account
To subscribe, the student needs to open the «Shop» section, where all available products are listed. Subscriptions are highlighted separately and contain information about:
- Cost and duration (e.g., 20 USD / 30 days)
- Free period availability (if provided)
- List of courses included in the subscription.
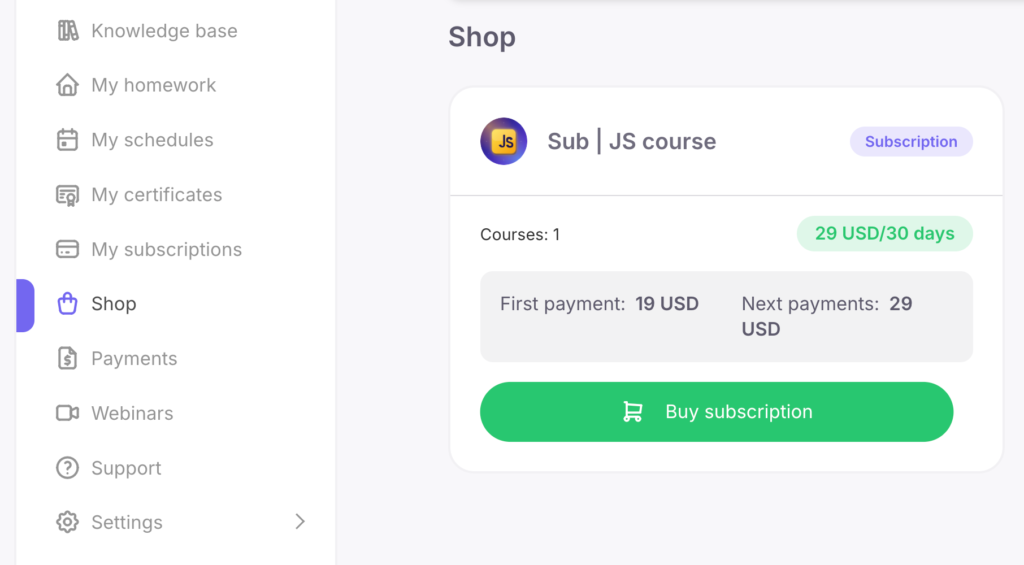
After selecting the desired subscription, the student clicks the «Buy subscription» button, chooses a payment system (if more than one is available), and confirms the purchase by clicking «Buy subscription».
After successful payment:
- Access to the courses included in the subscription is granted automatically.
- The «My subscriptions» section appears in the sidebar (if the student has not subscribed before).
- The option to extend or cancel the subscription becomes available.
- Payment information is recorded in the «Payments» section, where the student can track their purchase history.


