Creating testing
21.06.2023
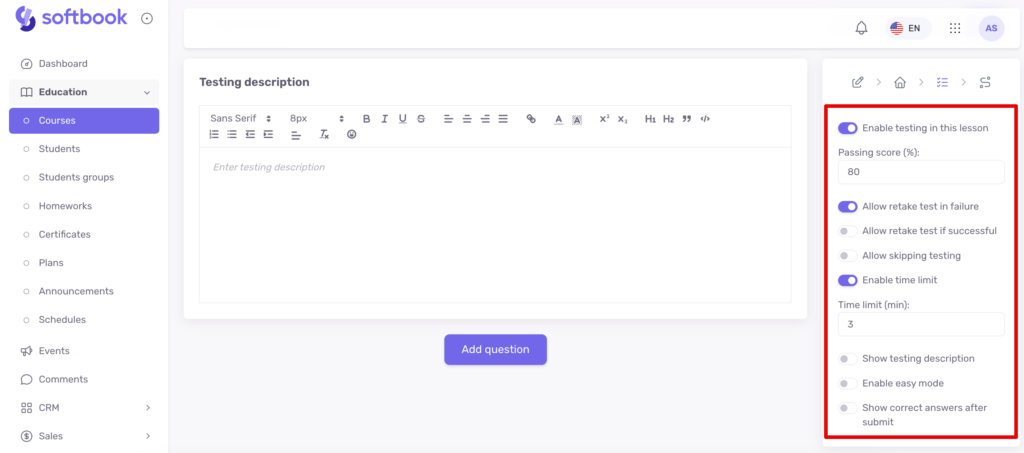
Let’s move on to the next stage – testing. Like the others, this block has a main part for editing and key options for setting up:
- Enable testing in this lesson – enable if a test is planned in the lesson.
- Passing score – set the number of correct answers as a percentage for the system to pass the test for the student (50% – half, 100% – all) and allow them to proceed.
- Allow retake test in failure – if the student fails the test, they can retake it multiple times.
- Allow retake test if successful – for those who like to beat their own records.
- Allow skipping the test – allows the student to complete the lesson and move on to the next lesson without taking the test.
- Enable time limit – a limit on taking the test in minutes.
- Show testing description – data about the test for students: number of questions, passing score, is there a time limit.
- Enable simplified mode – if the test has several correct answers, the student’s answer will be counted if it contains at least one correct option.
- Show correct answers after submit – a parameter that shows the answer options chosen by the student and the correct options after the test is completed.
Tests can be created with one or more correct answers. Each question should be entered in the appropriate field, and answer choices should be added to the question and labeled correct.
You can add explanations to the correct and incorrect answer choices that will appear to students as they take the test.
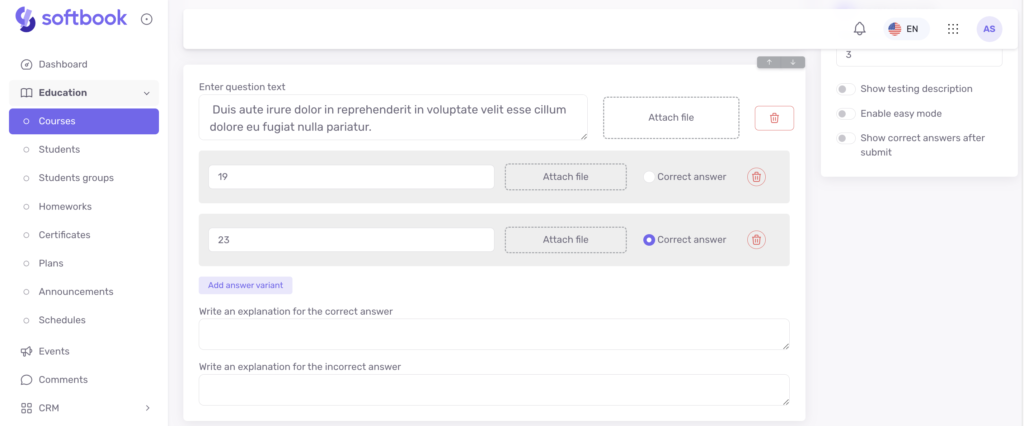
When you’ve finalized all the test questions with answer options click “Save and Continue”. Congratulations, the lesson has been created!


