Adding students
Option 1: Adding students manually
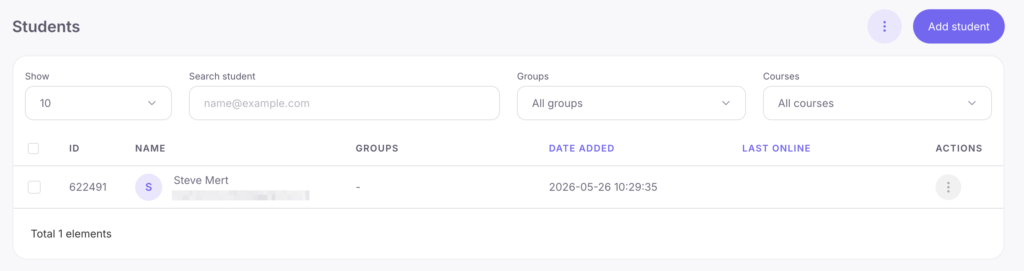
1. Open the “Learning” section and go to the “Students” tab.
2. In the editor that opens, find and click on the “Add Student” button in the upper right corner.
3. In the opened form, enter the student’s name, surname, and email address. Select a course for the student to receive access credentials to the platform. You can specify the student’s group immediately or later, if needed.
Note: When you add a new student, they will receive their own Softbook account, which they can use for learning in different schools on the platform. Each Softbook account is an entire ecosystem. Therefore, school owners do not have the right to change students’ names, as it would lead to changes in their data across all schools where they are enrolled. Only the student can change their name, surname, and phone number in their own account.

Every new student who does not have an account on the platform before will receive an email automatically with login details for the course and the platform account. Therefore, it is important to ensure the accuracy and correctness of the students’ email addresses when adding them.
Option 2: Importing students
1. Log in to your Softbook account and open the relevant online school. Go to the “Learning” section and click on “Students”.
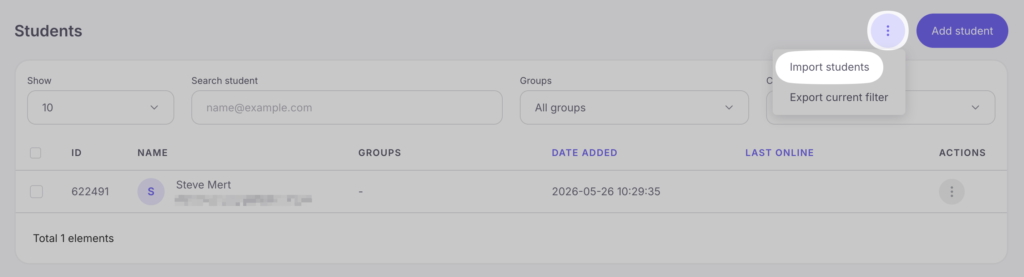
2. In the opened editor, find and click on the button with three dots in the upper right corner, then select “Import students”.
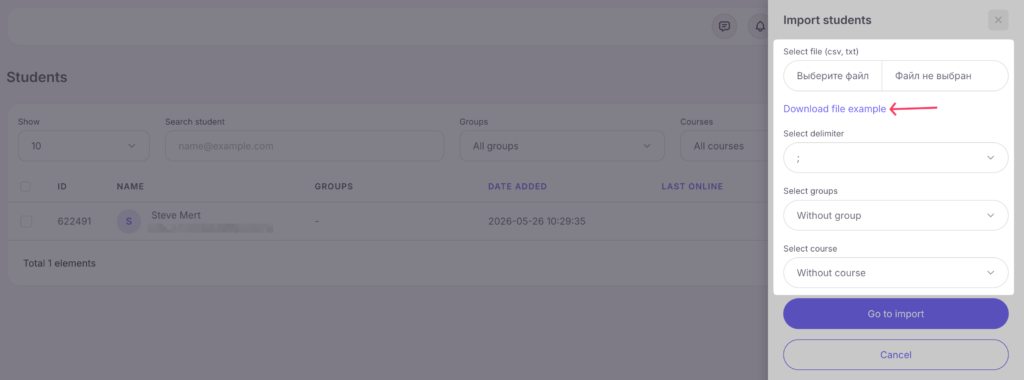
3. A form will open up for you to fill out. Here, you will need a CSV or TXT file containing the names, surnames, email addresses, and phone numbers of the students. You can see an example file by clicking on the “Download example file” link below this field.
Click on the “Choose File” field and upload your CSV or TXT file.
In the “Choose Separator” field, select the delimiter used in your file to separate the student data, whether it’s a period or a semicolon.
In the “Student Group” field, choose the group to which you want to add the students from the import file, if applicable, or leave it as “No group”. In the “Add to Course” field, select the course to which you want to enroll the students or leave it as “No course”. Click the “Next” button when you have set all the parameters.
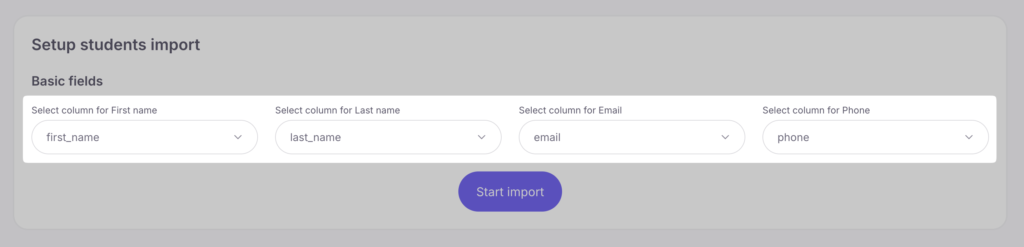
4. The second page of the student import process will open. There you will see information about the file contents. Below, you will find four fields where you need to select the appropriate data options for display. For example, in the “Select the column for the first name” field, choose the first name from the drop-down list, in the “Select the column for the last name” field, choose the last name, and so on. This will help the system correctly import student data into your school. Once everything is set, click the “Start Import” button. Wait for the import process to complete.
Important: There is a limit on the amount of data that can be imported on the platform – only 500 students can be imported in one session.
Each student’s name is clickable and allows you to open their profile with contact information, course achievements, and group affiliations.
Every new student imported to the platform will automatically receive an email with login and account details for the course if they were not previously registered on it.
You can mass-add new students of your school to courses. To do this, go to the student list, check the names of all those you plan to add to the course, and find the icon with an open book above the list.
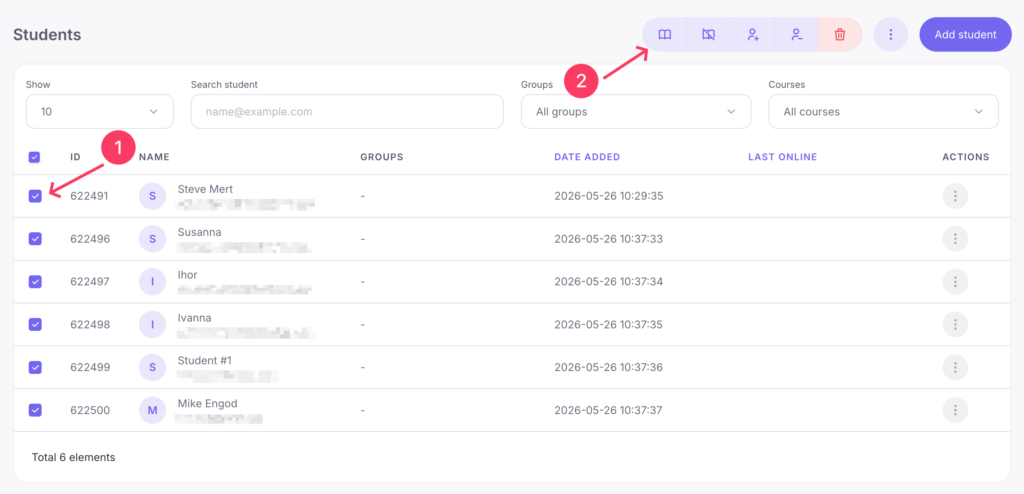
Click on it – a side panel with your courses list will open. Choose the one in which you want to add students and click “Enroll in course”. You can select multiple courses at once.
The same can be done if you want to mass-remove students from courses. Go to the student list, check the names of all those you plan to remove from the course, and find the icon with a crossed-out book above the list. Click on it – a side panel with your courses list will open. Choose the one from which you want to remove students and click “Exclude from course”. You can select multiple courses at once.
That’s all, now you know about two manual options for adding students on the platform.
.


