Contacts
The CRM system of your online school on Softbook LMS consists of several sections, and the first one is “Contacts”.
This section contains information about people with whom you communicate prior to the moment of purchasing your products.
Contacts can be created in two ways:
- automatically, in the “Sales” section
- manually
With the appropriate settings, all contacts that appear in the “Sales” section during the purchase or orders of your products can be automatically sent to the CRM section.
To manually create a new contact, click on the “Add Contact” button in the top right corner.
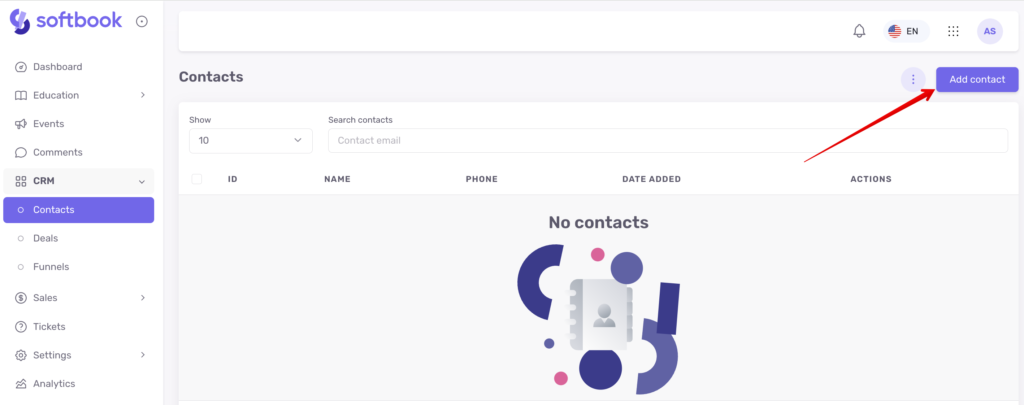
In the opened field, enter the name, surname, email, and phone number of the new contact, then click “Create Contact”.
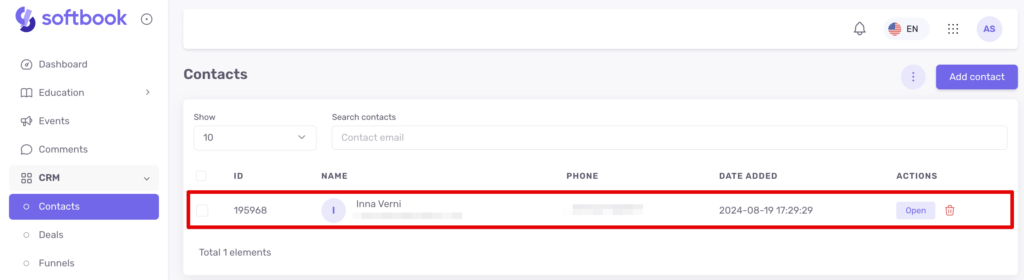
After that, you will see the created contact in the contact list. The row will display all the information you provided, as well as an “Actions” option. In this option, you can delete or edit the contact accordingly. The contact name is also clickable, opening its card and allowing you to make changes to the data.
The contact card includes:
A section with basic information: first name, last name, email, phone. The contact avatar may appear in the card if you have added the student’s email in your online school and if they have uploaded a photo to their profile.
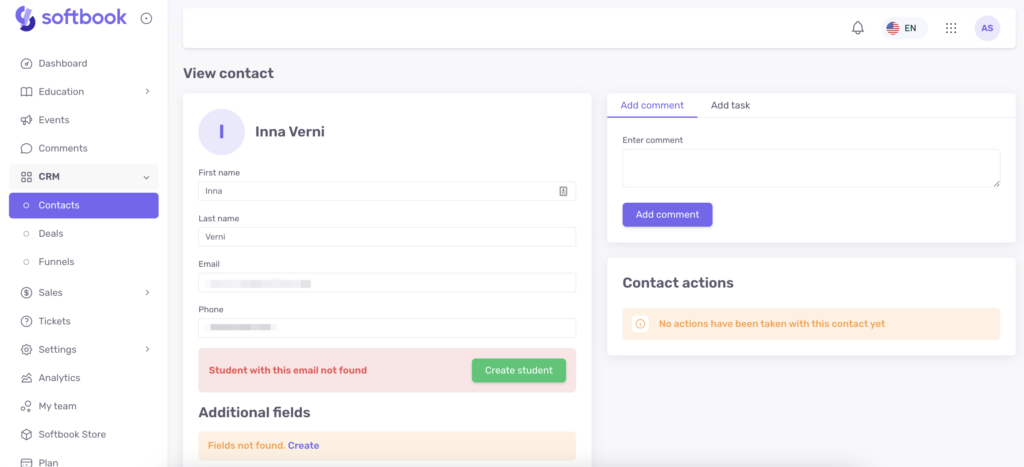
Additional fields. These are fields that can be added as desired. If you need any additional information about the contact, click on the “Add Field” option. The field editor will open for you. Create the necessary field in the “Contact Fields” section and save it. Go to the “Contacts” subsection, refresh the page, and you will see the new field in the contact card. The number of additional fields is unlimited.
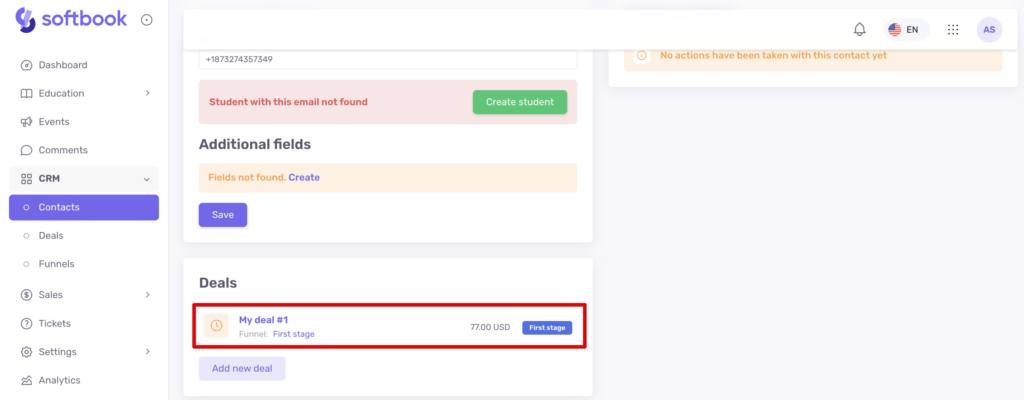
Deals. Here you can find information about deals associated with this contact. Deals can be created directly in the contact card using the “Add New Deal” button. Enter the deal name, value, and stage in the pipeline in the respective fields. The deal name is clickable. There is no limit to the number of deals in the contact card. If you go to the “Deals” subsection, you will see the card for that specific deal with corresponding contact details, timestamp, creation date, and price.
Action block. Located to the right of the contact card. Here you can add comments about the contact, notes, and any other useful information for your work. You can also create a task to be completed with this contact. Enter the task name, set a deadline in the calendar using the timer dropdown, and provide a description. All entered information is displayed in the “Contact Actions” section below. Comments and tasks are visible on color-coded tabs. The task card contains information about the task name, details, posting date and time, result, as well as control buttons for editing, marking completion, and deletion. Completed tasks are indicated by a green-colored tab in the card.
Done! Now you know what you can do in the “Contacts” subsection of the CRM system in your online school on Softbook LMS.


