MailChimp integration
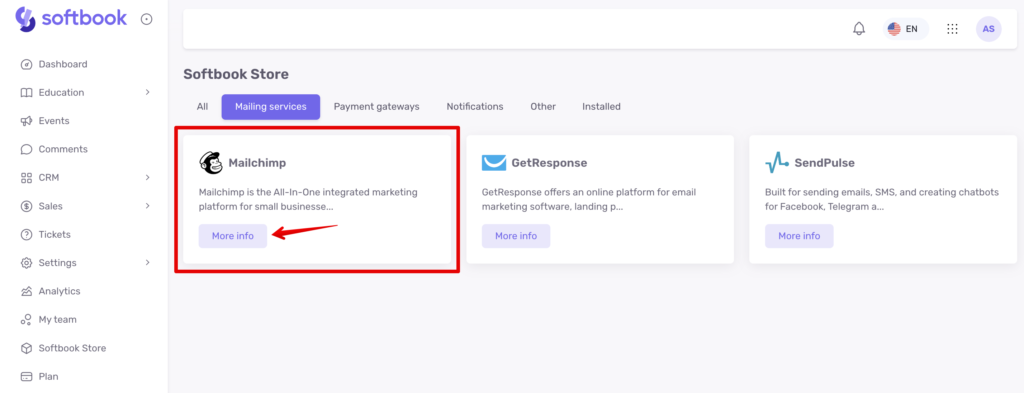
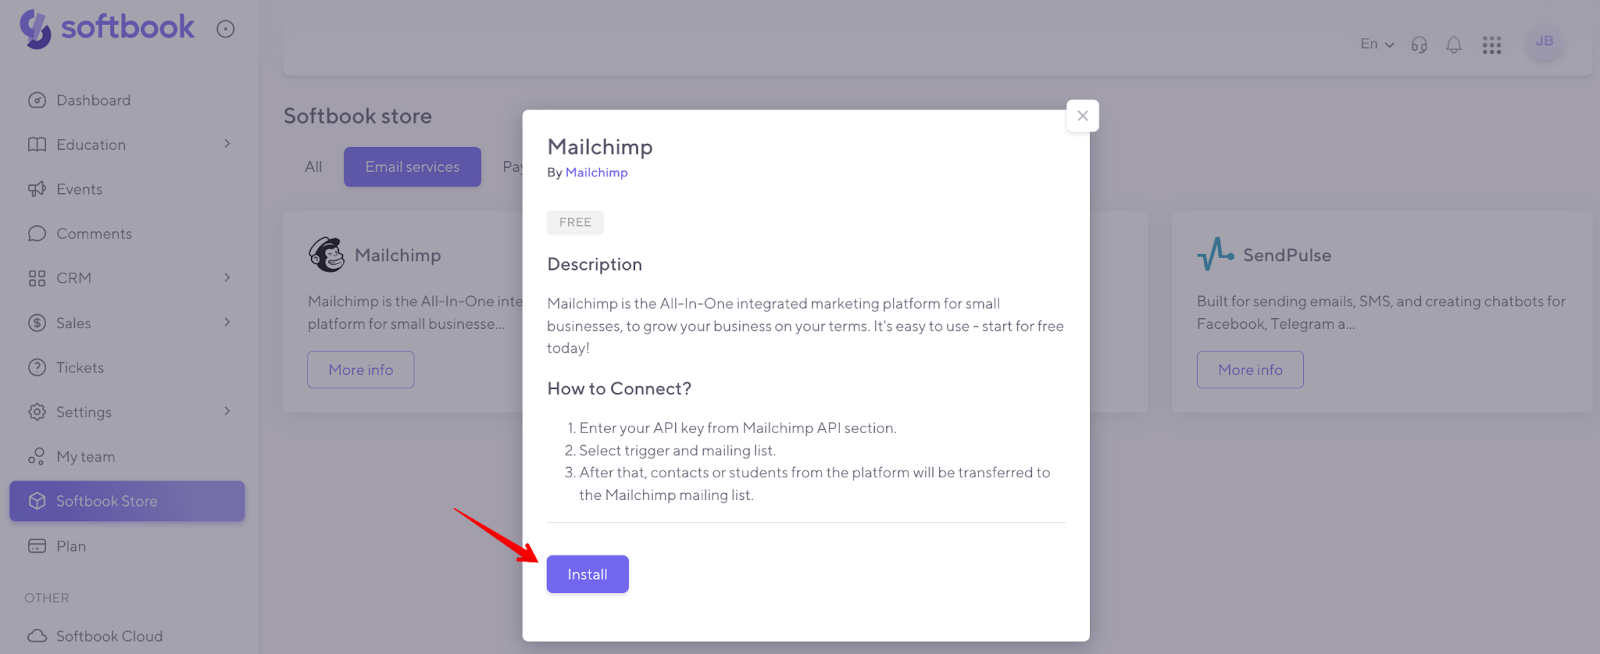
If you have decided to integrate the Mailchimp email service, go to the Softbook Store, find the Mailchimp card, and click the “More info” button on it.
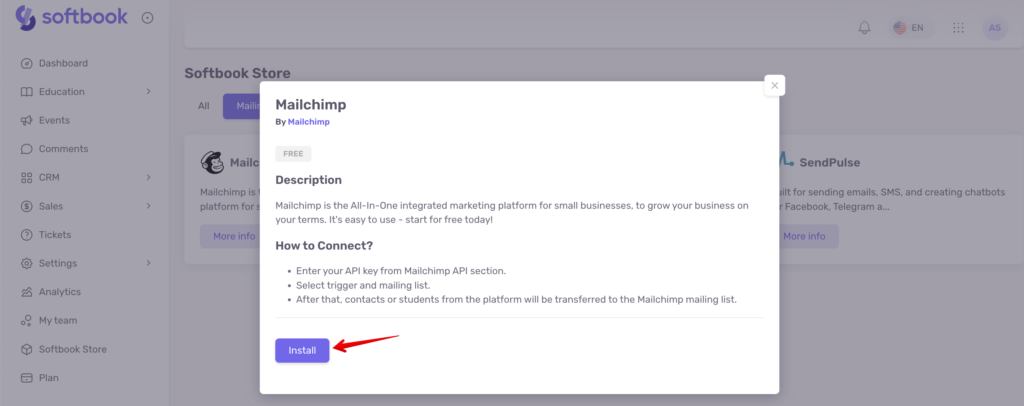
You will see a card with a description and instructions on how to connect:
- Enter the API key from the MailChimp API section.
- Choose a trigger and a mailing list.
- After that, the contacts or students from the platform will be transferred to the MailChimp mailing list.
Copy this list for further work and click on the “Install” and “Yes, install” buttons in the window that appears.
After that, you will be taken to the page for setting up the service.
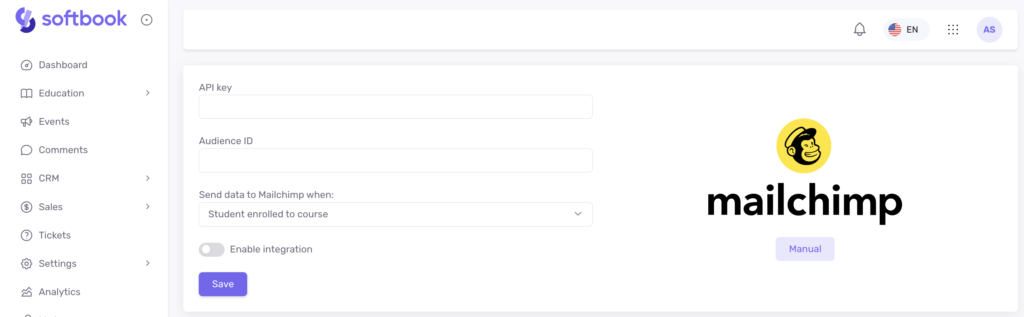
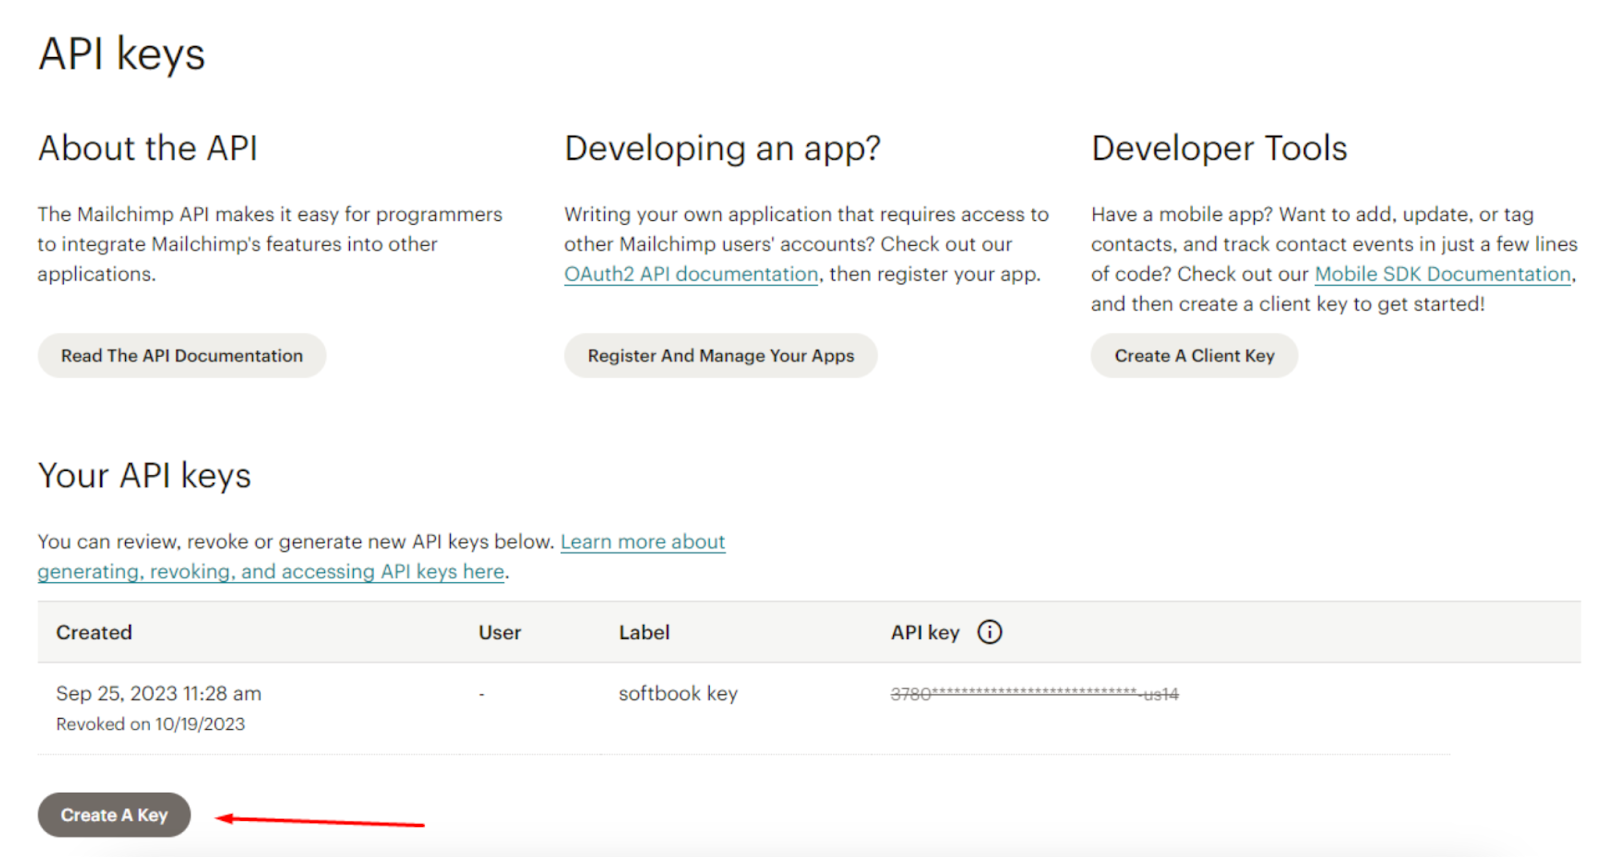
You need to fill in all the lines on it. You can get the data for them from Mailchimp. Log in to your Mailchimp account or create one there. Click on your profile and find the Profile item in the list.
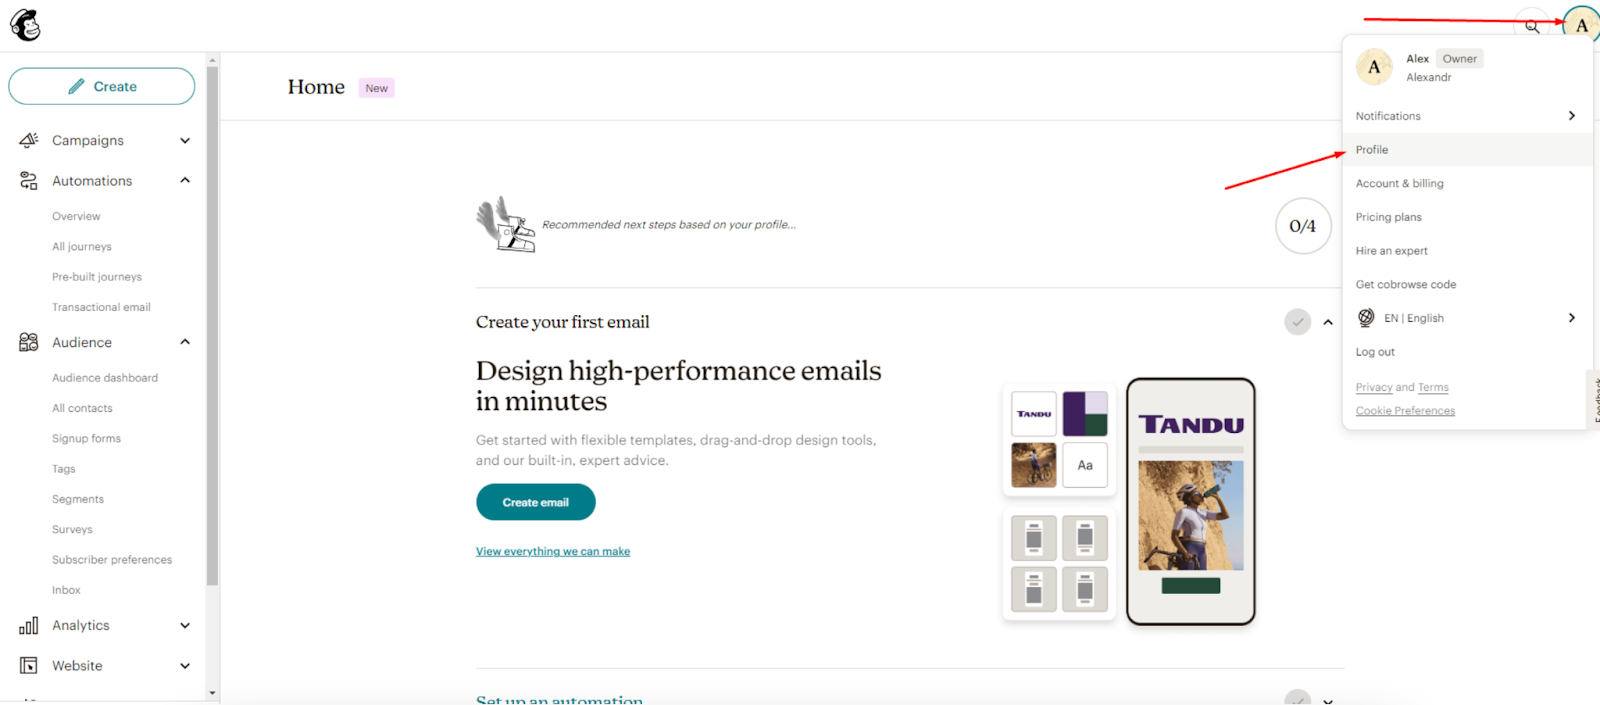
In this section, click on the “Extras” item and find the “API keys”.
In the field that opens, find the “Create a key” button.
Enter the name of the key in the field and click the “Generate key” button. After that, the generated key will appear on the page.
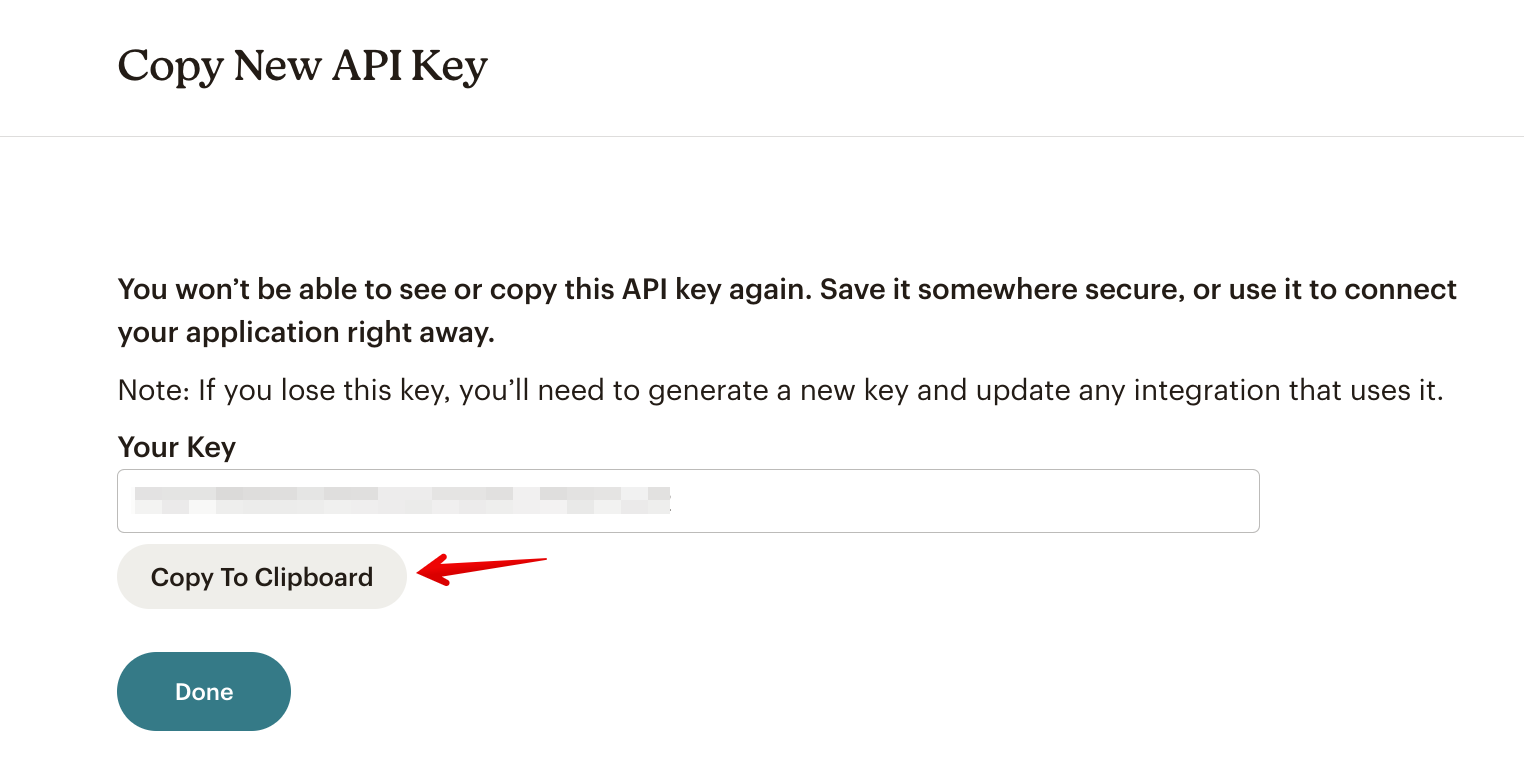
Copy it and paste it into the “API key” field on the Mailchimp settings page on Softbook LMS.
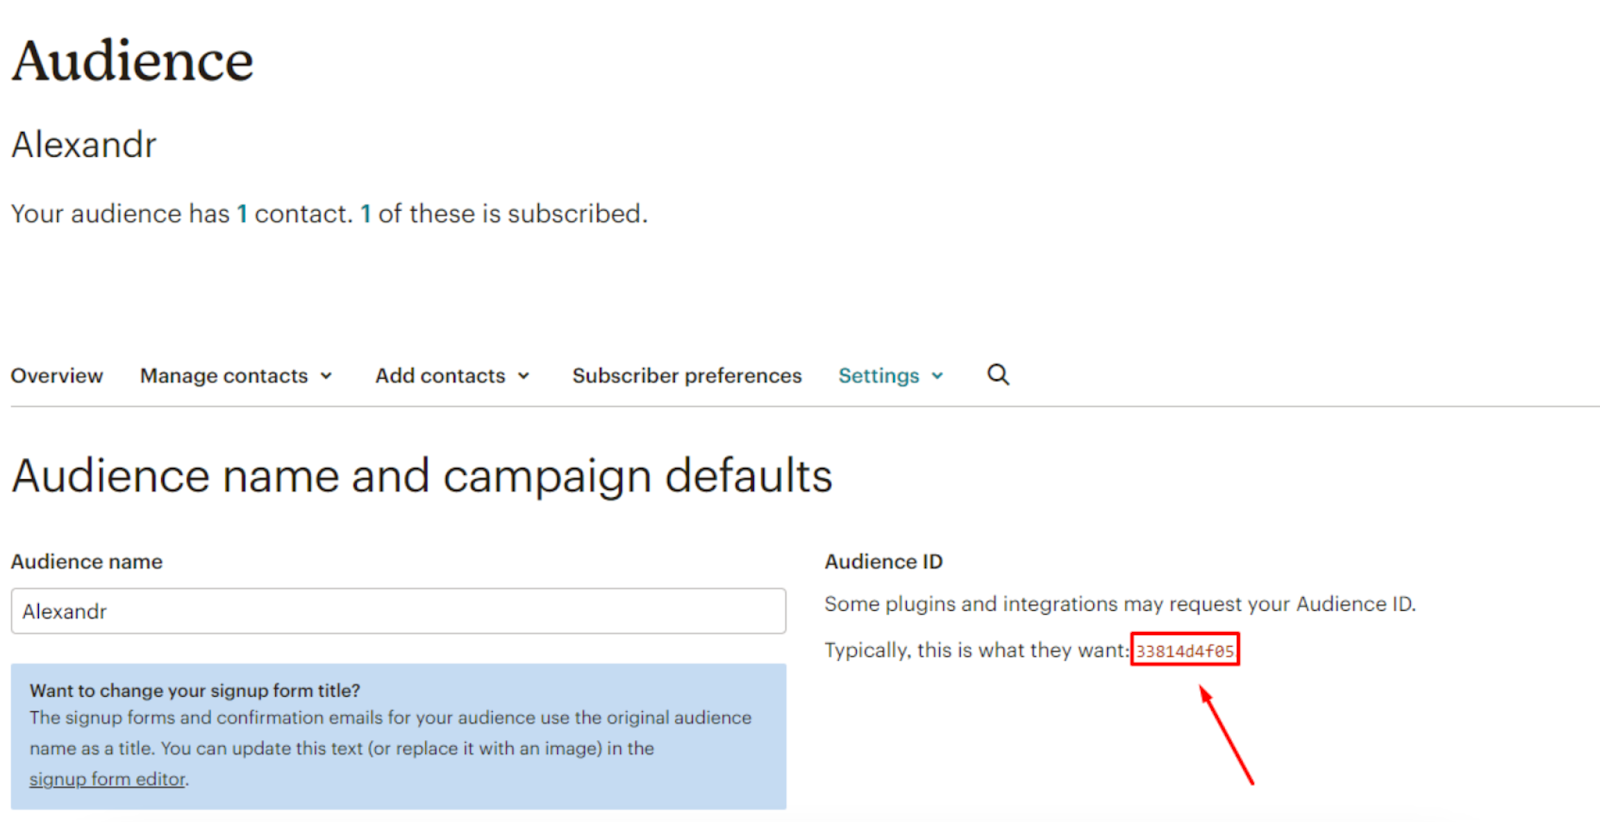
Audience ID is a list where all of your school’s contacts will be added to Mailchimp. To get this ID, find the “Audience” section in your Mailchimp profile and go to the “All contacts” item. In it, find the “Settings” item and go to the “Audience name and defaults” item.
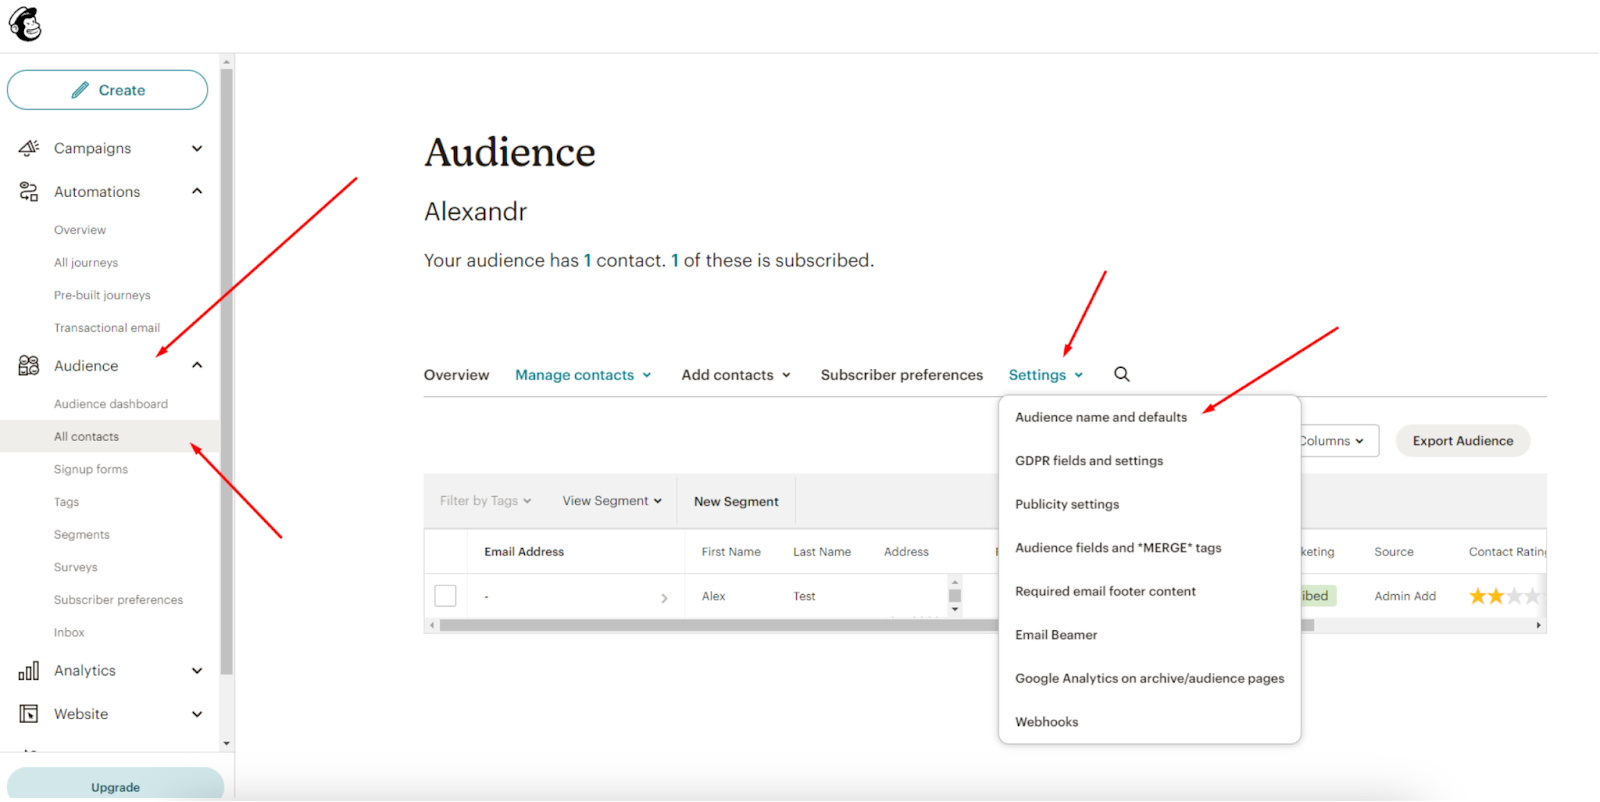
Here, in the right column, you will find the “Audience ID” item, where there will be a string of numbers. Copy it without a dot and paste it into the “Audience ID” line on the Mailchimp settings page on Softbook LMS.
The last item in the “Send data to Mailchimp” settings is a trigger that determines when to send contacts to the service. There are two options available here:
- a student is enrolled in a course
- a new contact is created
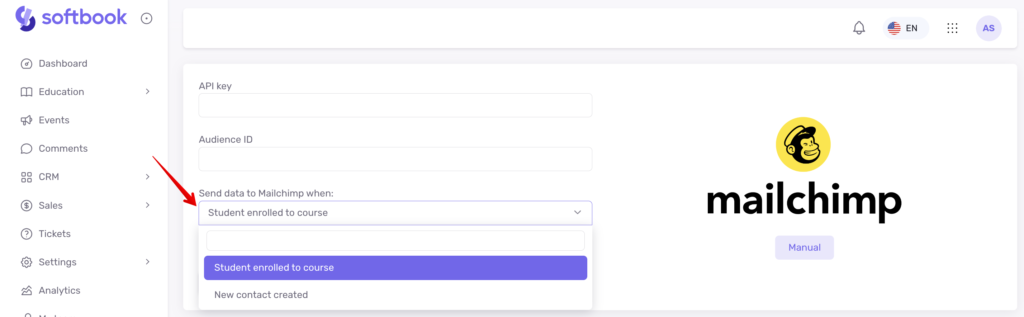
Choose the option you want and click Save.
Done, the integration is set up!


