Promocodes
The second of the two useful tools found in the “Sales” section are promo codes. To create them at your school and give them out to existing and prospective students, go to the “Discounts” subsection. Click on the “Add discount” button.

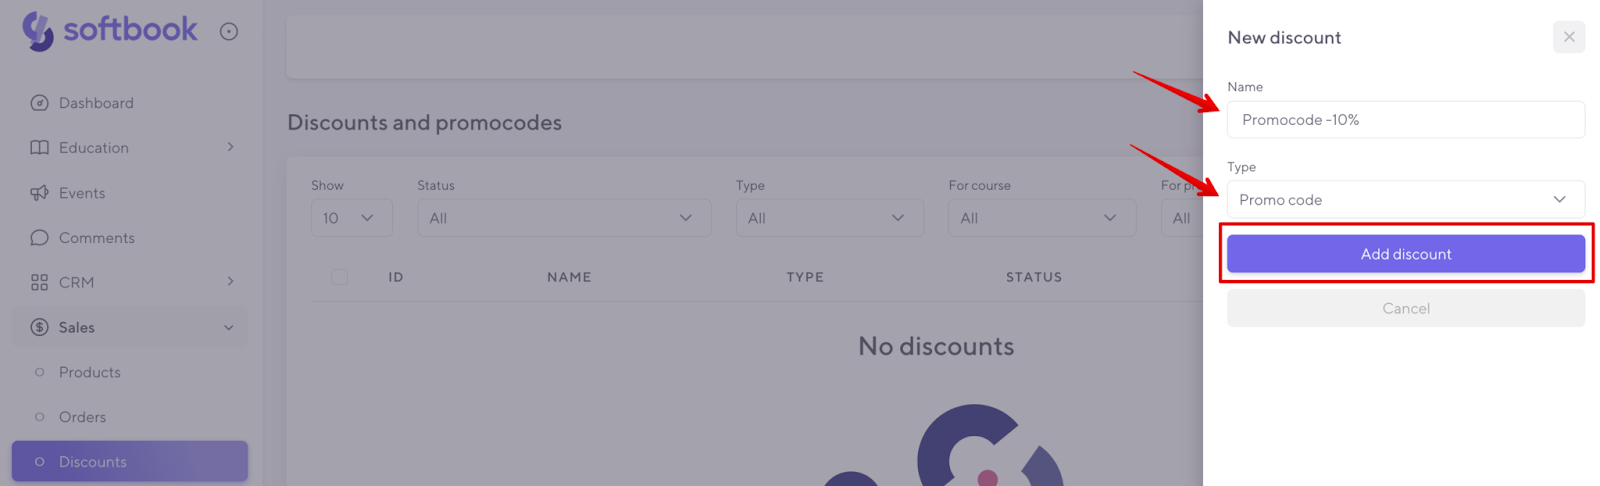
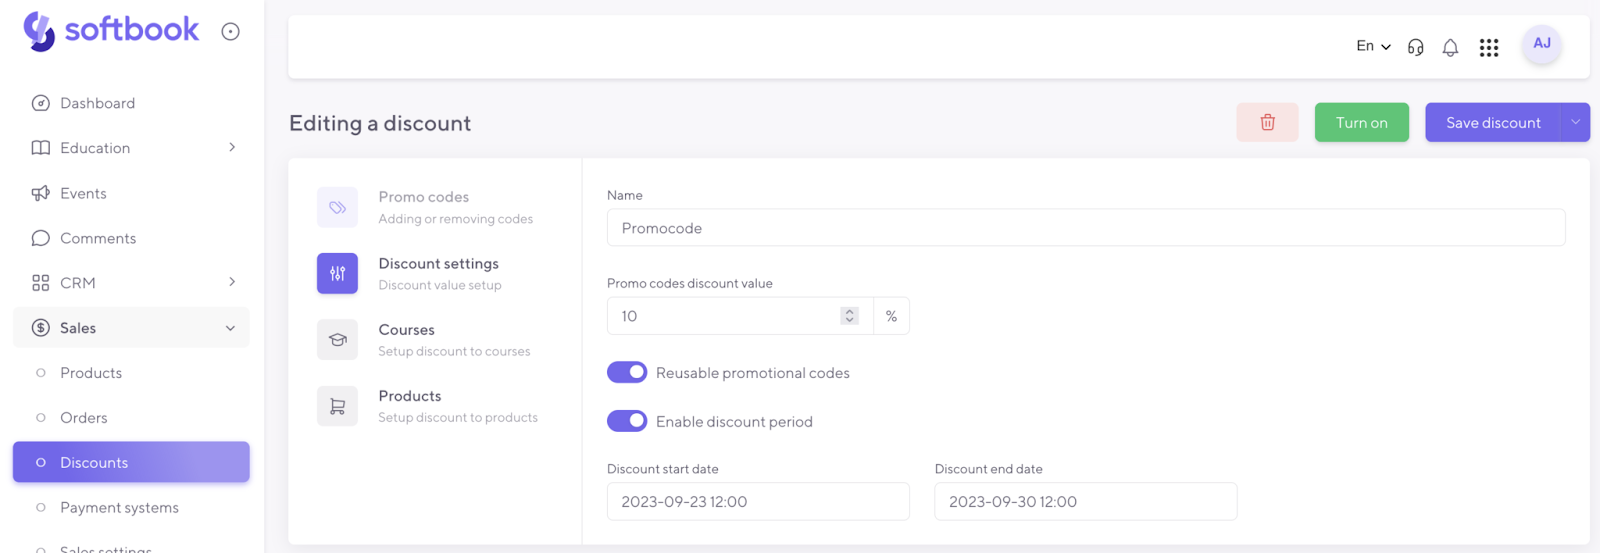
An editor for customizing promo codes will open in front of you. It consists of four blocks:
- promo codes
- discount setting
- courses
- products
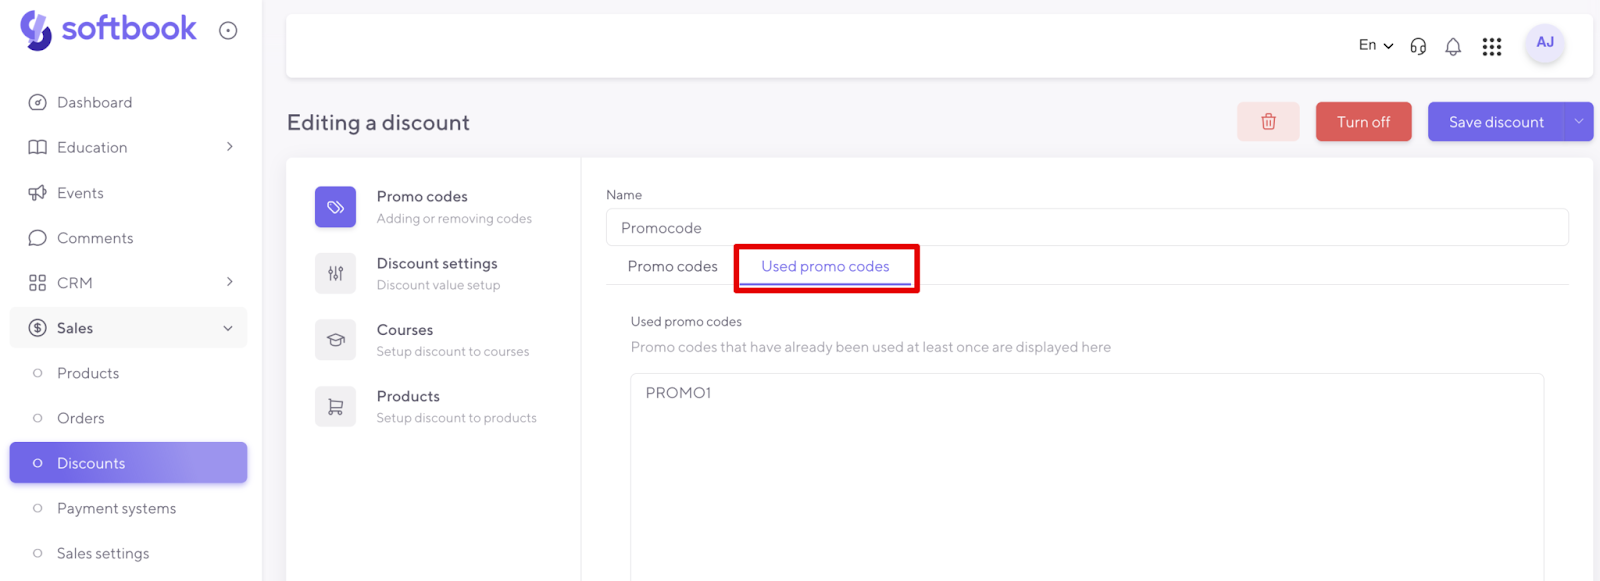
The most interesting part starts in the “Promo Codes” block. There are two items here: “Promo codes” and “Used promo codes”.
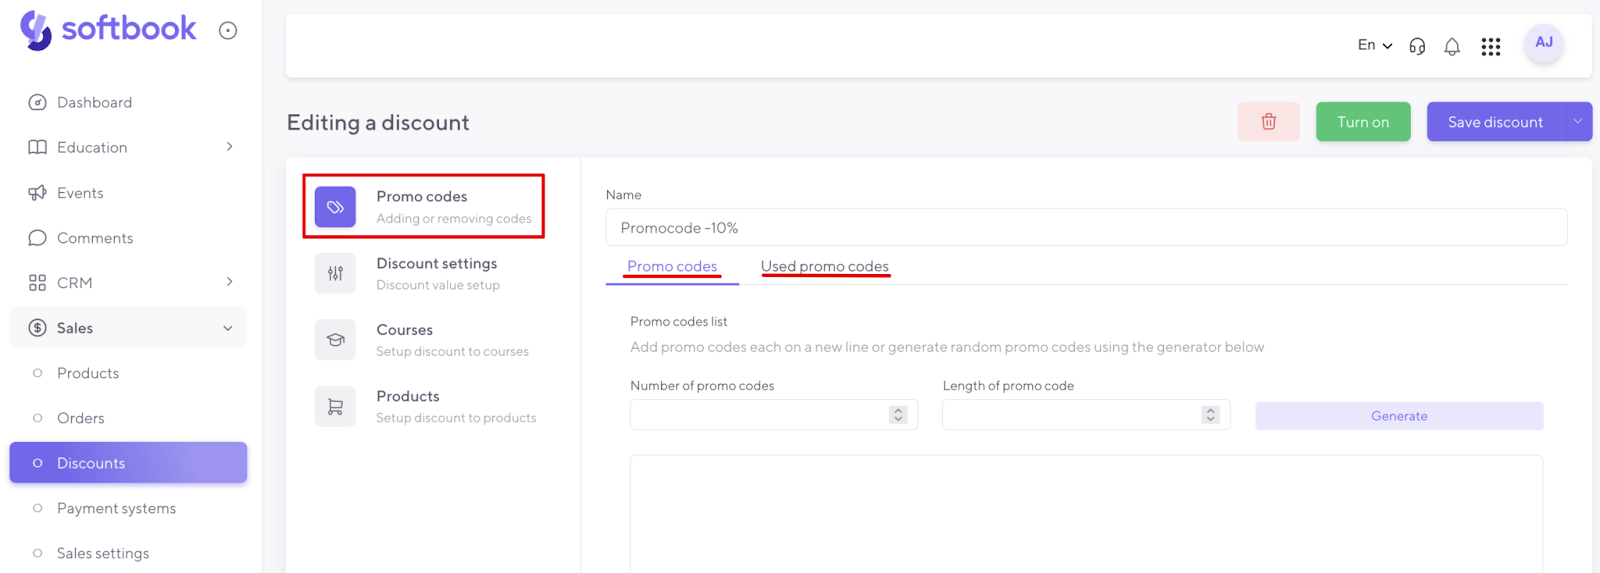
In this block, you can get a promo code in two ways: you can enter it yourself or generate it.
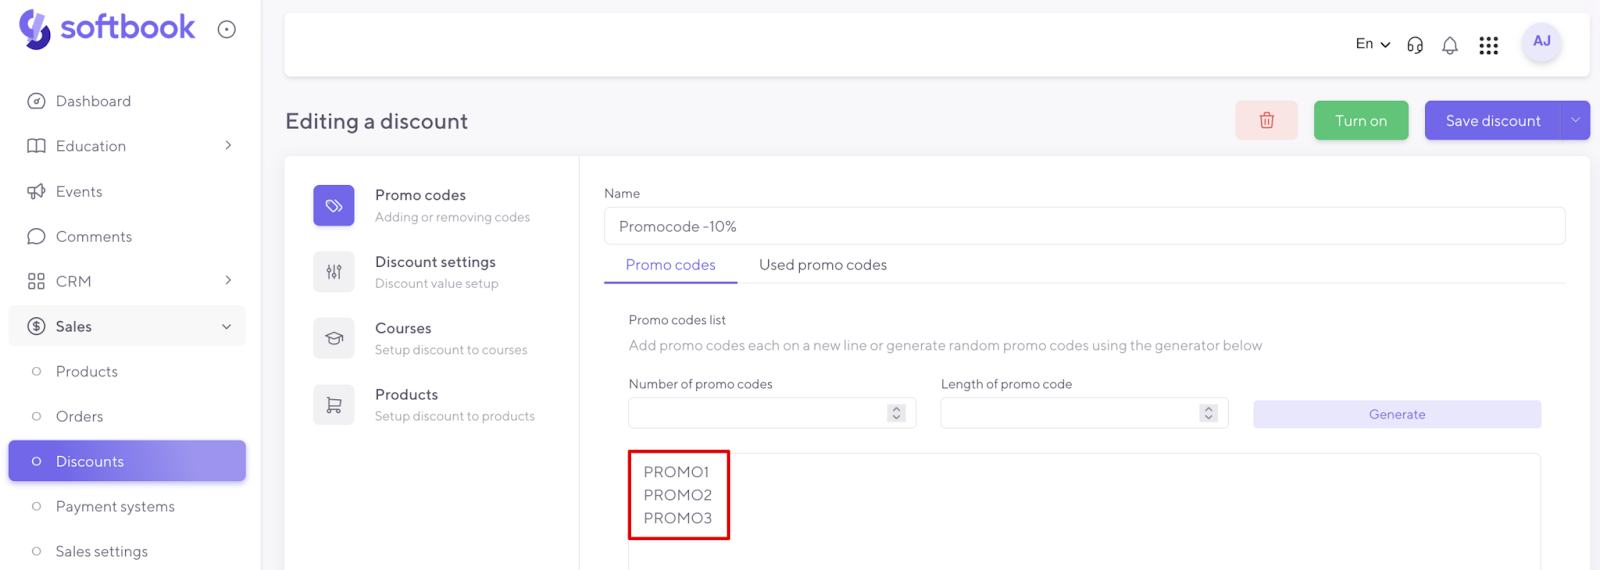
To create, for example, a single universal promo code manually, enter a word using Latin letters and/or numbers in the field below.
Important:
- One word — per line
- Maximum length — 15 characters
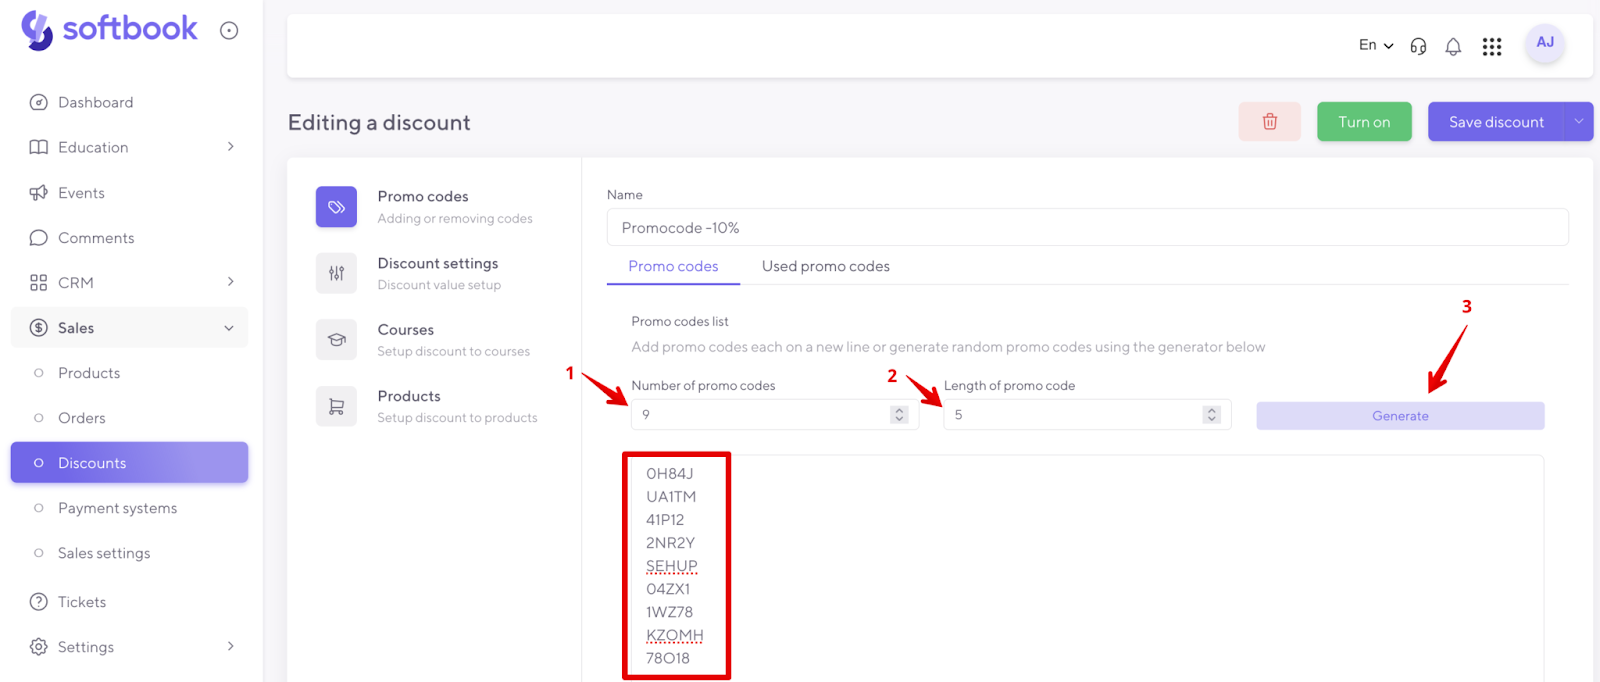
To generate a lot of unique promo codes, specify in the field labeled “Number of promo codes” how many of them you need. In the field labeled “Length of promo codes” – the number of characters they should contain. Click the “Generate” button. In the field below, you’ll get the ordered number of promo codes.
For example, you want to create and start using a promo code yourself. Type its name in the field and go to the “Discoun settingst” block. Set the size of the discount here and choose the type of work: whether it will be one-time or time-limited. The promo code will work as a one-time use code unless you activate the “Reusable Promo Codes” option. In the item “Discount period of validity” set a time in which this discount will be valid.
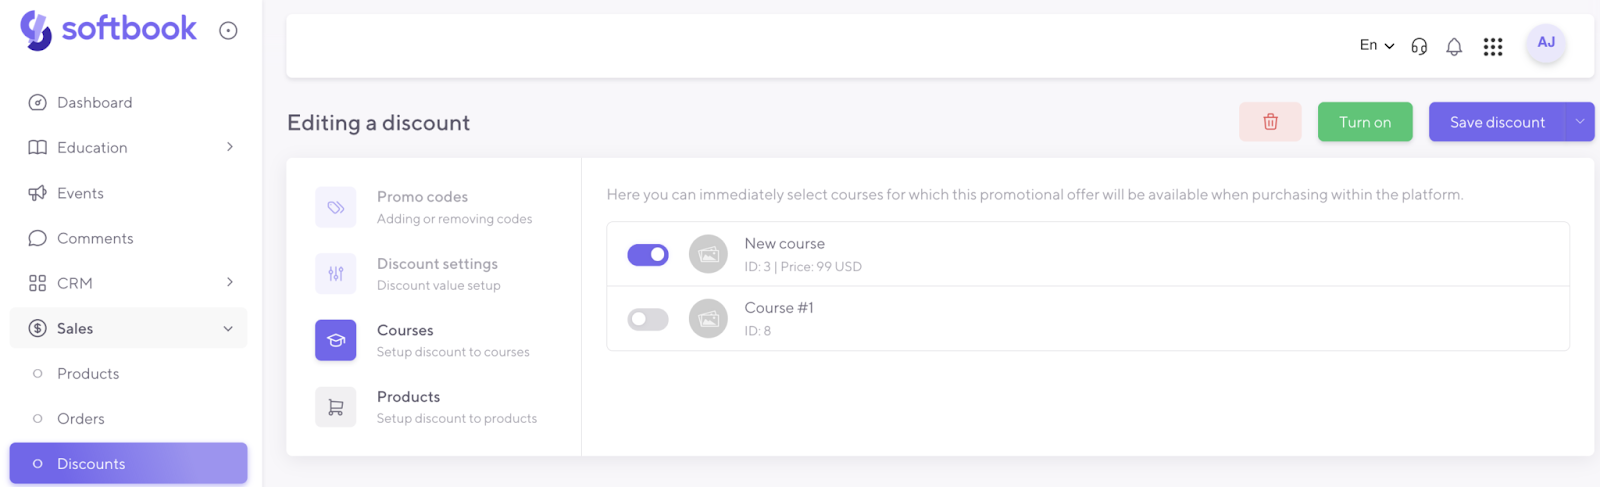
If you want to assign the promo code to a course, go to the “Courses” block, and select and activate the desired course.
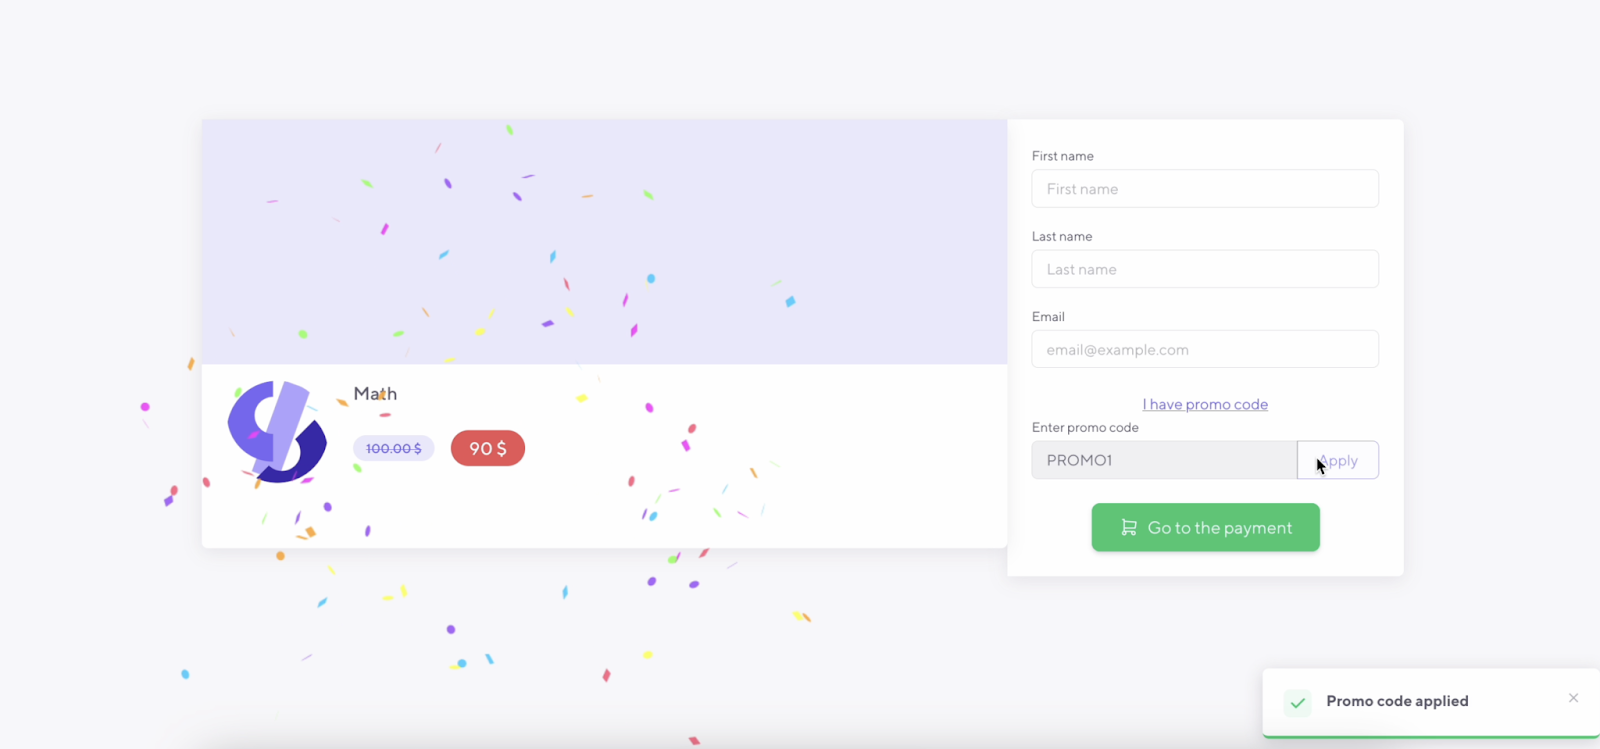
When the student wants to use the promo code to purchase the course and clicks on his card, he will see the price, and below it will be a clickable “I have a promo code” line. If he clicks on it, it will open a field to enter the promo code, type it in, and apply it, he will see the full price crossed out and the new price for the course already discounted. The payment page will also show the price of the course with the promo code already used.
If you want to assign a promo code to a product, go to the “Products” block, and select and activate the desired product. On the page of this product, in the part of the order form, the line “I have a promo code” will appear. If the customer enters and applies it, the full price will explode with animated confetti and become crossed out, and the discounted price will appear in its place.
You can always find all used promo codes in the “Promo codes” – “Used promo codes” block.
There is a full list of promo codes on the “Discounts” page. Here you can filter them by ID, name, status, type, and purpose (for course or product).

You can also check which promo codes worked – that is, find out which clients used the discount and what they purchased. To do this, open the promo code settings. Find the “Promocode statistics” item there. Click on it, and a page with a list of all promo codes will open. It has only three columns: promo codes, the number of applications, and actions. If you click on the “Actions” item, a sidebar will open with a list of clients who successfully applied the promo code for any product, as well as links to their orders.


