Schedules
“Schedules” is a tool that organizes the delivery of a course in a specific order. There are two main types of schedules: fixed and dynamic.
Schedule type “Fixed dates”
To organize the learning process by fixed dates:
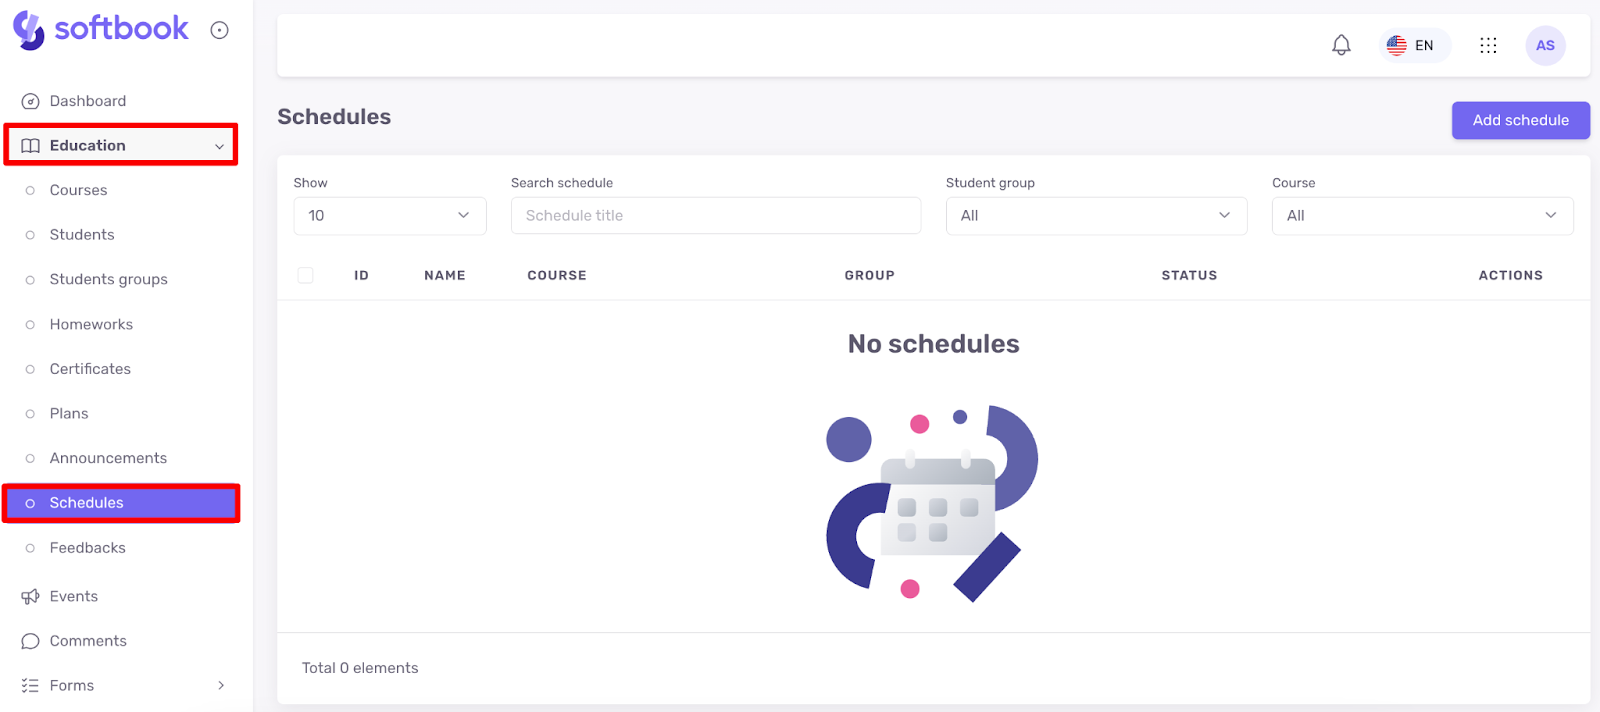
1. Go to the “ Education” section and click on the “Schedules” item. You will see a section with an empty list of schedules.
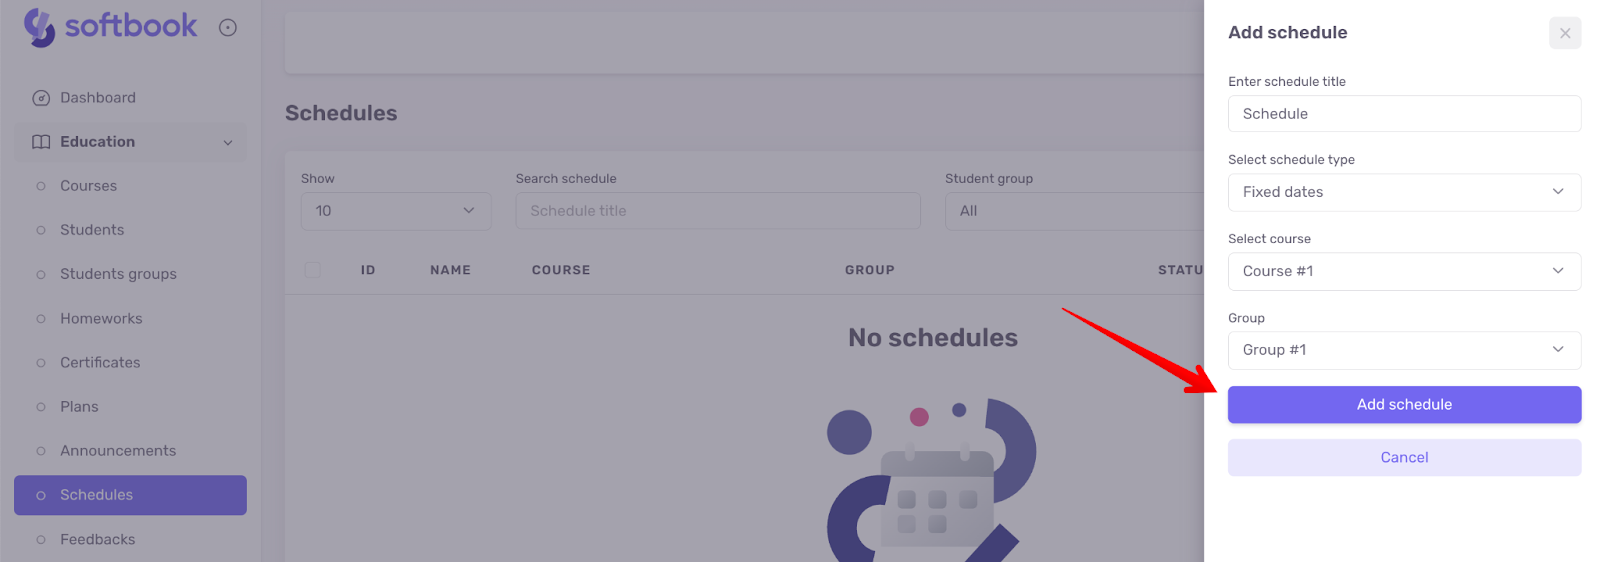
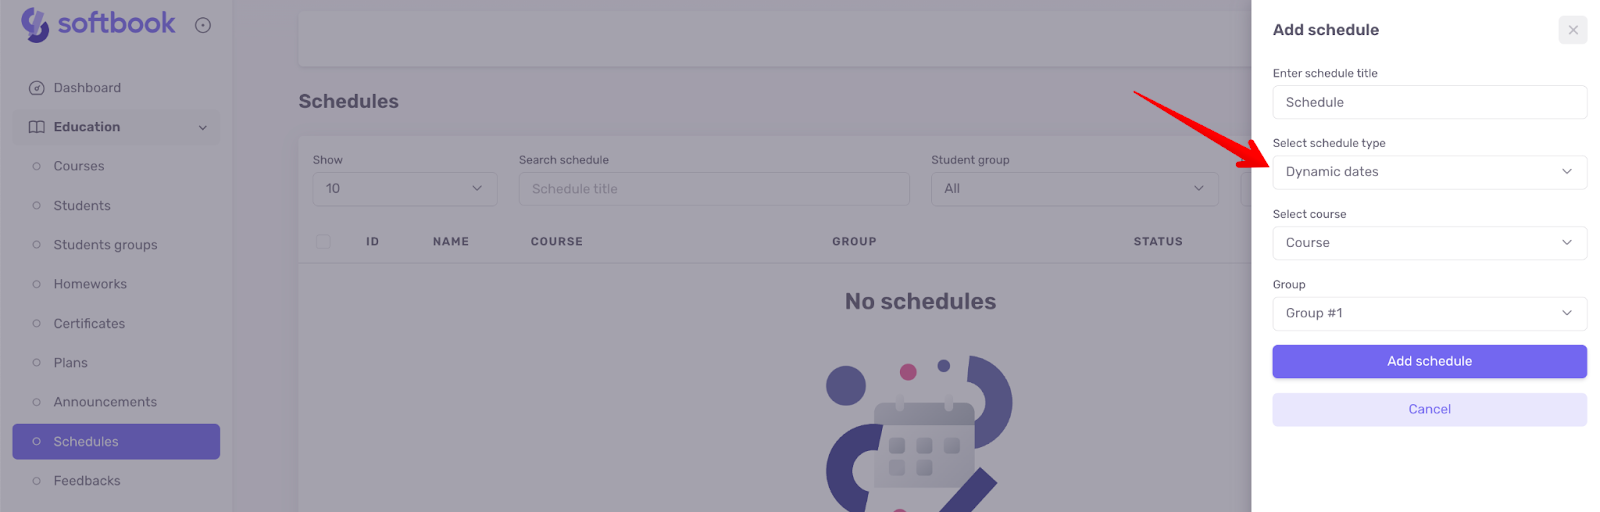
2. Click on the “Add Schedule” button located in the upper right corner. In the form that opens, you need to specify the name of the schedule, select the “Fixed dates” type, and choose the appropriate course and group.
Please note that you cannot create a timetable without selecting a group, since it is set up only for a specific group, not for the entire course. If you don’t know how to create a group, please see the corresponding instructions. A group can be created without students.
After filling in all the fields, click the “Add schedule” button.
Important: Having different access periods for different groups within the same course allows for further customization and marketing activities without disrupting the learning process for current students.
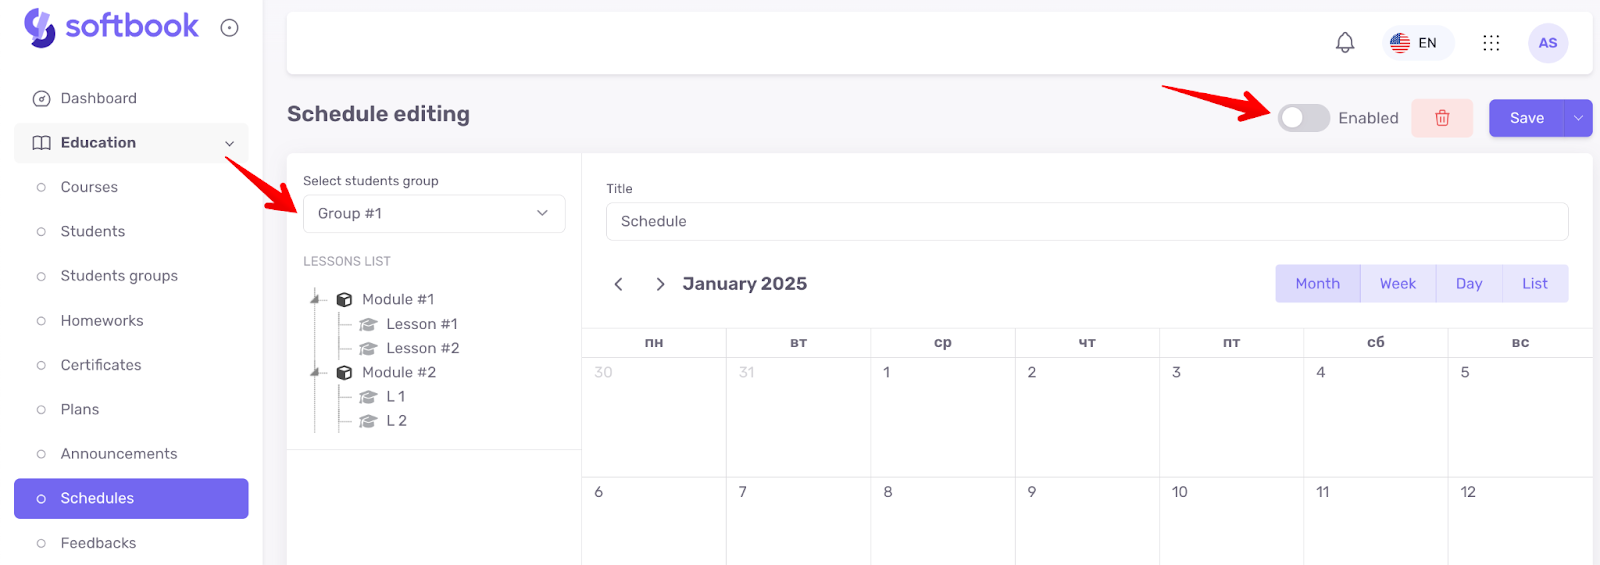
3. You will be directed to the schedule editing page. It consists of a course tree, calendar, and a panel for main settings, where you can:
- Enable or disable the created schedule
- Select and change the groups of students for which the schedule will apply
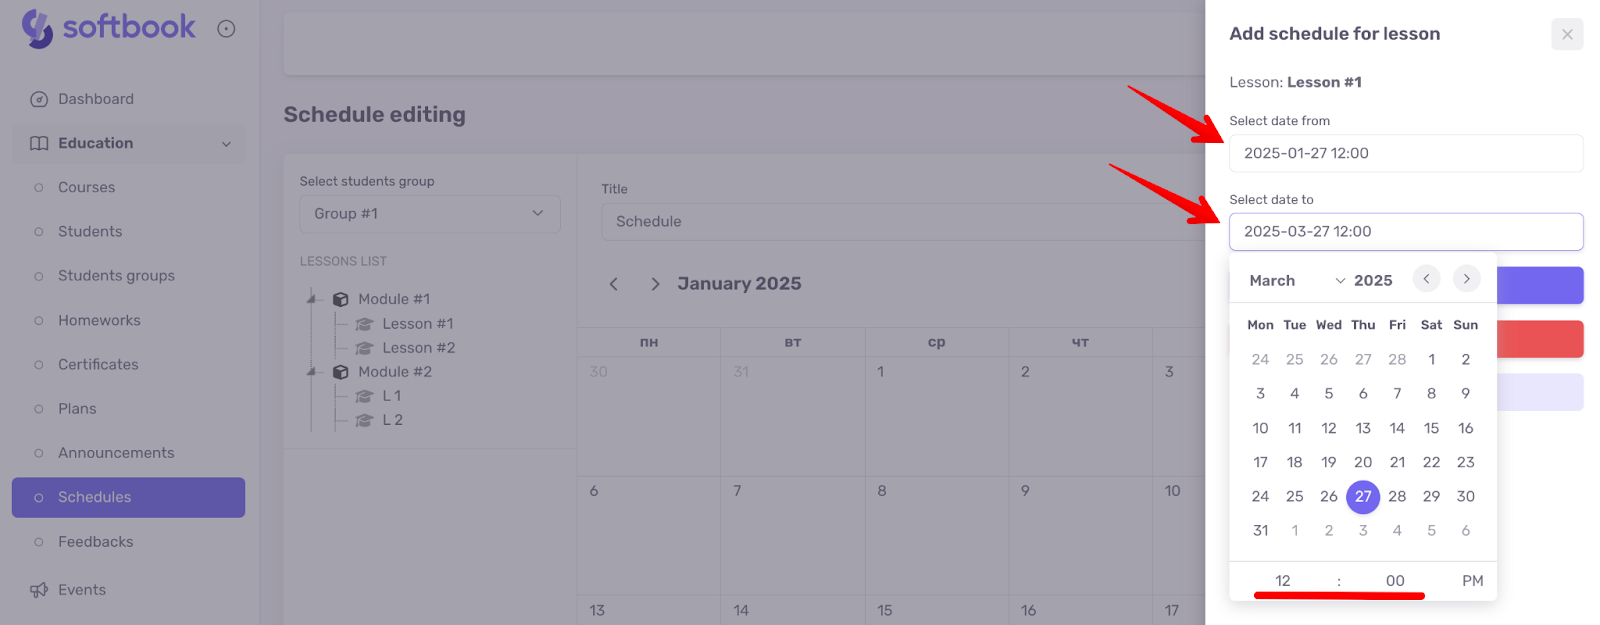
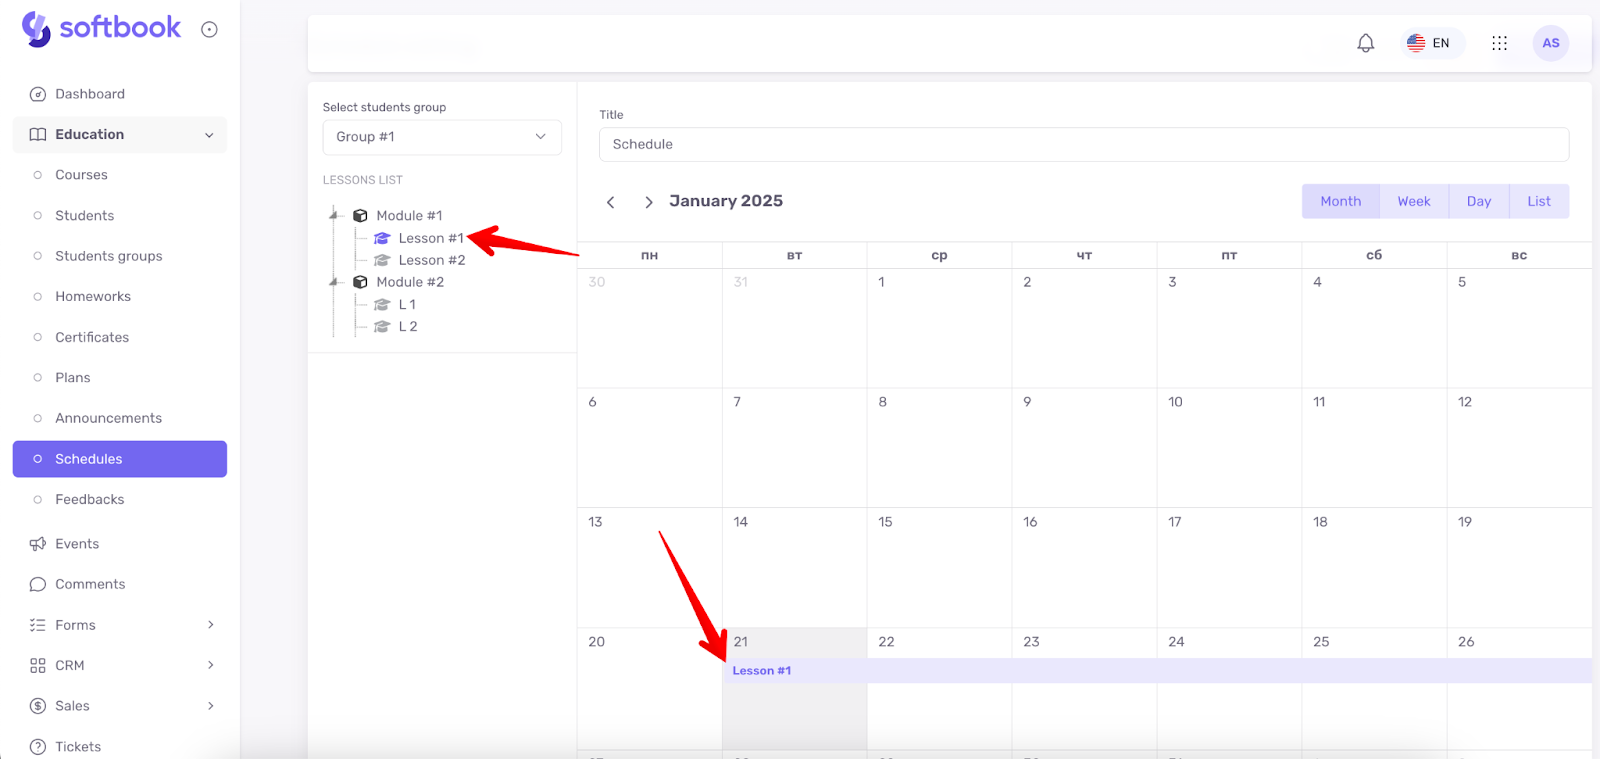
To create a schedule, click on the lessons and specify the required start date and time. Students will have access to the lessons as long as they have access to the entire course. Set the dates and click the “Save” button.
The calendar will display the lesson name and its access period in the form of a Gantt chart.
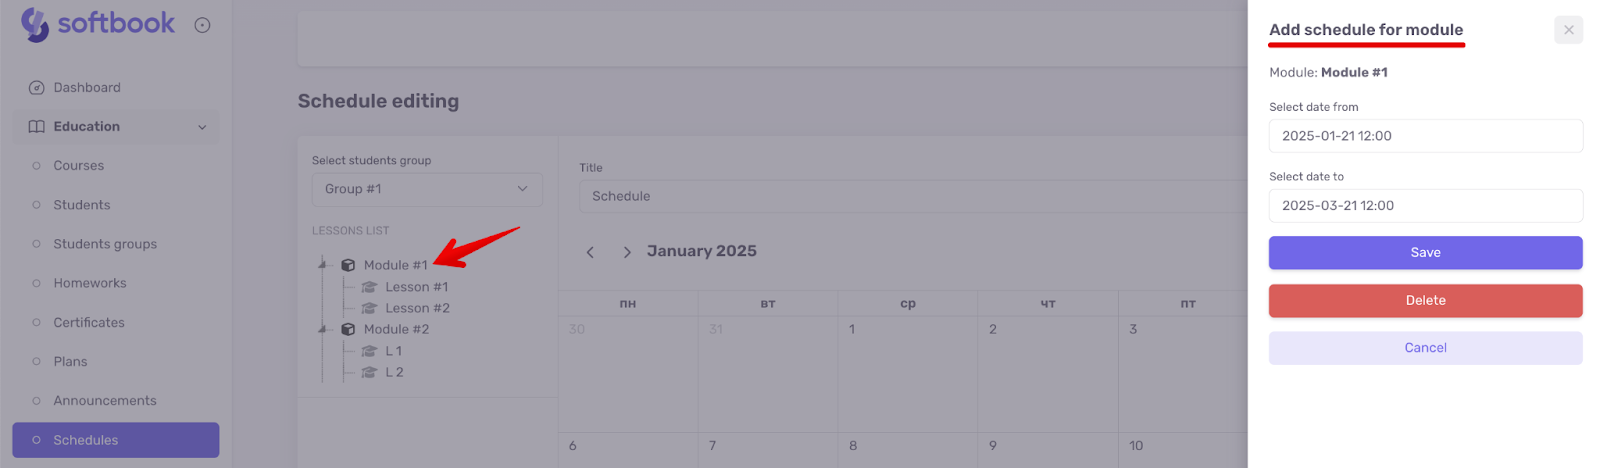
If there are many lessons in the course modules and you want to set up the schedule faster, you can do it in a few steps. Click on the specific module in the course tree for which you want to set the required schedule, set the required date in the calendar, and click “Save”. The schedule will be automatically set for all lessons included in this module.
You can set up a schedule for an empty group, keep it turned off, and then add students to this group and enable the schedule. Students must be enrolled in the course for the schedule to work.
Schedule type “Dynamic dates”
The dynamic dates schedule allows you to set up lessons to open after the previous lesson has finished after a certain period of time, for example, 1-2 minutes, hours, or days. This is a convenient tool for automatically controlling access to lessons, when each next lesson opens depending on how much time has passed since the previous one.
To set up a schedule with dynamic opening of lessons, you need to select the Dynamic dates type when creating a schedule.
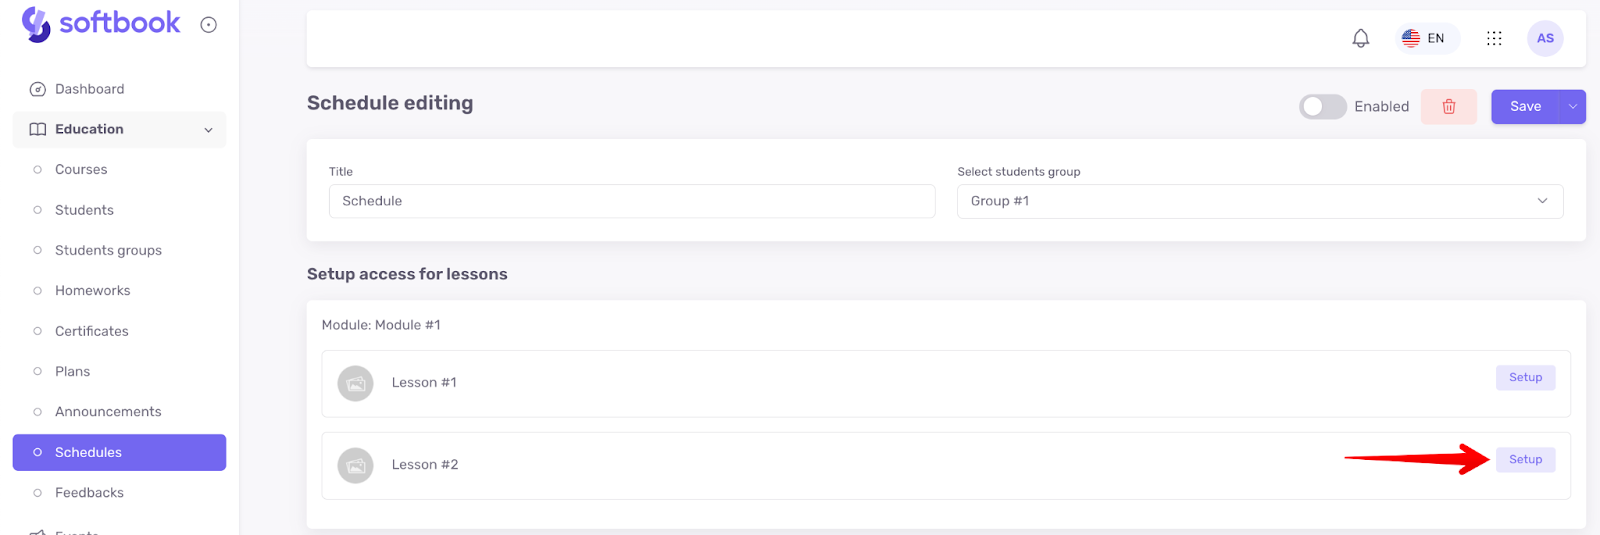
After that, when you click on “ Setup ” next to each lesson (except for the first one*), the setup form will open, where the following fields will be available:
- Open access after the previous lesson is completed in – in this field, you need to specify how soon after the previous lesson is completed the next one should become available. You can specify in minutes, hours, and days.
- Open access to the lesson for – this field indicates how long the lesson will be available to the student. This field can be left blank, in which case access to the lesson will be closed automatically after access to the course is completed.

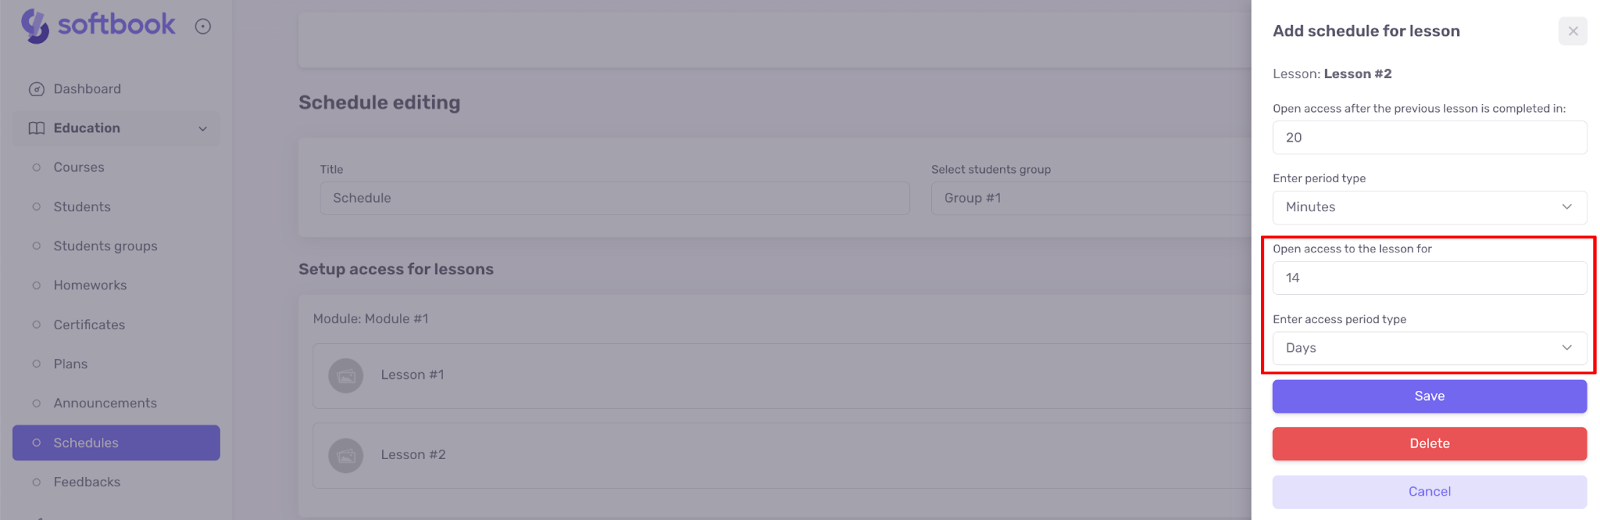
* The first lesson is always open and has no settings, as it is the initial stage of the course from which learning begins.
Please note: you cannot create a dynamic schedule for a group that already has a fixed schedule. In this case, you need to create a new group specifically for setting up a dynamic schedule.
That’s it. Now you are familiarized with all the features of the two types of schedules that allow you to effectively organize students’ learning.


