Filling a lesson with content
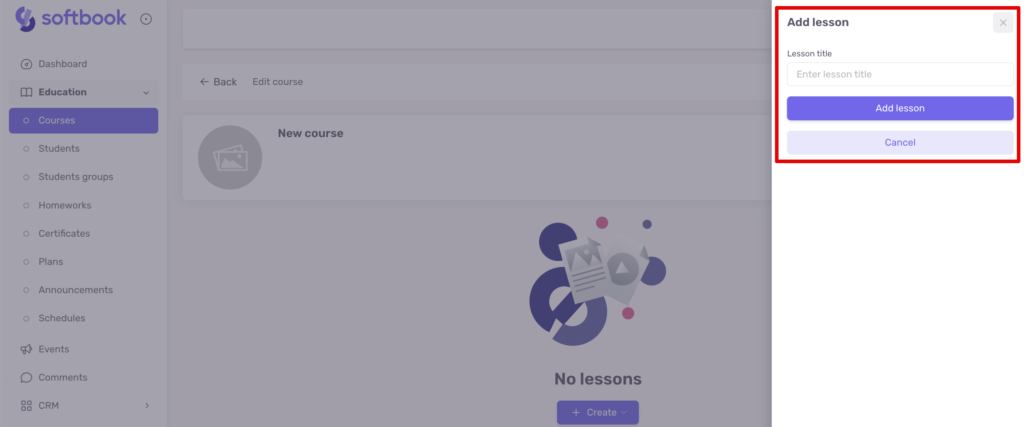
In this article, we’ll look at how to create a lesson in a course and fill it with content. To do this, click on the “Open course” button in the “Courses” section. You will see the name and description of the course with two buttons – “Create lesson” and “Create module”.
A module is a collection of lessons and learning materials that are united by one topic within a course.
Lesson – a coherent logical element of the learning space dedicated to a specific topic or skill.
So, you need to create a lesson. To do this, click on the appropriate button and fill in the fields in the form that opens.
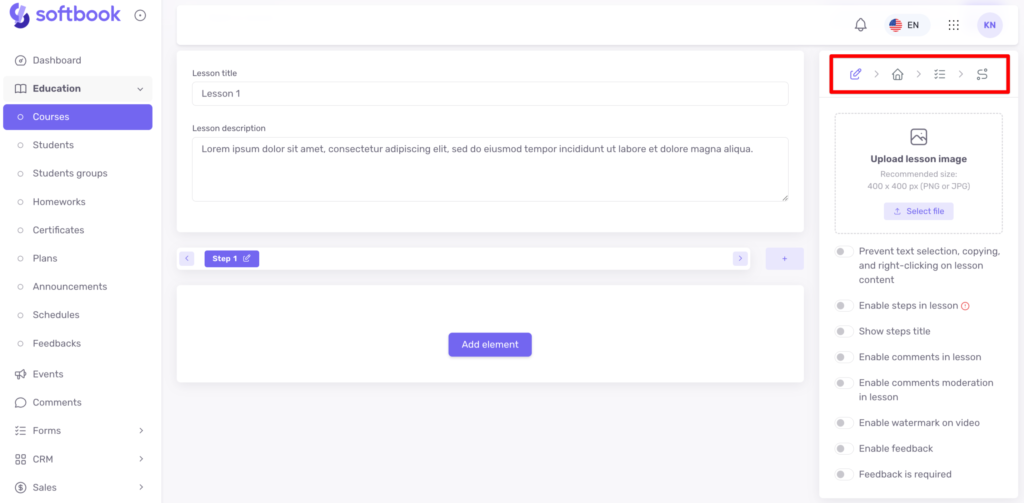
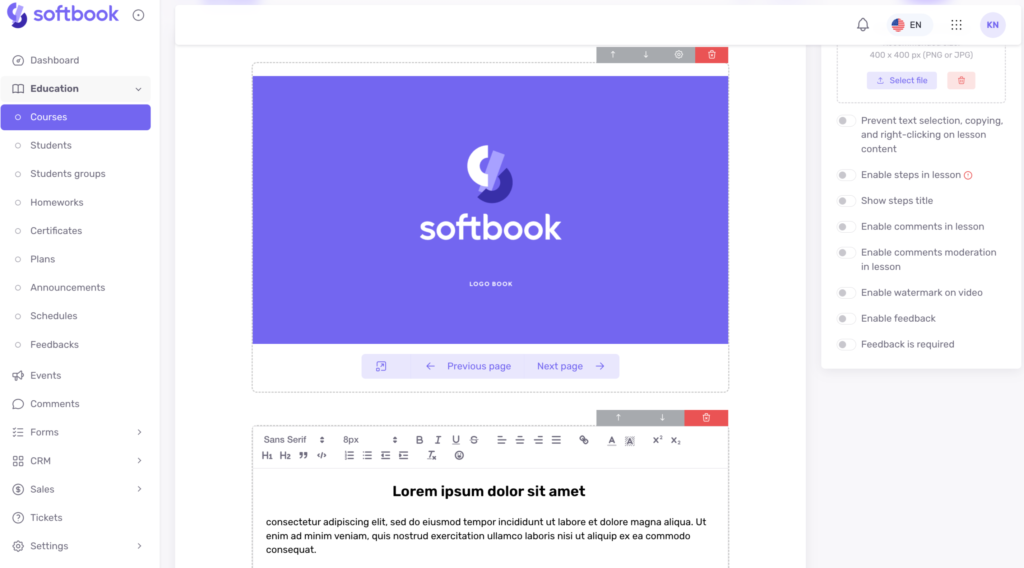
The lesson editing page opens. Editing consists of three steps:
- lesson content
- homework
- testing
- changing the order of blocks
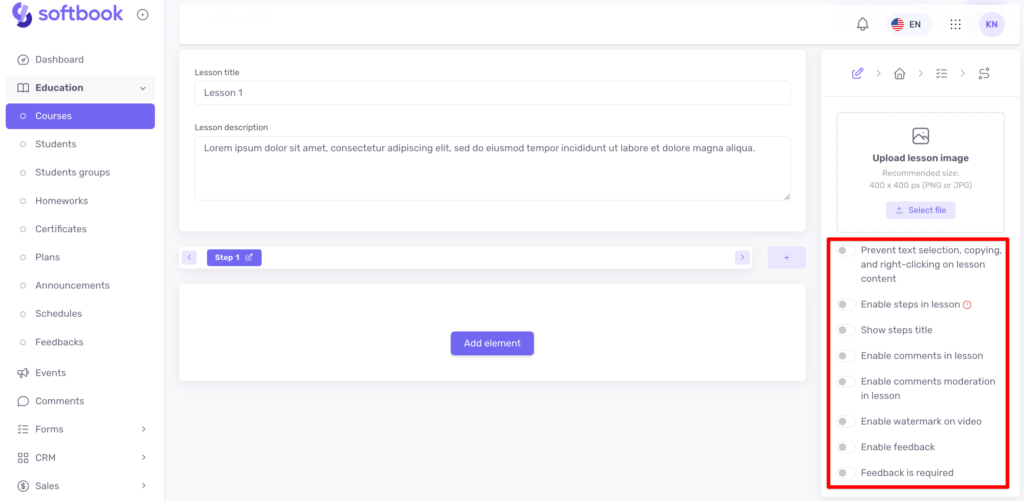
In the center of the page is the lesson editor. On the right side are options for customizing them:
- Prevent text selection, copying, and right-clicking on lesson content – a setting that protects the text and images included in the lesson from copying. Does not apply to embedded videos hosted on other platforms (YouTube, Vimeo).
- Enable steps in lesson – a setting that helps divide a large lesson into convenient blocks. Each step needs to be filled separately. Steps in the lesson editor can be swapped and given unique names. The names will be visible to students if you activate the corresponding function in the settings item.
- Enable comments in lesson – a block under homework or lessons where students can ask questions, and teachers can answer them. Comments and answers are visible to all students.
- Enable comment moderation in lesson – students can leave comments, but their publication and visibility to everyone are regulated by the administrator.
- Enable watermark on video – when this option is enabled, a translucent text layer with the student’s ID and timestamp is displayed on the student’s side of the video. This helps to identify when the student was recording the screen.
- Enable feedback – allows you to collect feedback from students about this lesson. The template for collecting feedback is configured in the Education section, Feedback subsection. Learn more in this article. If you want to make feedback mandatory, activate the corresponding option. In this case, the student will not be able to proceed to the next lesson until they leave a feedback.
When the basic settings are set, move on to creating a lesson. To do this, click the “Add Element” button in the lesson editor. It will open the panel of all possible elements:
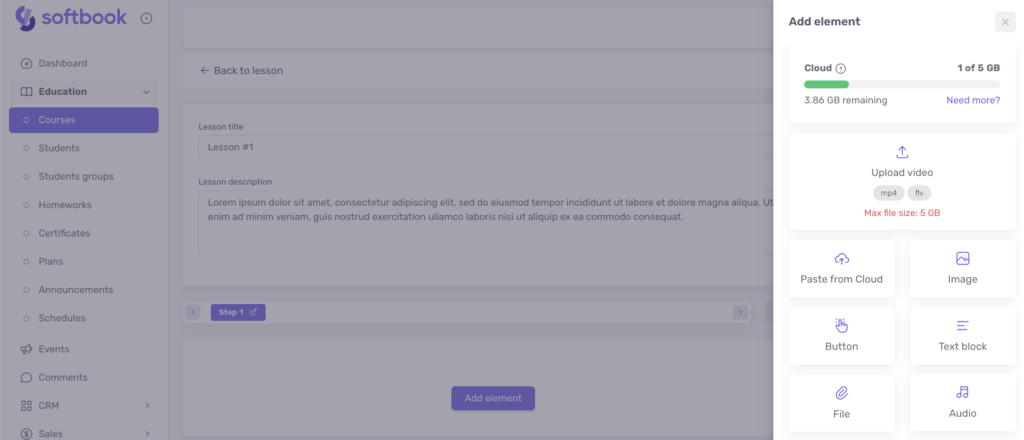
Upload Video – uploads a video from your PC and allows you to host it in Softbook Cloud.
Paste from Cloud – if you already have materials uploaded to your Softbook account you can use this element to add them to the lesson. It is also convenient if some materials are used in several courses at the same time.

Button – you can add it to your lesson, it allows students to click on links in the form of a button. To make it work, you need to make the following settings: enter a name, add URL, set it to open in a new tab (to not interrupt the learning process), color of text and background.
Image – allows you to add an image to the lesson and format it as needed.
Audio – allows you to upload an audio file to the lesson, available to the user as an audio player.
Text block – allows you to add texts (lesson descriptions, topics, additional teaching materials) with different formatting to the lesson.
File – allows you to attach a file of various extensions (pdf, rar, zip, txt, xls, xlsx, doc, docx).
Video from YouTube – allows you to insert a link to a YouTube video and embed it in the lesson.
Video from Vimeo – allows you to insert a link to a video from Vimeo and embed it into the lesson.
HTML code – allows you to embed any custom HTML-code with any content in the lesson, which will diversify its content.
Wordwall task – integration of the service for creating interactive tasks on the Softbook LMS. It is not subject to the settings of access and lesson sequence for the student, as it is integrated externally.
PDF file – allows you to embed a pdf document in the body of the lesson with the ability to view and flip through the pages of the document directly on the lesson page, as well as open the document in full screen.
When all files are added and settings are set, click the “Save and Continue” button to continue working on the course. The most difficult stage of the work is passed. Congratulations!


