Webhooks
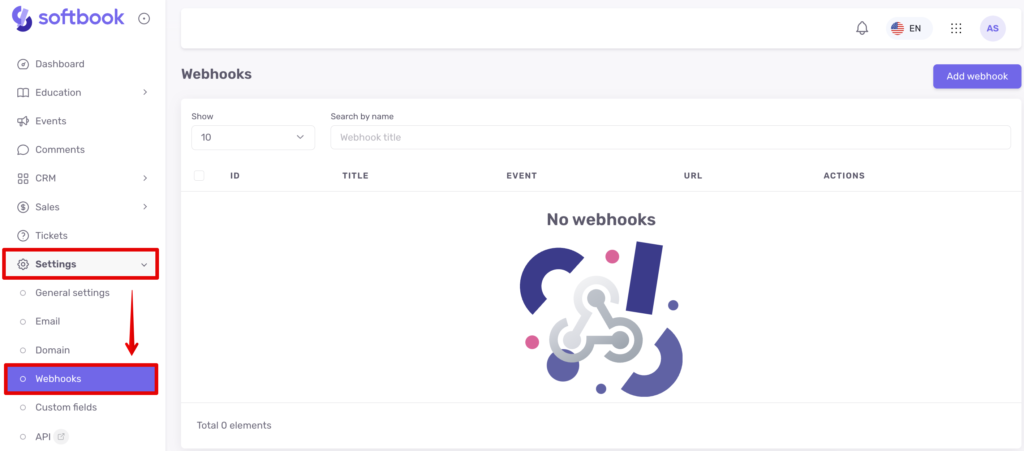
In the “Settings” section of your online school, there is a subsection called “Webhooks”.

According to Wikipedia, webhooks in web development are a method of enhancing or extending the functionality of a web page or web application through custom callbacks. These callbacks can be served or managed by users or web developers who are not necessarily associated with the mentioned website or web application.
Usually, a webhook is triggered by a specific event, after which the service handling them sends an HTTP request of a specific format to the user-specified address.
For example, if you want information about paid orders in your online school to be sent to your external CRM system, Telegram, or elsewhere, webhooks can be used for this purpose.
To configure webhooks in your online school, go to the “Webhooks” subsection and click on the “Add Webhook” button.
Fill out the form that has opened:
1. Enter the webhook name (for system identification).
2. Choose the appropriate trigger from one of the three categories provided in the list:
- Education
- CRM
- Sales
This trigger will determine when the event will be triggered. In other words, it will determine when the data will be sent to the specified URL. For example, let’s set the trigger to “New Order”.
The webhook URL is the address of the script or service that receives webhooks, where the data will be sent.
Developers often use the website https://webhook.site to test webhooks.
Visit the website and copy the provided unique address

Insert this link into the Webhook URL field and click the “Create Webhook” button.

The created webhook will appear in the list on the “Webhooks” page. It will display the following information: name, trigger, URL, and the number of calls.
Here’s how it works:
- A customer places an order on your product page.
- The webhook is triggered, and new data about the event appears on the webhook testing website. This data includes information about the event itself, such as the order ID, trigger name, customer contact details, amount, currency, product ID, order creation date, your online school’s ID, payment system, and product type. This allows you to sort and filter the information on the resources where the data is sent.
The specific data set depends on the type of trigger set for the webhook.

The developer working with webhooks can receive this data on their server and configure its sending to other systems and programs for processing information about events in your online school.
Webhooks are used when the data received from the CRM system is not sufficient for the user’s needs.
Important: Webhooks process data that is sent from your online school and do not work in reverse order.


