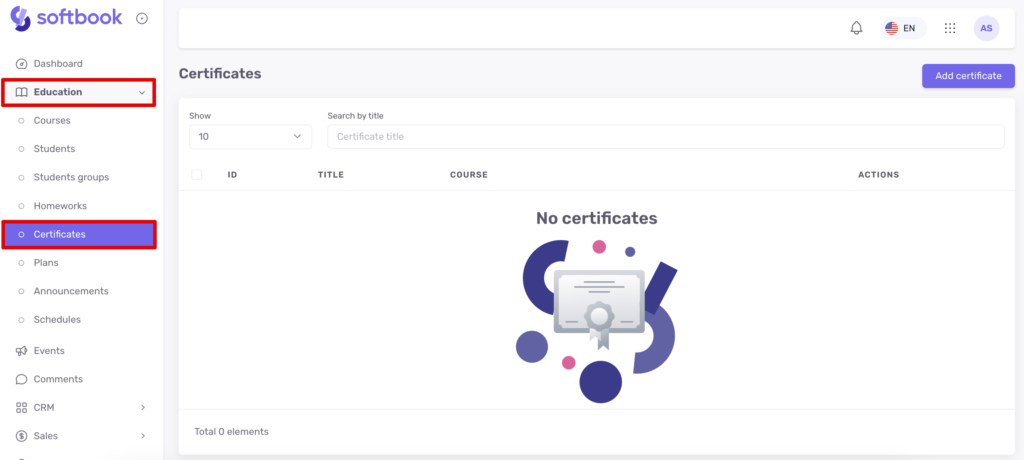
Certificates
A certificate is documentary proof that its holder has attended a certain course and has mastered knowledge and skills at a sufficient level. A certain category of people like to take courses just for the sake of another certificate with their name on it. The rest use them as a quick confirmation of their skills. Anyway, if you have already created a course and teach your students, create a small reward for them in the form of a certificate. Sometimes this document can be free advertising for your course in the future.
If you want to give your students certificates for courses completed, follow the instructions on how to create them:
1. Go to your Softbook account and log in to the online school. Click on the “Education” section, find and open the “certificates” item.
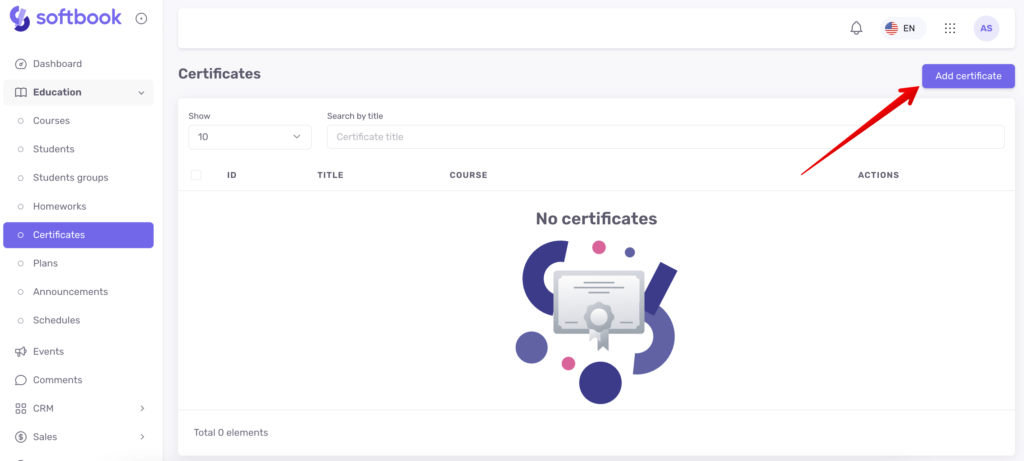
2. On the page that opens, find the “New certificate” button in the upper right corner.
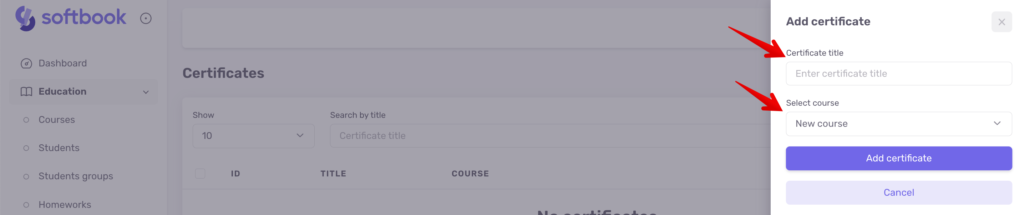
Fill in the fields of the form that opens. Type in the name of the certificate, select the course for which students can receive this certificate, and click on the “Create certificate” button.
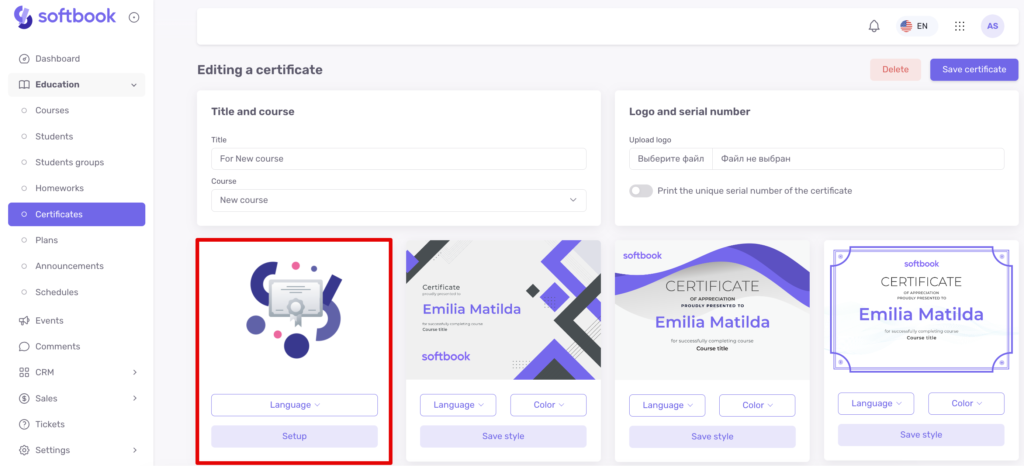
3. On the “Edit certificate” page that opens, select the certificate template image you want to use, click the “Select Style” button and set the settings for it:
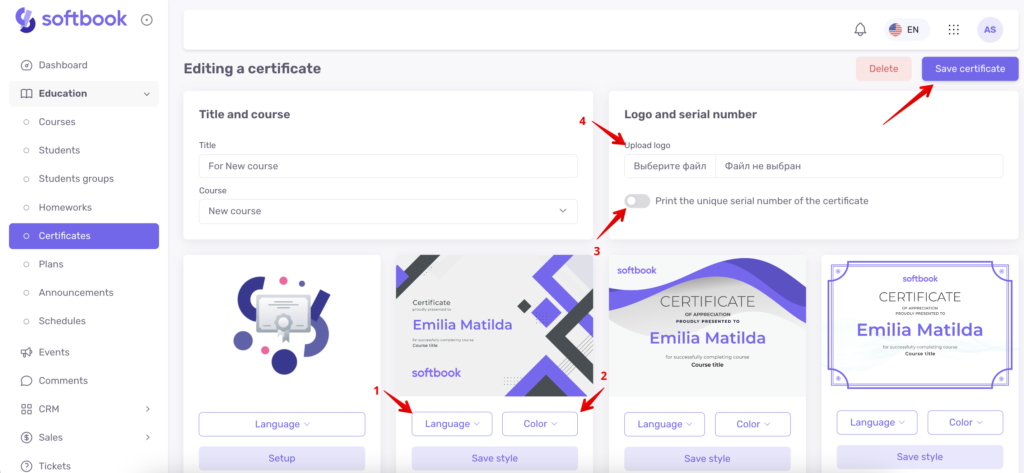
1) Language selection – contains 3 languages: Ukrainian, English and Russian.
2) Select the main color of the template (available only for the first four templates).
In the original certificate, instead of the template name of the student will pull up the real surname and name of the student and the name of the course he/she took, and you have assigned to the course.
3) Activate “Put a unique certificate serial number at the bottom” if you want all certificates in your courses to have it. It can be verified by this number. Students will be able to prove the authenticity of the certificate, that it was produced on the Softbook LMS at a particular school.
4) Under “Upload your logo to be automatically placed on the certificate”, upload your school’s logo to turn the certificate into a branded document. The Softbook LMS logo appears on the preview only as a reference point.
When all settings are done, click on the “Save” button.
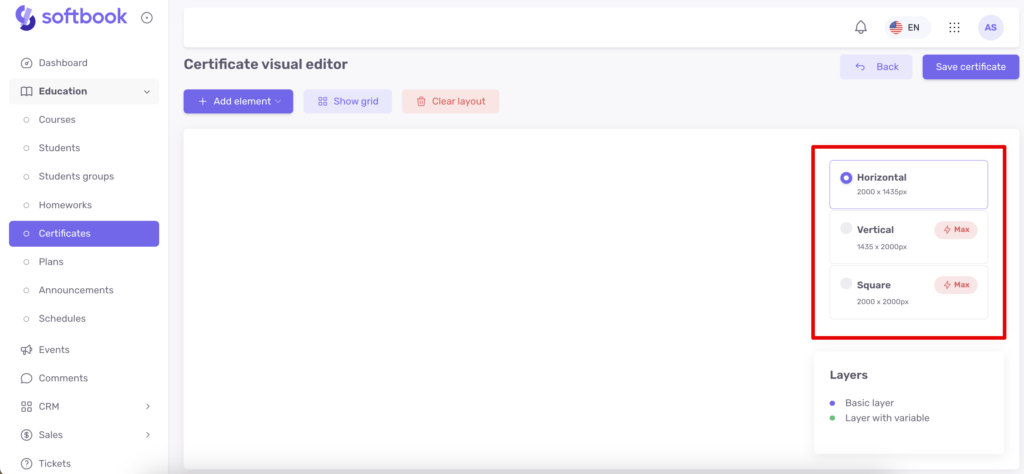
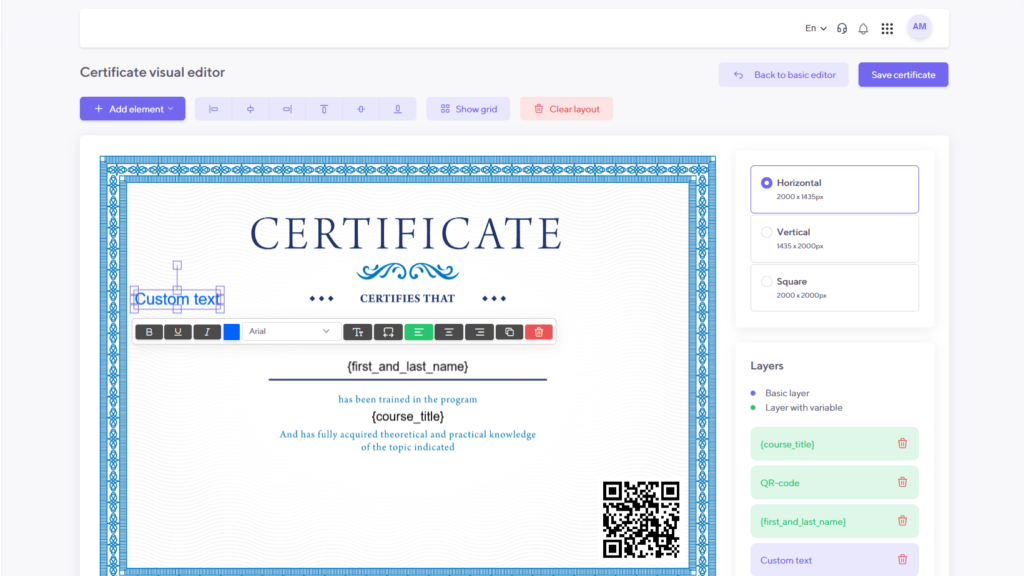
In addition to templates, a certificate builder is available in the Certificates section. This is a builder where you can create your unique certificate for the course.
Click on the “Change” button. You will see the certificate editor page with a workspace and a panel of standard and variable layers.
Above the workspace are the buttons for creating a certificate. The first one is “Certificate Format”, it opens 3 options:
- horizontal – available for users on the “Pro” tariff
- vertical – for users on “Max” tariff
- square – for users on “Max” tariff
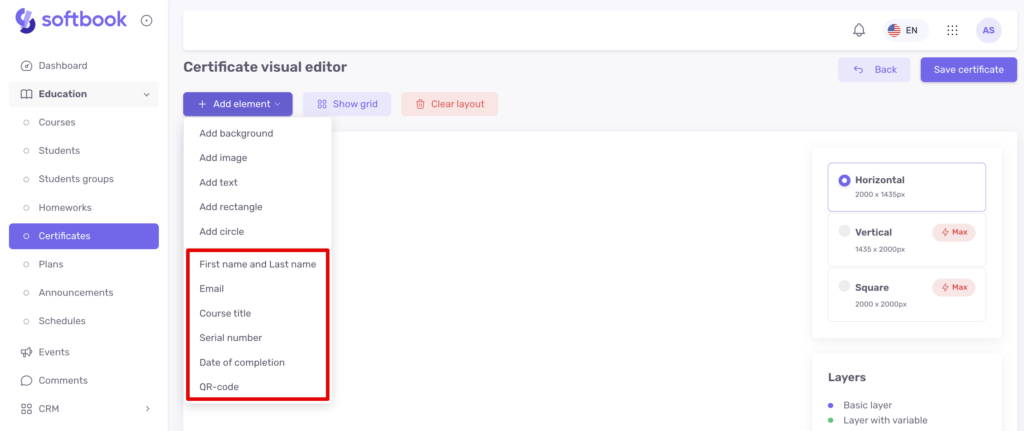
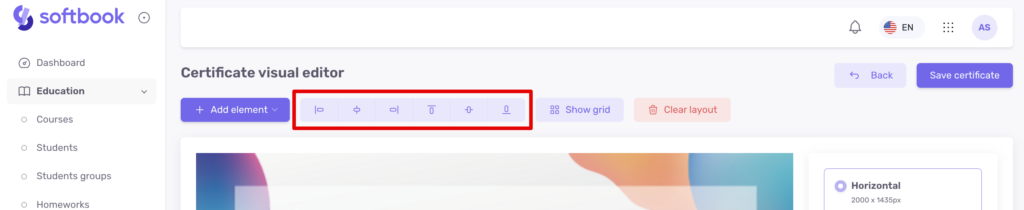
Choose a format and go to the next button, “Add Item”. It opens the following items:
Permanent:
- add a background – to add a background image
- add image – to add a logo or other branded images
- add text – to add text
- add rectangle – to add a geometric shape
- add circle – geometric shape
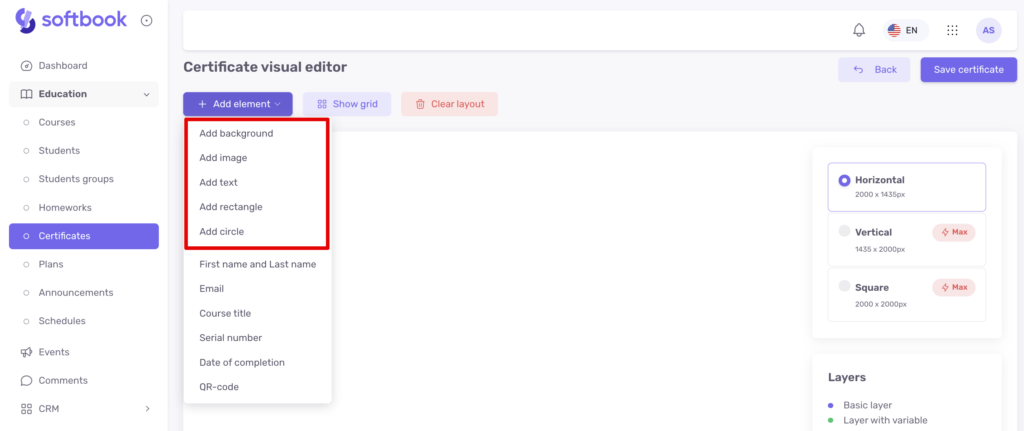
Variables:
- last name and first name of the student who receives the certificate
- course title
- certificate serial number
- date of course completion, the same as the date of certificate receipt
- QR-code – allows recognizing and check the certificate on a special site
Click “add background” and upload the template image you want to make the background of the certificate. Next, click “add image” and add your online school logo, you can change the size of the image by selecting it and start stretching or shrinking it by pulling the corner.
To add text, click “add text” and control its size, color, fonts, lettering, and placement in the accompanying settings box. Each element on the certificate can be deleted from the workspace by selecting the desired one in the layers panel.
If you want to add a rectangle or circle to the certificate, select the appropriate item in the editor and place it. If you zoom in or out these shapes with the cursor, they will change proportionally. If you hold down the Shift key – the proportions will become free. In the layers panel, you can change their order of placement.
Next, go to the variable elements of the certificate – choose where the course title, the student’s last name and first name, and his e-mail will be placed. Set the location of the serial number (consider its length) and the date of course completion.
Place a QR code that will link to the certificate verification site. That is, the site will show exactly who earned the certificate when and for what. Each certificate will have a unique QR code.
Also, among the tools is the element alignment. It comes after the “Add element” button. For example, the logo you placed on the certificate can be aligned with its help relative to the center of the document or another starting point from several offered.
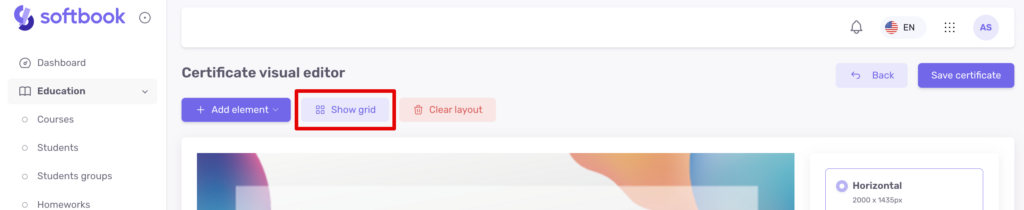
There’s also a “Show grid” button. It activates a grid that is overlaid on top of the certificate image and helps you to place and align elements on the certificate more clearly.
The “Clear Layout” button removes the certificate editing field completely.
When all elements on the certificate are written and structured, click the “Save Certificate” button. Now in the course for which you set up this certificate, students will receive it after completing their studies.
Your template will be saved in the “Certificates” section and will be available for editing. And its image will become the avatar for the certificate editor.
To see how many students have already received a certificate, click on the icon – the letter “i” in a circle, which is in the list of the “Certificates” section. A panel with a list of people who received it will appear.
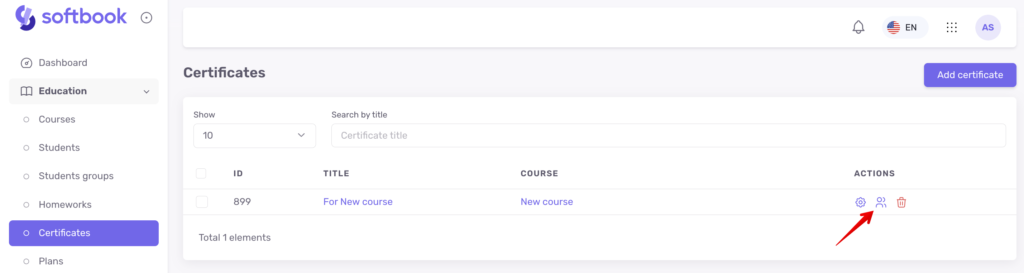
Next to each student’s name is an eye icon. If you click on it, you will be taken to this student’s card. The student cards also contain certificates with their images.
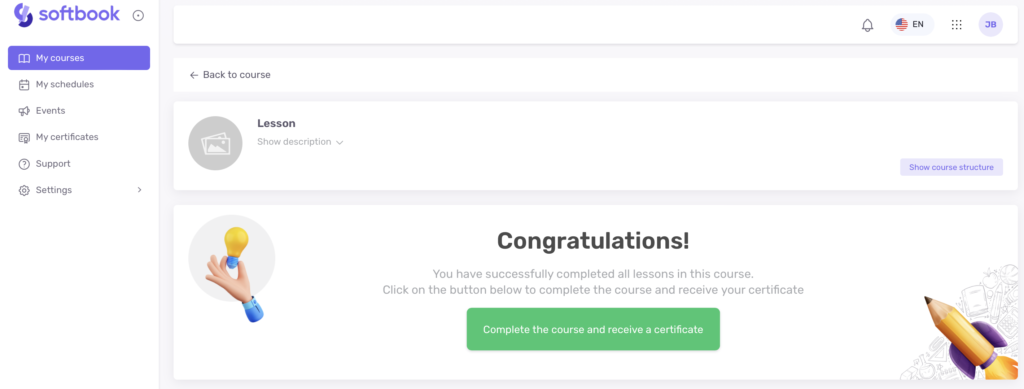
Example of notification of course completion and certificate in the student’s office
The student receives the course certificate at the end of the last lesson. A welcome notice with the button “Complete the course and receive the certificate” appears in front of him/her.
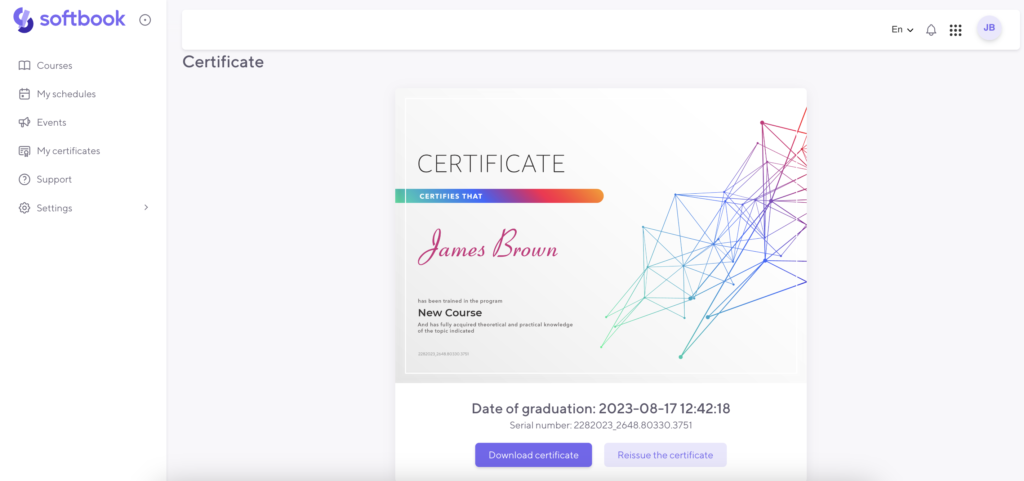
Example of demonstrating the receipt of certificate with the date and serial number in the student’s cabinet
The “Complete course and receive certificate” button opens a student’s certificate image with the course title, first and last name, date of receipt, and serial number if the course author has set such a setting. The student can download the certificate image to his/her computer to add it to his/her resume and post it on social networks.
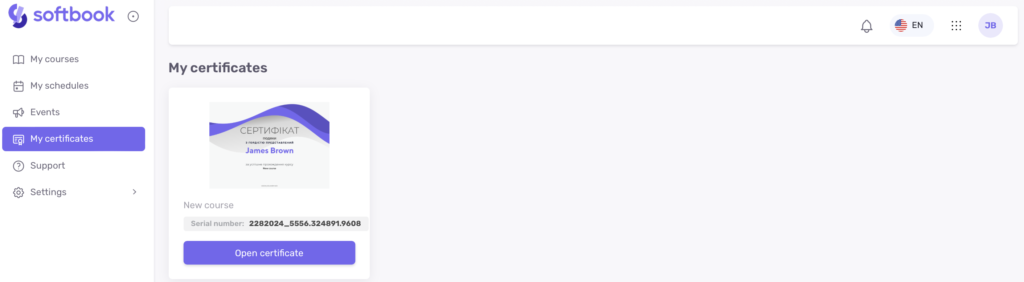
The student can find all their certificates in their cabinet in the “My Certificates” section. Their images are stored in the platform’s storage for life and will be available to students even if the online school on the platform ceases to operate.
That’s all. Now you know why certificates are needed and how to issue them to your course students on the Softbook LMS.


