Homeworks
How to work with homework assignments submitted by students? Where to find them?
If you want to know the answers to these questions – go to the “Education” section and find the “Homeworks” subsection.
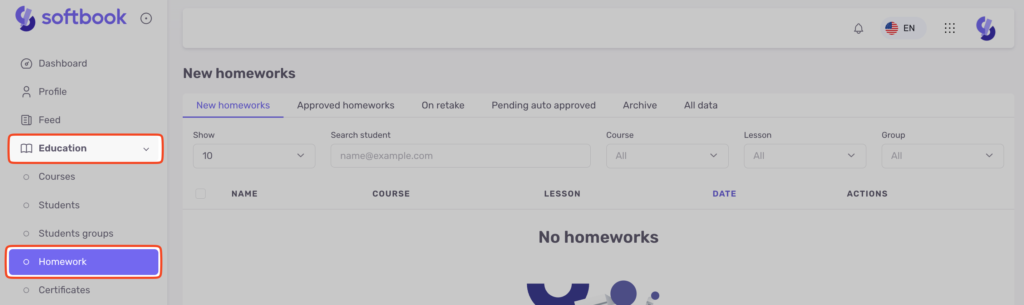
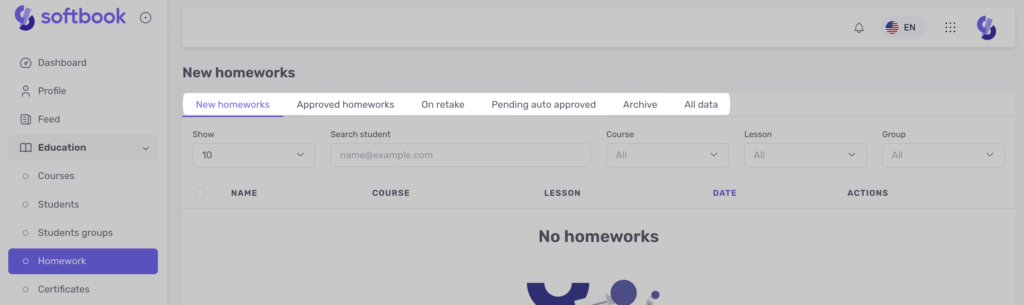
This subsection consists of five groups:
- New homework. Contains all homework assignments that need to be checked, and then accepted or rejected.
- Approved homework. Contains all homework assignments that you or your teachers have ever accepted from students.
- On retake. Contains rejected homework assignments, that is, those assignments that students redo after review and rejection.
- Pending auto approved. Here, homework assignments from courses with automatic acceptance settings are added.
- Archive. This is a separate tab for storing assignments that no longer require review. You can move new, reviewed, or outdated assignments here so they are not displayed among active ones.
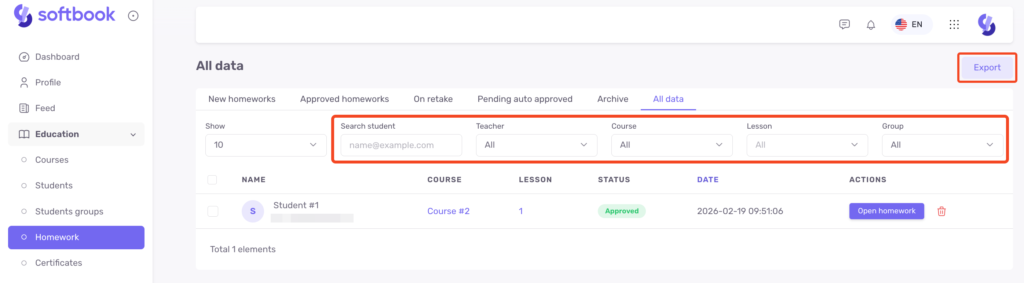
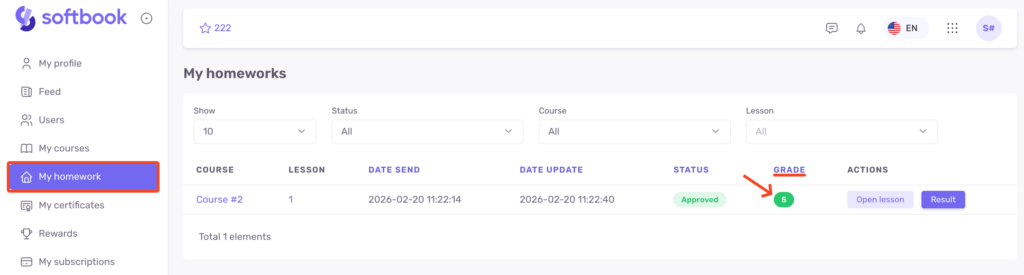
- All data. Contains homework assignments of all types that your students have ever submitted. They can be filtered by courses, teachers, lessons, groups, and student names.
Data in any group can be filtered and downloaded as a CSV file for further processing.
How to Work with Homeworks
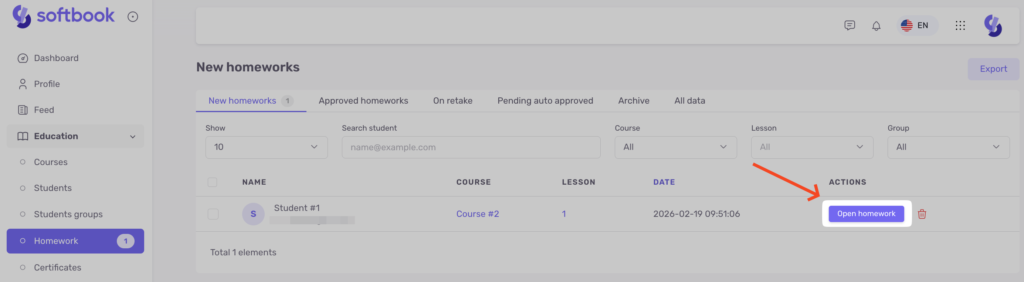
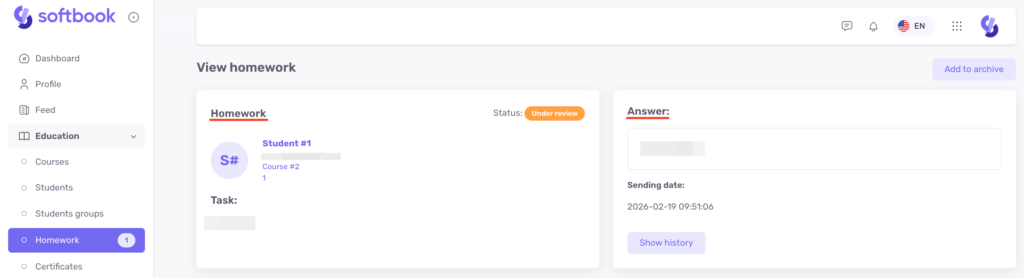
Homework assignments that need to be checked are located in the “New homeworks” group. Click on it, and you will see a list with the names of students who submitted assignments, as well as data about the assignment – course name, lesson, submission date, and the “Open homework” button.
Click on the “Open homework” button – a page with four fields will open:
- The upper left field “Homework” – here are the student’s name and surname, course name, lesson name, assignment status, and assignment description.
- The upper right field “Answer” – here is the student’s homework, submission date, and the “Show History” button, which shows the entire history of the student’s interaction with this lesson.
- The lower left field “Approve homework” – here you can comment and accept the homework by clicking the bottom button.
- The lower right field “Decline homework” – here you can reject the homework. If you decide to reject the work, you must specify the reason for rejection in the comment field. Providing a reason is necessary for the student to understand why their work was rejected.

You can rephrase your comment using AI by choosing the appropriate tone — neutral, friendly, motivating, encouraging, strict, inspiring, ironic, or professional. This will help you express your message more clearly and adapt your communication style to the specific situation.
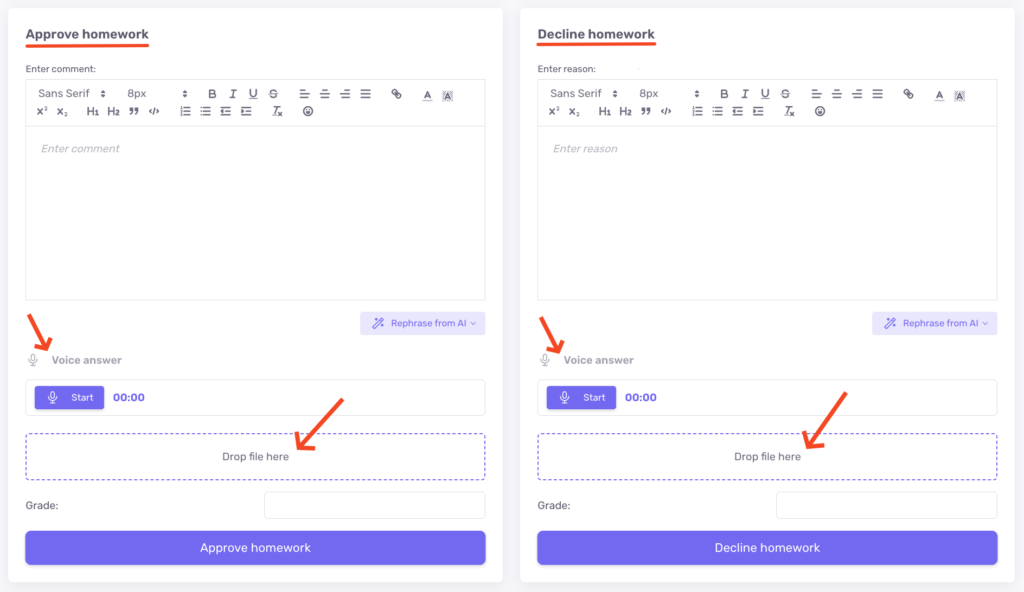
Both fields for accepting and rejecting homework also have buttons for recording voice messages for the student.
The teacher can attach a file to the homework response and send it to the student along with a voice message and a comment if necessary.
Students can also record a voice response to their homework using the recording button.
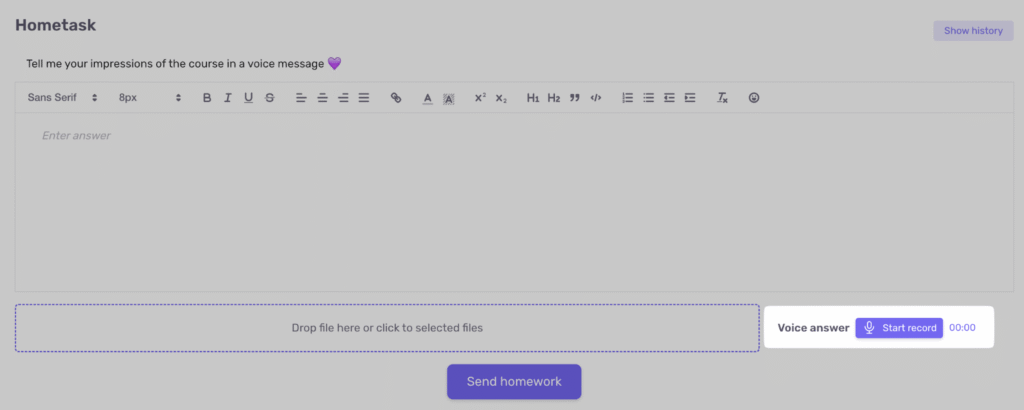
A text comment or an attached file must be added to the voice response.
This feature is convenient when the assignment requires a spoken explanation or pronunciation check.
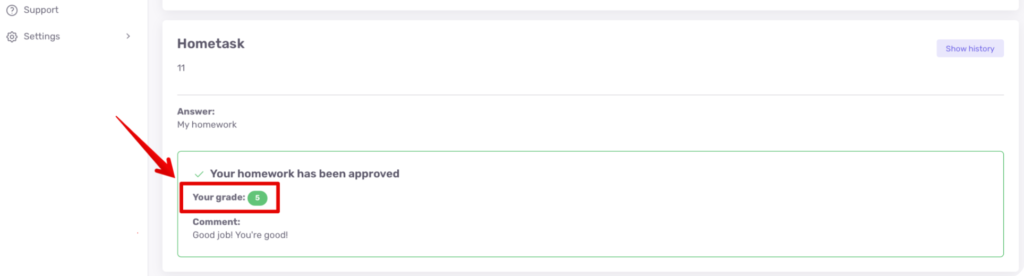
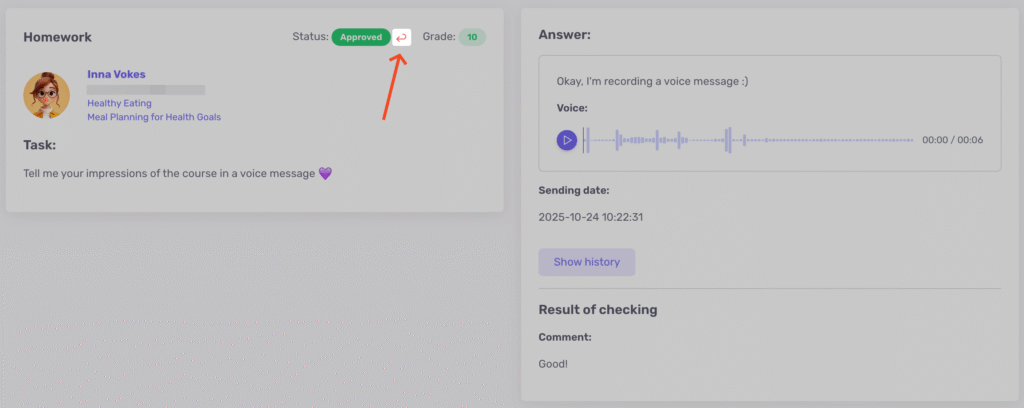
The teacher can also grade the work by entering a score in the “Enter a grade for this homework” field.
The student will see the grade in the homework assignment as well as in the “My homeworks” section.
If the assignment has already been graded but the teacher accidentally rejected it instead of approving it, or vice versa, they can change the decision by clicking the arrow next to the homework status. This allows the status to be corrected without requiring the student to resend the work.
Important: if the course progression is set to sequential, access to the next lesson is not blocked. Even if the work is later rejected, the student retains access to lessons that were previously unlocked.
Done! Now you know how to work with homework assignments from students.


