Emails
In this article, we will look at how to create and customize the appearance of emails using the email constructor. This tool allows you to build email layouts from ready-made blocks without using HTML code.
The email constructor is used for two main tasks:
- replacing standard Softbook system emails;
- creating templates for email campaigns.
Working with the “Emails” section
To open the email list, go to “Marketing” → “Emails”.
This section displays all email templates created in your school.
At the top of the page, you will see the following filters:
- Search — search emails by title;
- Type — filter by template type;
- Status — filter by email status.
The table displays:
- email ID;
- template title;
- status;
- creation date;
- language;
- email actions.
Using the actions menu, you can open the email in the editor, create a copy of the template, or delete it.
Creating a new email
To create an email, click the “Add email” button in the upper-right corner.
After that, the template creation window will open.
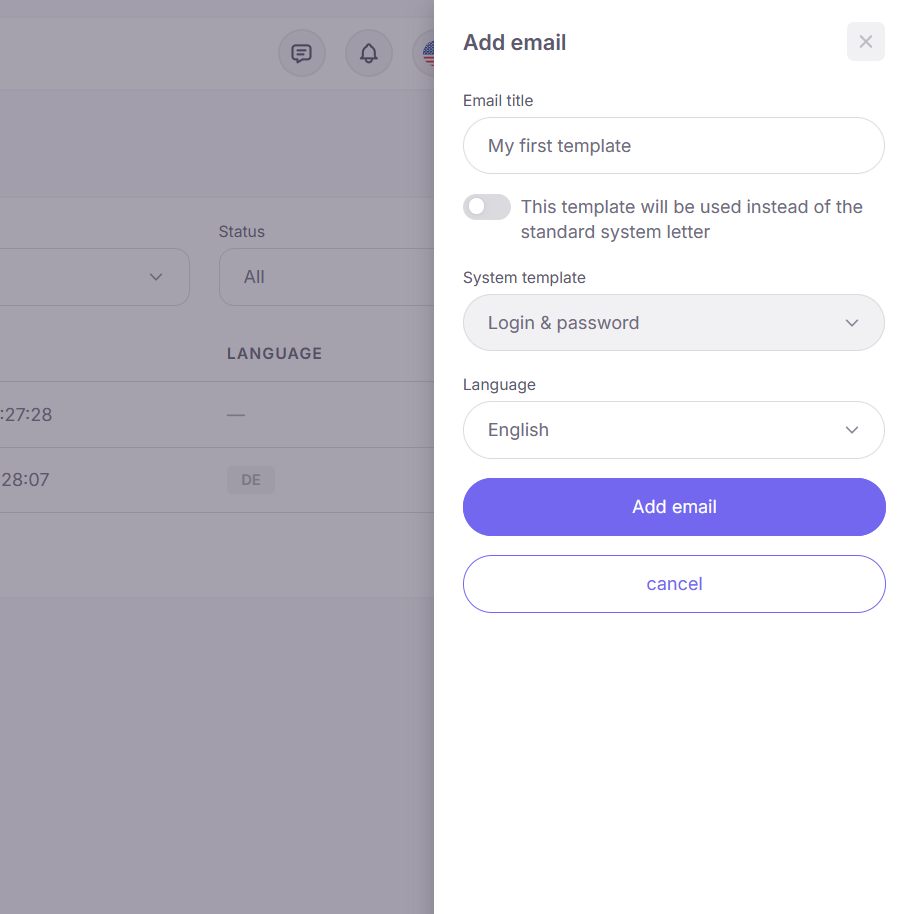
In the form, fill in the following fields:
- Title — internal template title;
- This template will be used instead of the standard system letter — defines the email type;
- System template — select the system email to replace;
- Language — language of the created template.
If the system email replacement toggle is enabled, a custom version of the standard Softbook LMS email will be created. If disabled, a template for email campaigns will be created.
Important: only one replacement per language can be created for each system email.
After saving, the email constructor will open.
Working in the email constructor
The constructor consists of four main areas:
- top panel;
- left block panel;
- central workspace;
- right properties panel.
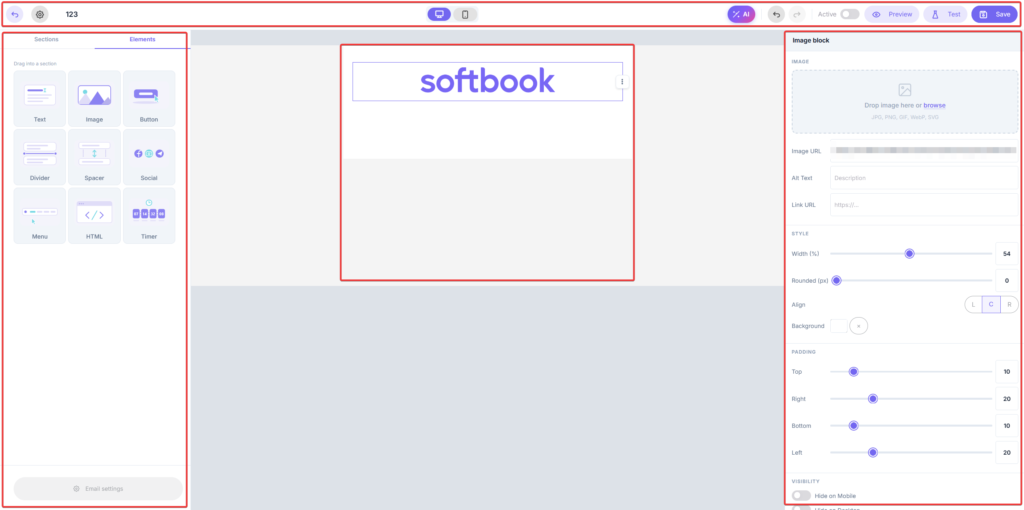
The top panel contains email management tools: template settings, switching between mobile and desktop view, AI email generation, preview, test sending, and saving changes.
The left panel contains sections and elements used to build the email structure. Sections define the column layout, while elements are used to fill the email with content.
Available elements:
- text;
- image;
- button;
- divider;
- spacer;
- social networks;
- menu;
- HTML;
- timer.
The central area displays the current email layout. Here you can move blocks, edit content, duplicate elements, and add new sections.
The right panel contains settings for the selected element: colors, fonts, spacing, sizes, alignment, and other parameters.
Email settings
To open email settings, click the gear icon in the top panel.
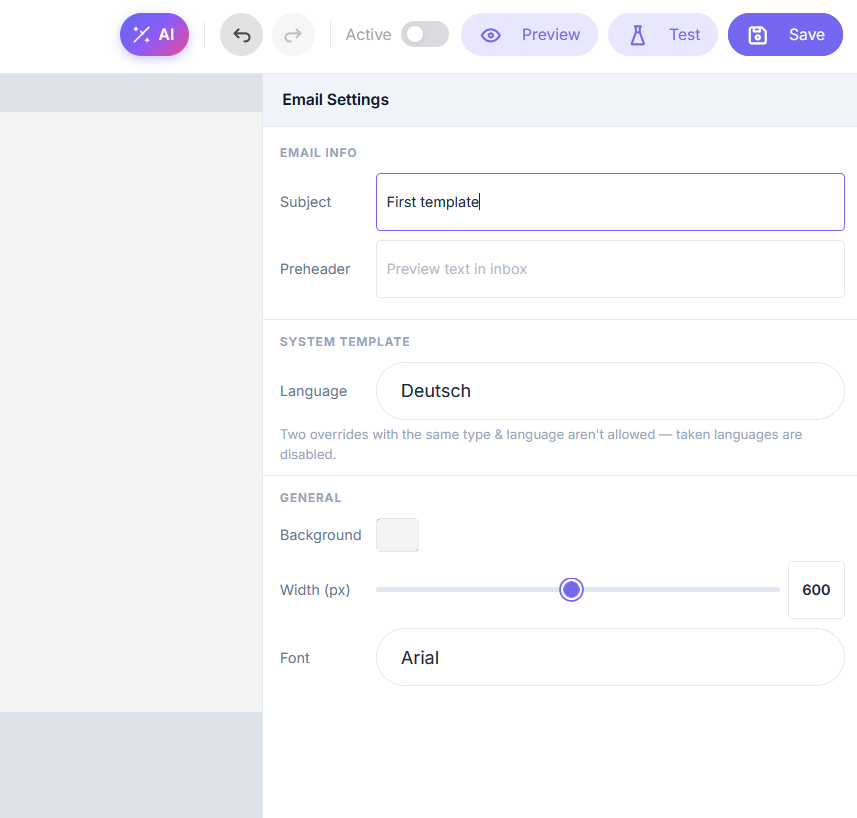
Here you can configure:
- email subject;
- preheader;
- language;
- background;
- content width;
- main font.
If the subject field is left empty, the template title will be used as the email subject.
Email personalization
You can add variables to the email text and button links. These variables are automatically replaced with recipient data when the email is sent.
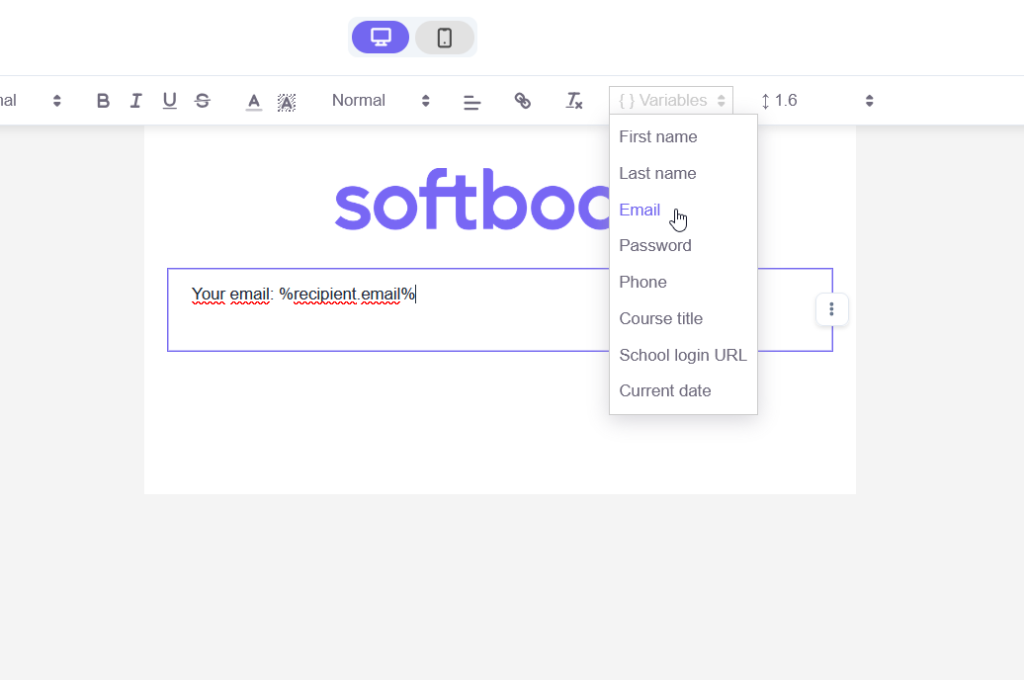
For example:
- %recipient.first_name% — recipient’s first name;
- %recipient.email% — email;
- %recipient.course_title% — course title;
- %recipient.lms_link% — login link.
For some system emails, the list of variables is automatically extended with additional values.
Please note: if required variables are missing, the system will not allow you to save the email.
AI email generation
The AI button in the top panel opens the AI email generation tool.
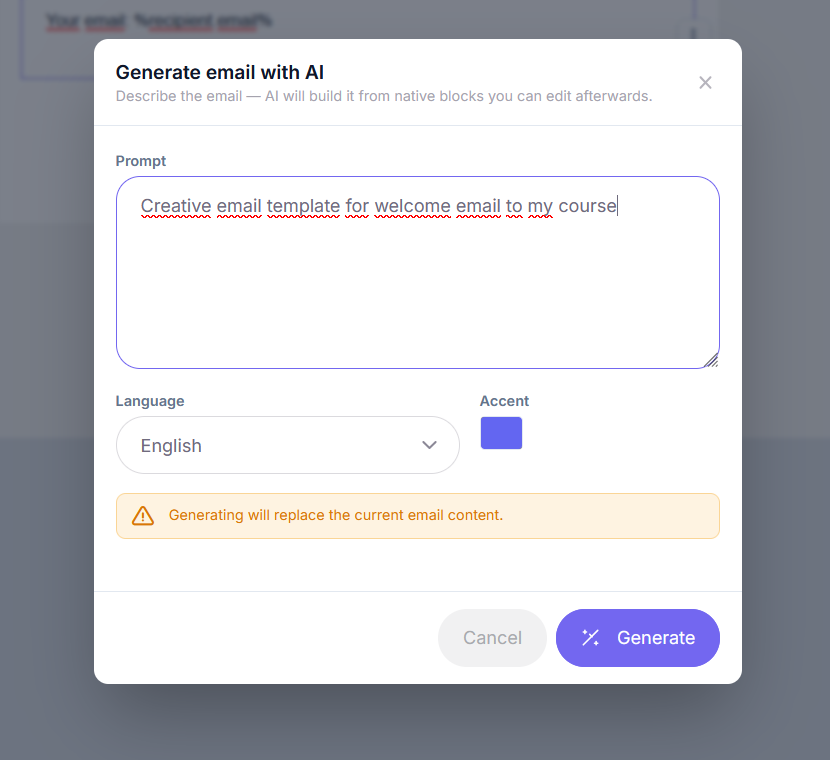
To generate an email, specify:
- email description;
- language;
- accent color.
After запускing AI, the system will automatically create the email structure, texts, and design.
Important: generation completely replaces the current email content. It is recommended to create a copy of the template before using AI.
Test sending
The “Test” button allows you to send a test email to a school staff member.
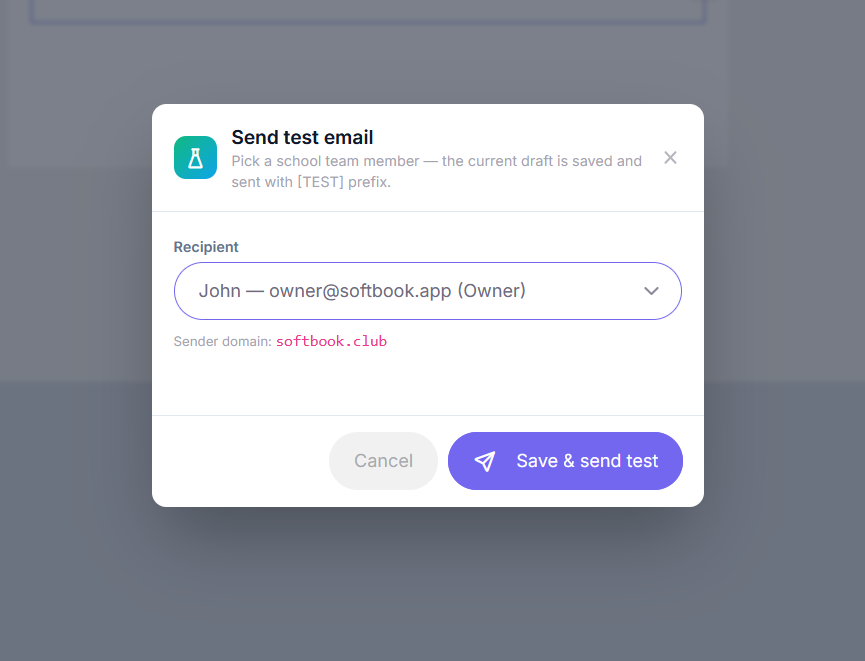
After sending:
- the current email version is saved;
- the email is sent with the [TEST] label.
Please note: the “Test” button may be unavailable if the sender domain has not been verified in the school settings.
Language version logic
When a system notification is triggered, the platform selects the email template using the following logic:
- checks for an active custom replacement in the required language;
- if there is no replacement, the standard Softbook template in the required language is used;
- if there is no translation, the standard English Softbook template is used.
For course-related emails, the language is determined by the course settings. For all other emails, the school language is used.
Using templates in email campaigns
Templates of the “Custom” type can be used in email campaigns.
To do this:
- create a template;
- configure the email layout;
- change the email status to “Active”;
- go to “Marketing” → “Campaigns”;
- select the created template while configuring the campaign.
FAQ
Why are standard emails sent instead of my replacement?
Make sure the template has the “Active” status and the email language matches the course or school language.
Why is the test sending button unavailable?
This feature is blocked if the sender domain has not been verified in the school settings.
Can AI generation be canceled?
No. AI generation completely overwrites the current email content, so it is recommended to create a copy of the template before using AI.
That’s all. Now you know how to create and configure emails using the email constructor on the platform.


