Zoom
In this article, we’ll look at how to set up and run online sessions on the platform using Zoom webinars and Zoom meetings. The platform automatically embeds the Zoom stream into the webinar page and manages participant connections.
Before creating a session, make sure to complete the following setup:
- have an active Zoom account;
- connect the Zoom integration in the Softbook Store section;
- when using the webinar format, activate the Zoom Webinars module in your Zoom account settings.
Two types of live sessions are available on the platform:
- Zoom Meeting — suitable for interactive classes, lessons, and meetings where participants can enable cameras, microphones, and communicate with each other;
- Zoom Webinar — suitable for large lectures where only speakers host the broadcast while students participate as viewers.
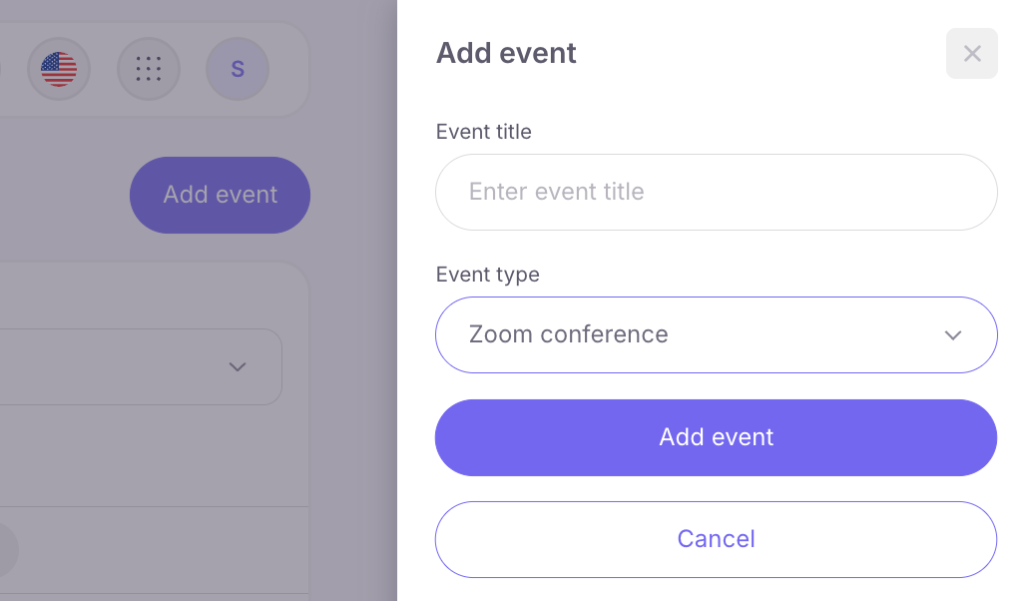
To schedule a webinar, go to the Webinars section and click the Create Webinar button. In the side window that opens, select the required type: Zoom Meeting or Zoom Webinar.
Important: if you see a message that the webinar feature is unavailable while creating a webinar, make sure the Zoom Webinars module is enabled and paid for in your Zoom account.
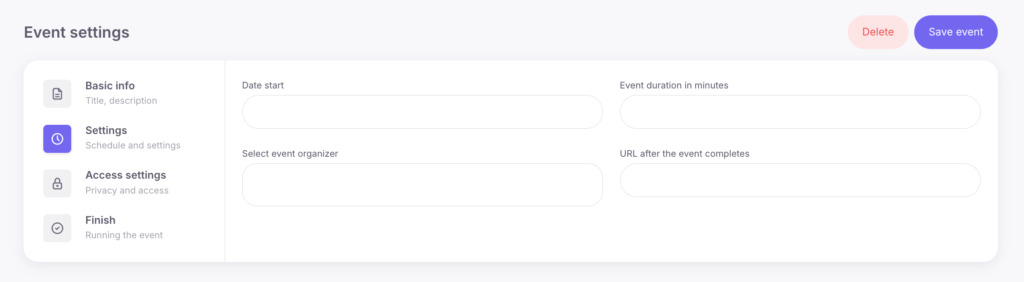
After creation, the webinar settings page will open. The setup process consists of four sequential steps.
Step 1. General Information
Fill in the webinar title and description. This information will be displayed to students in the webinar list and on the webinar page itself.
Step 2. Schedule
Set the webinar start date and time, approximate duration, and select presenters from the list of school staff members. Before the stream begins, students will see the webinar status as scheduled.
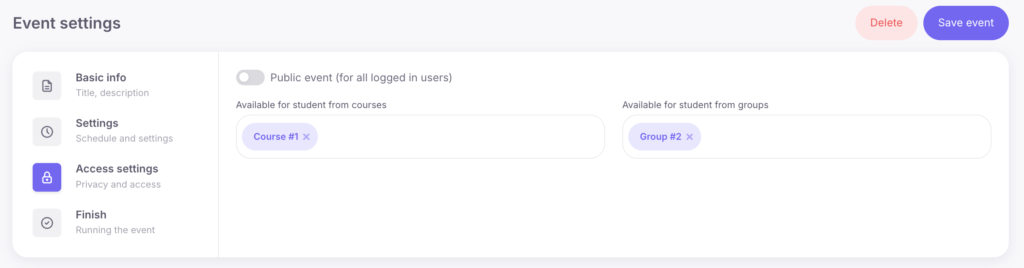
Step 3. Access Settings
Choose which categories of users can join the webinar. The following options are available:
- public access;
- access only for students of selected courses;
- access only for selected groups.
If necessary, you can select multiple courses and groups at the same time.
In the “URL after completion” field, you can specify a page that students will be automatically redirected to immediately after the webinar ends, for example a payment page, a course page with bonuses, or a feedback form.
Step 4. Final Setup
The final step displays the webinar summary and generates a link to the webinar page. Copy this link and send it to students.
How students join the webinar
Students can see available sessions in the Webinars section inside their personal account. To join the stream, they simply need to open the webinar page.
Webinar recording
The webinar recording is handled by Zoom itself. The presenter can start recording manually during the session or configure automatic recording in their Zoom account settings beforehand.
After the webinar ends, the video file is saved either in Zoom Cloud or locally on the computer, depending on the Zoom account settings. The finished recording can then be downloaded and uploaded to the platform as course material.


